
Hello everybody!! I was hoping to upload this entry sooner, but I spent the entire week sick, so it wasn’t possible. Still, I hope some of you might find this helpful.
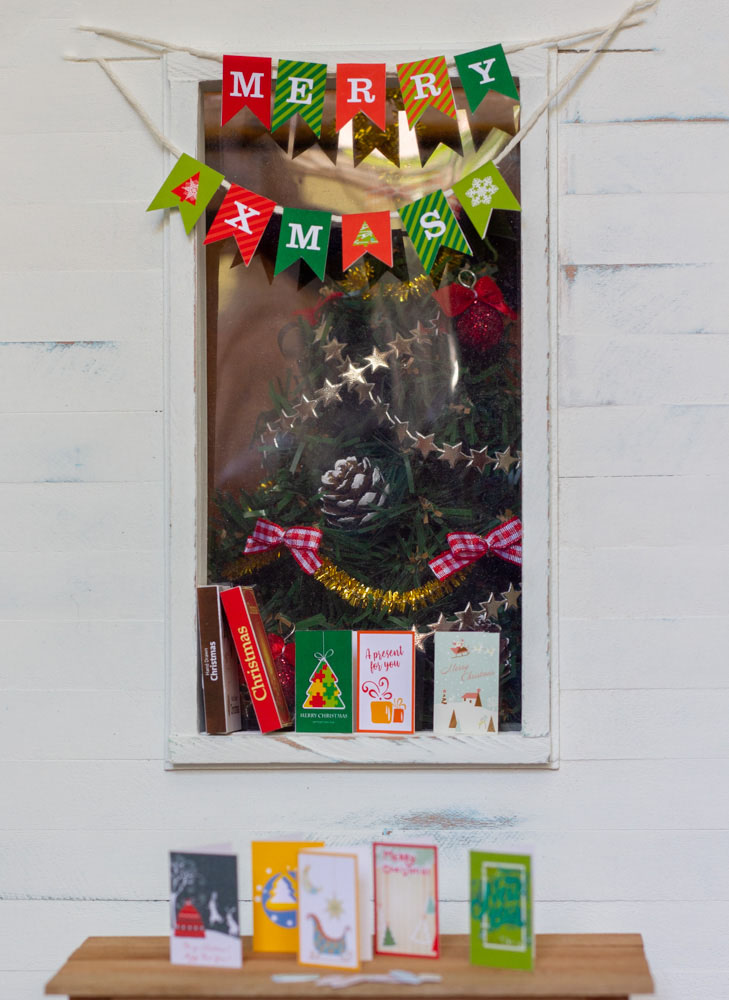
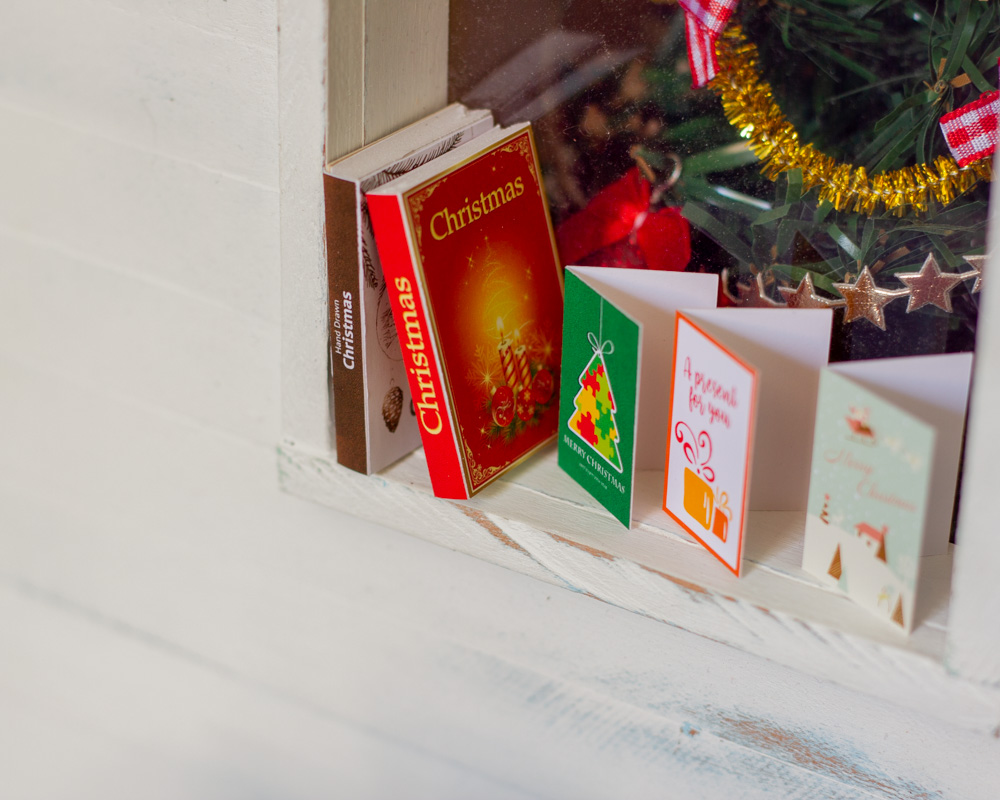
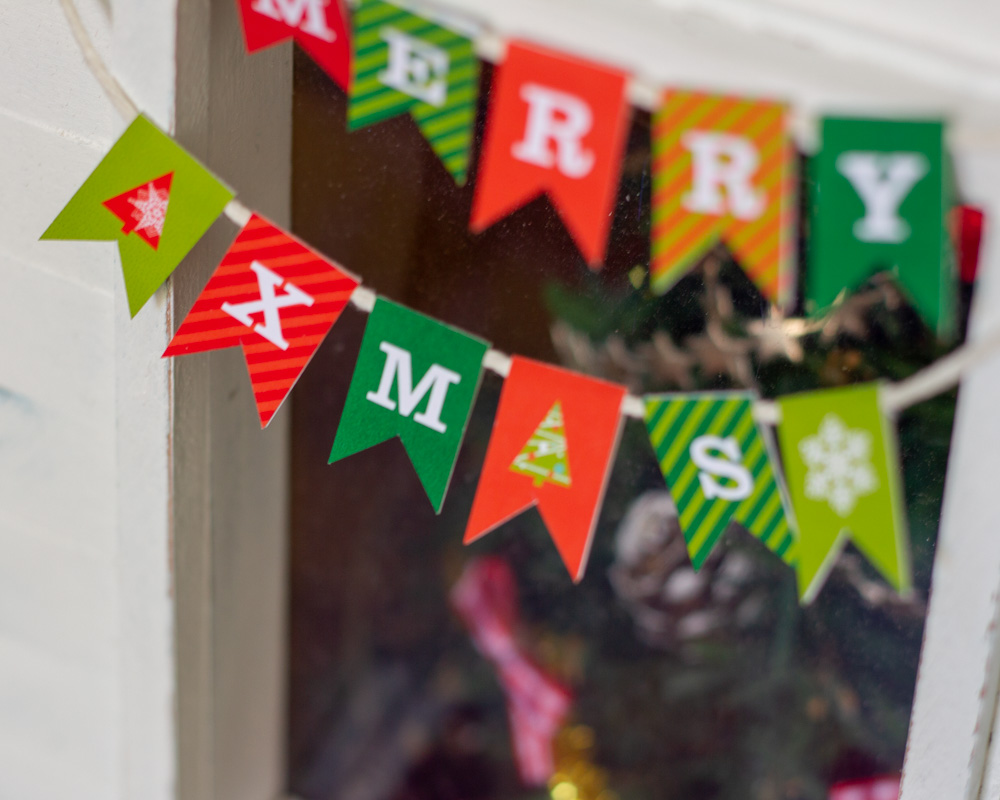
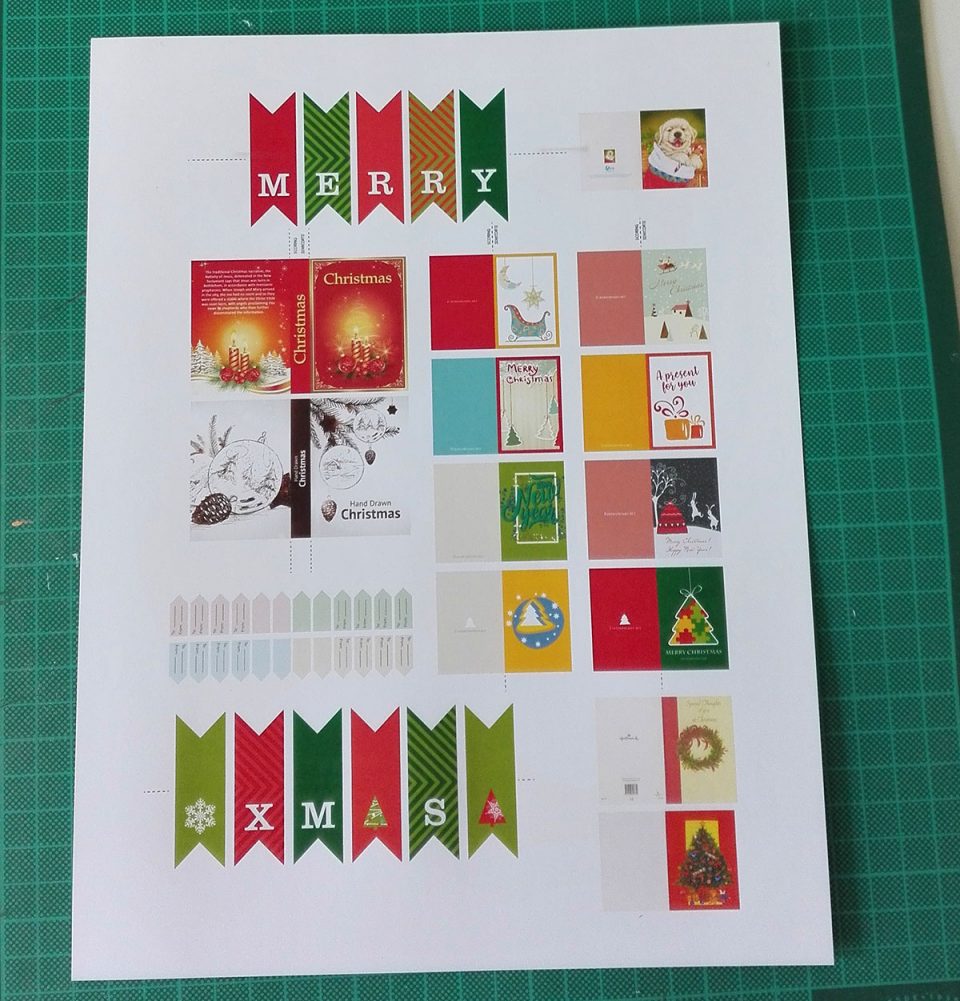
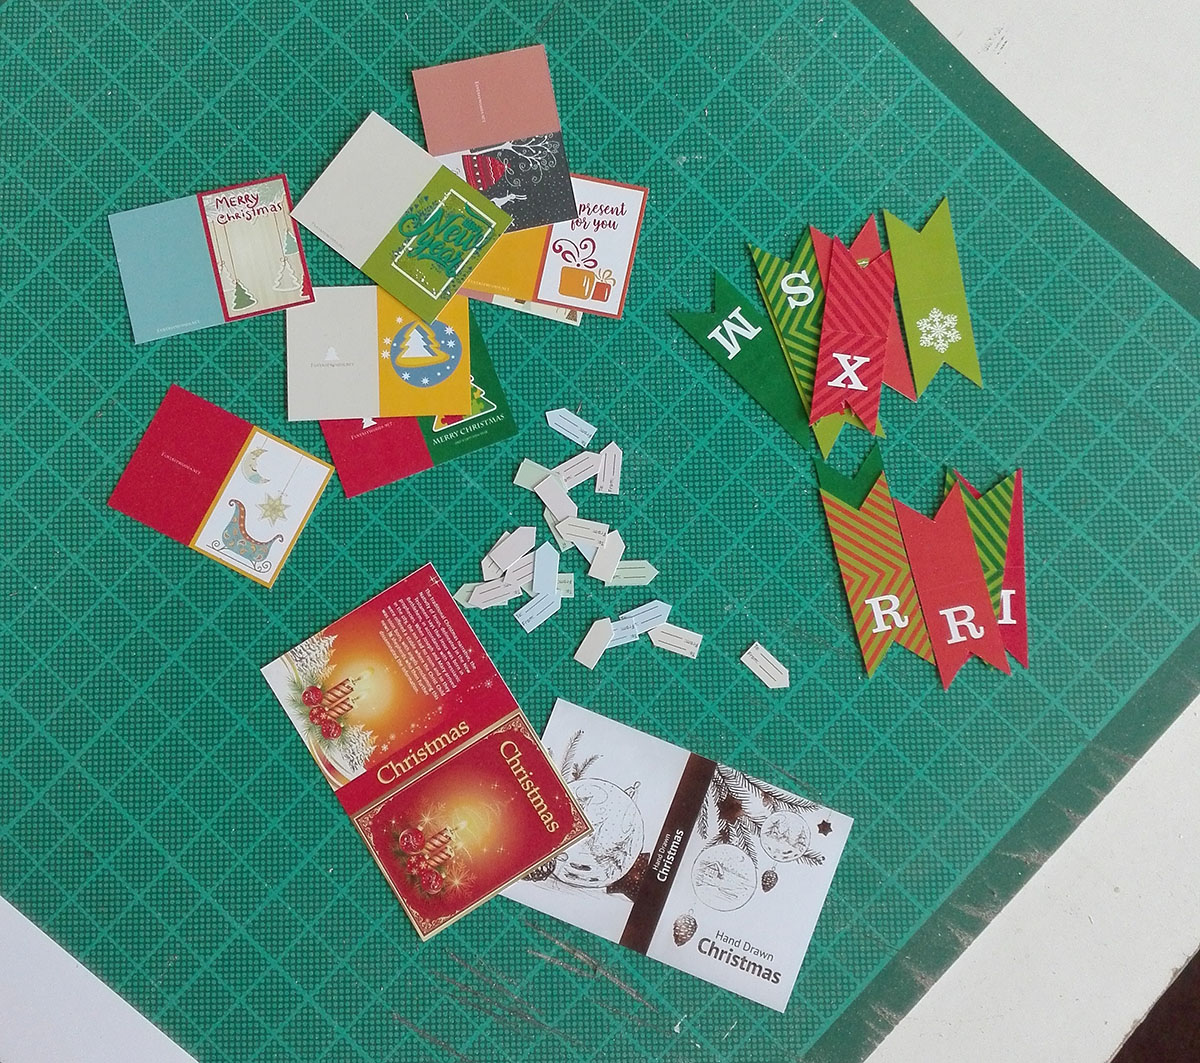
And what is this exactly? Well, I put together a free printable to decorate your Christmas dioramas. The 1/6 scale one includes Christmas flags, cards, books and gift tags. I also made a 1/4 scale version and a 1/3 version, but those include less items, as they take up more space (be warned, 1/3 file is 2 pages).
Here’s how it all looks together:
I’m not the best at drawing, so most of the graphics I used as base are from this website, as it provides free vector graphics for non commercial use.
Here are the files (they are a bit heavy):
Download PDF for 1/6 scale here.
Download PDF for 1/4 scale here.
Download PDF for 1/3 scale here.
I printed mine in matte photo paper for inkjet printers. You can use glossy paper if you like that finish too or a high quality paper. I like photo paper because it’s thicker.
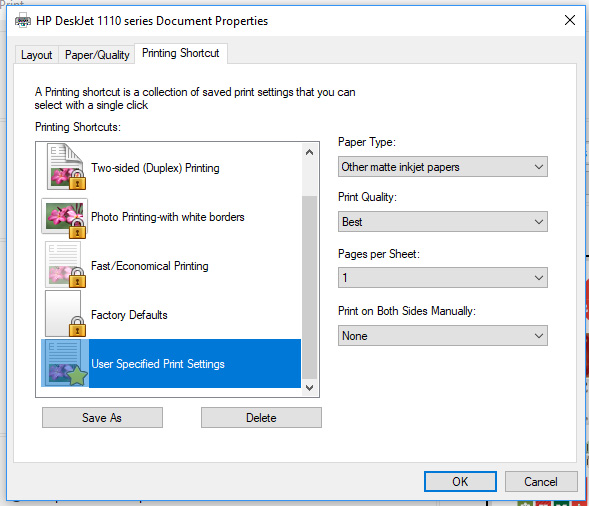
You should always follow the instructions your paper comes with, for an optimal print.
When printing it’s important to print at the actual size of the file, do not let the printer adjust the measurements. This printable is letter sized.

And also make sure you choose the right kind of paper in advanced options. If possible, go for high quality printing.
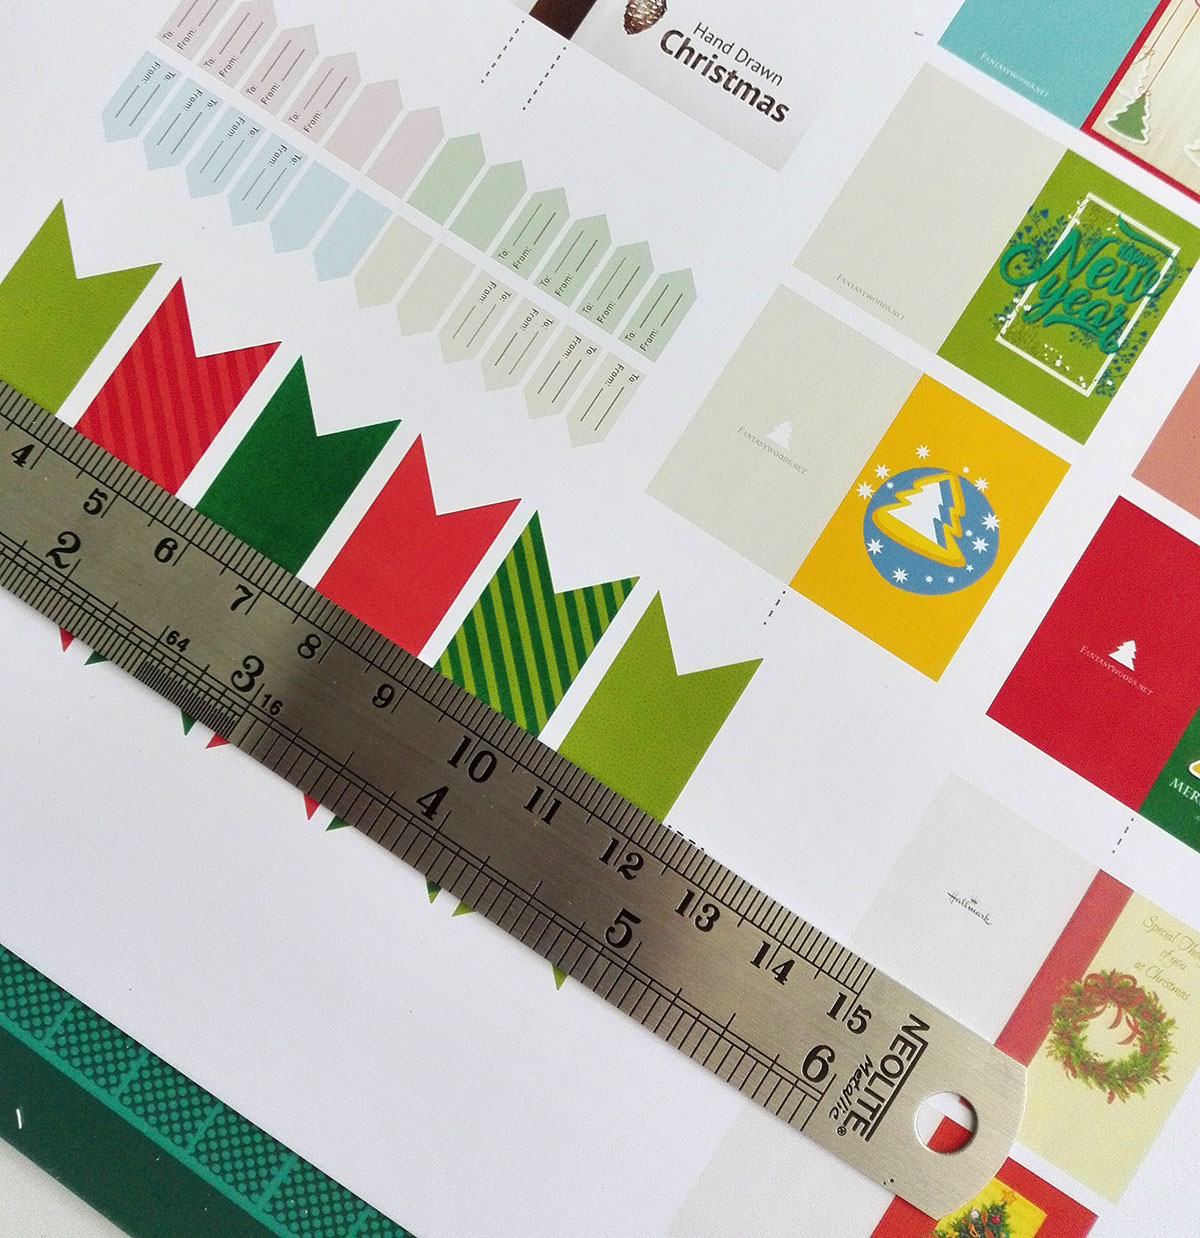
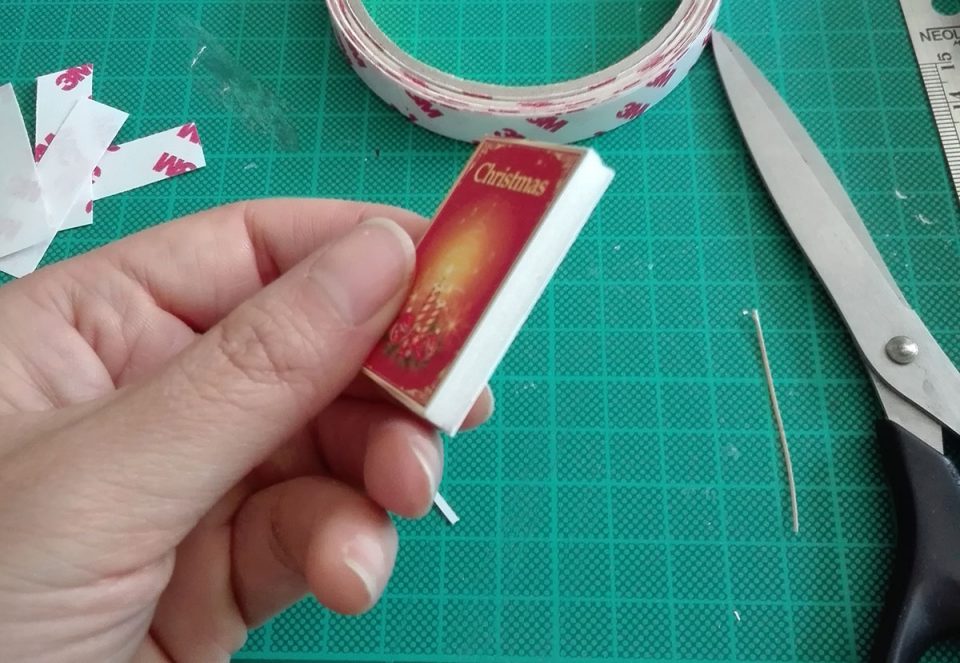
Once printed, I recommend to do some scoring (or semi cuts) on all the places you will be folding the paper: the middle of the cards, flags and books. I put a dotted line everywhere this needs to be done. You can line your ruler to the dotted line and then using your cutter, very lightly, pass it through the line. You can also use a ruler instead of a cutter. If using a cutter be very careful! This should make it easier to fold later on.
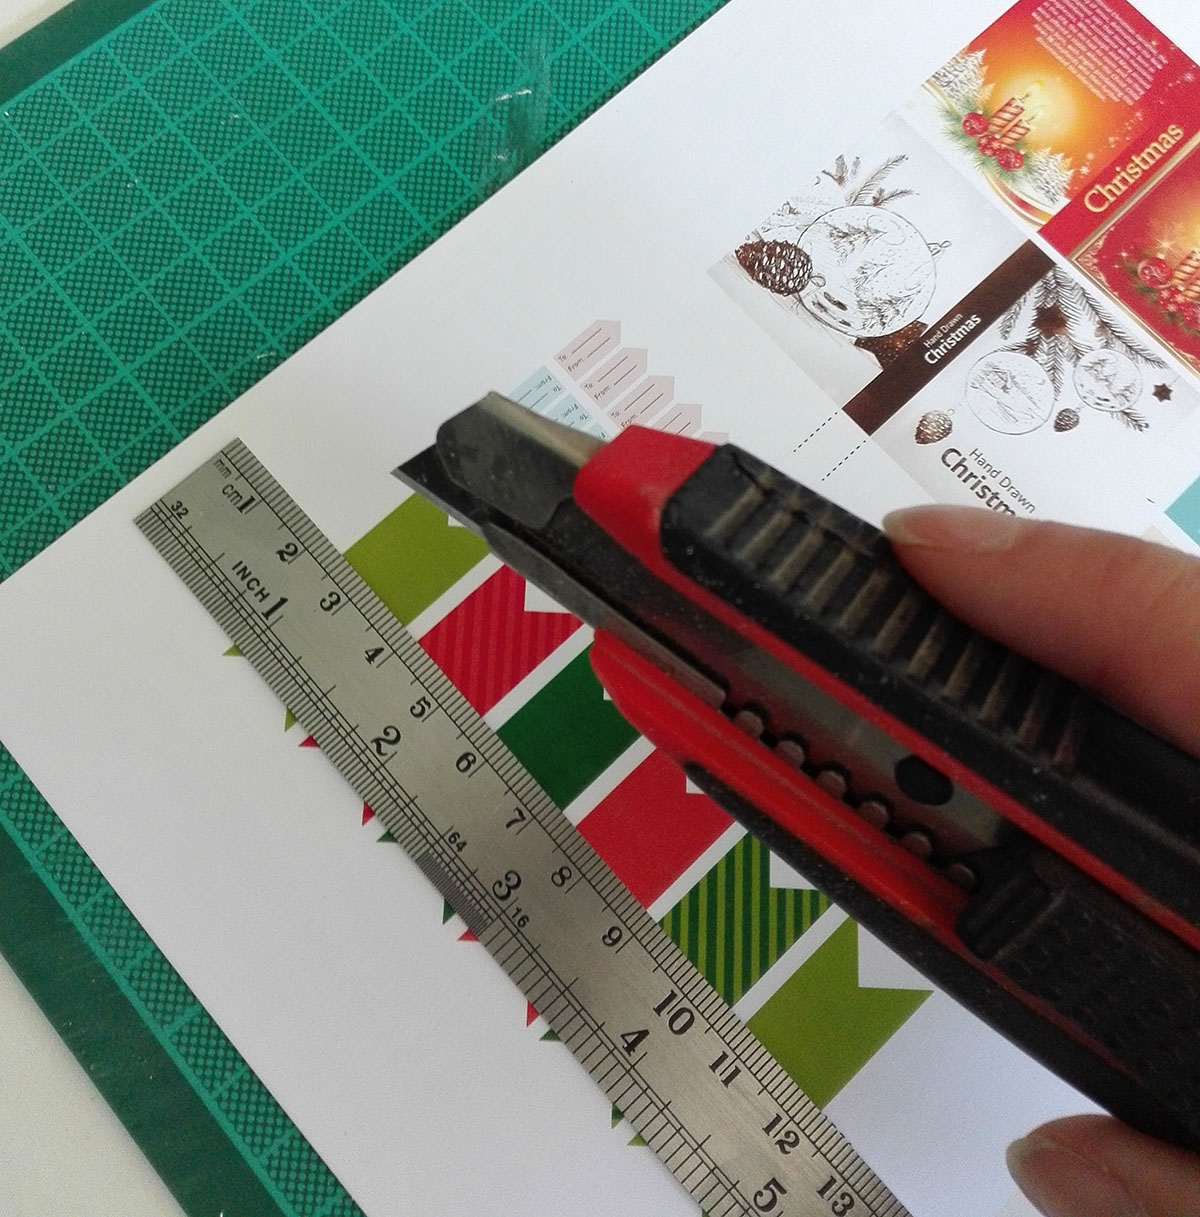
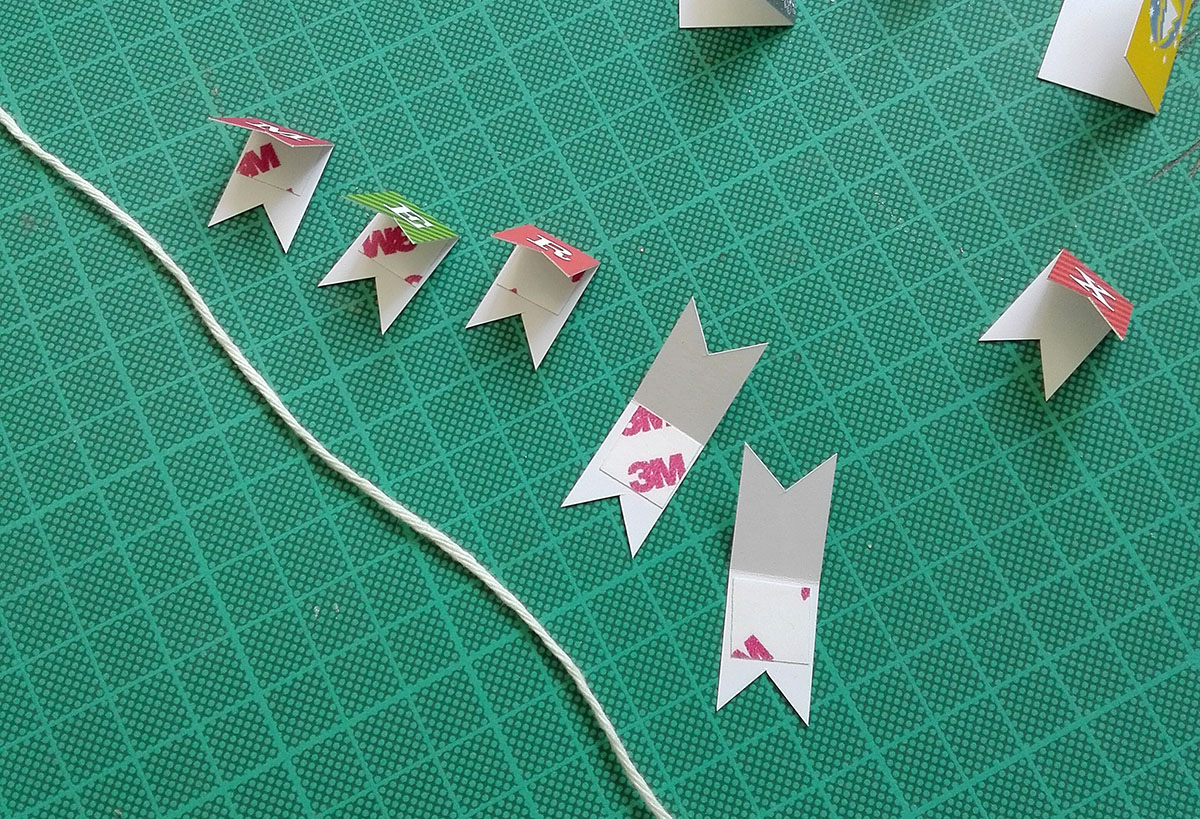
After that it’s time to cut all the pieces! And then fold.
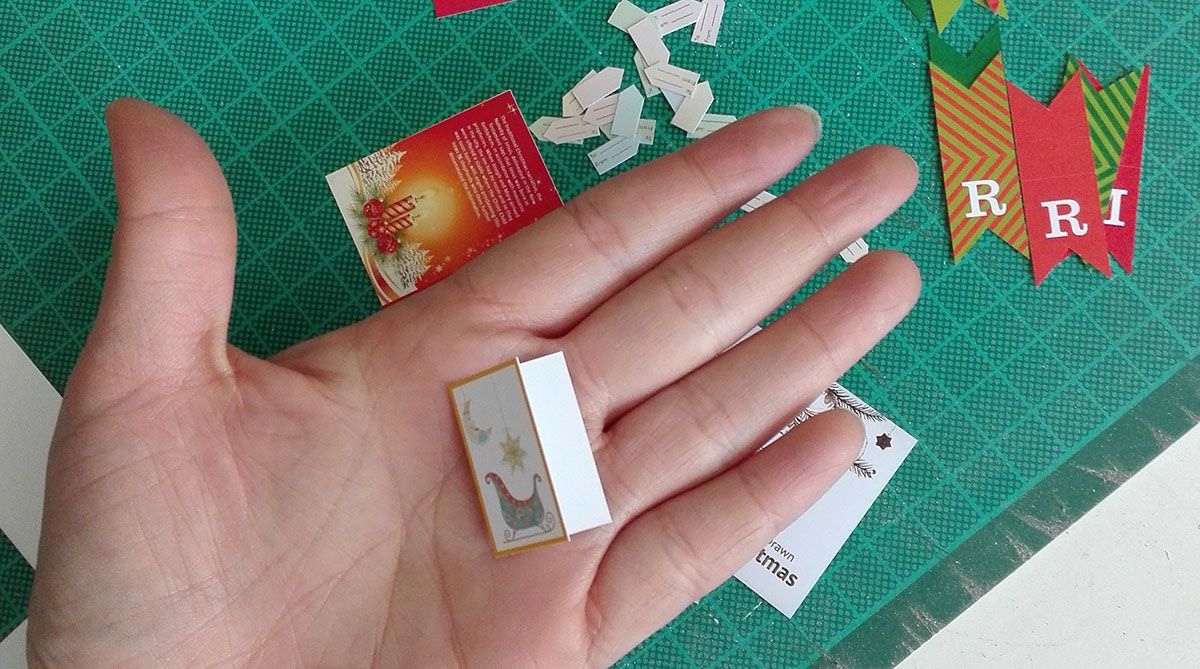
The book’s spine is around 5 mm. I used some left over foam board of that size to fill the book. You can also stack several layers of cardboard to the desired thickness.
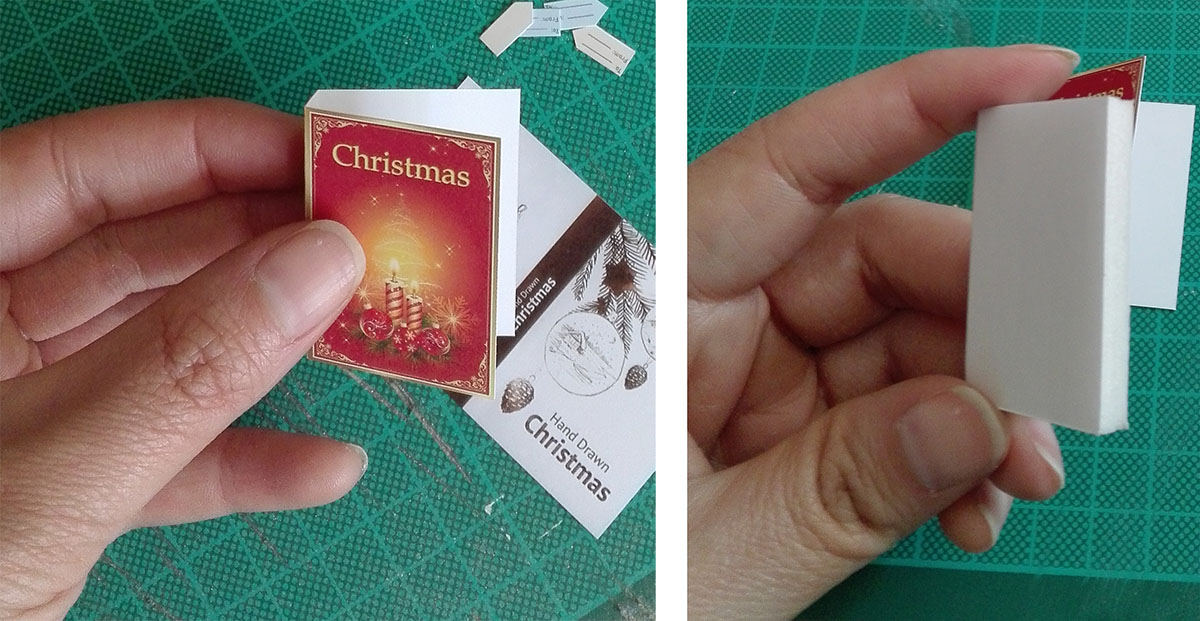
I used double sided tape to stick the cover to the foam board.
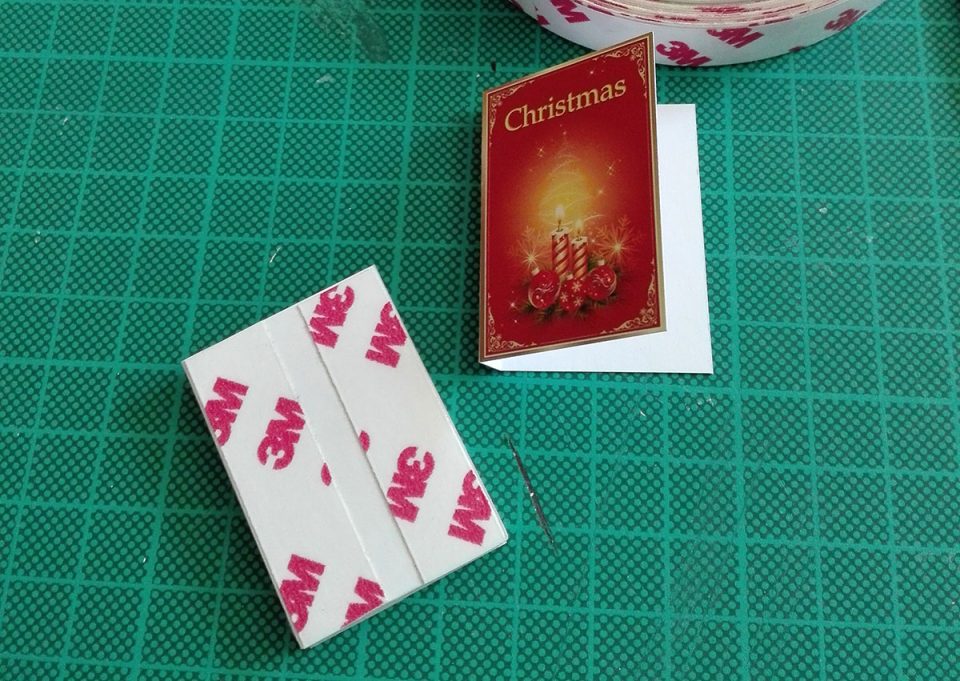
I also used double sided tape on the flags.
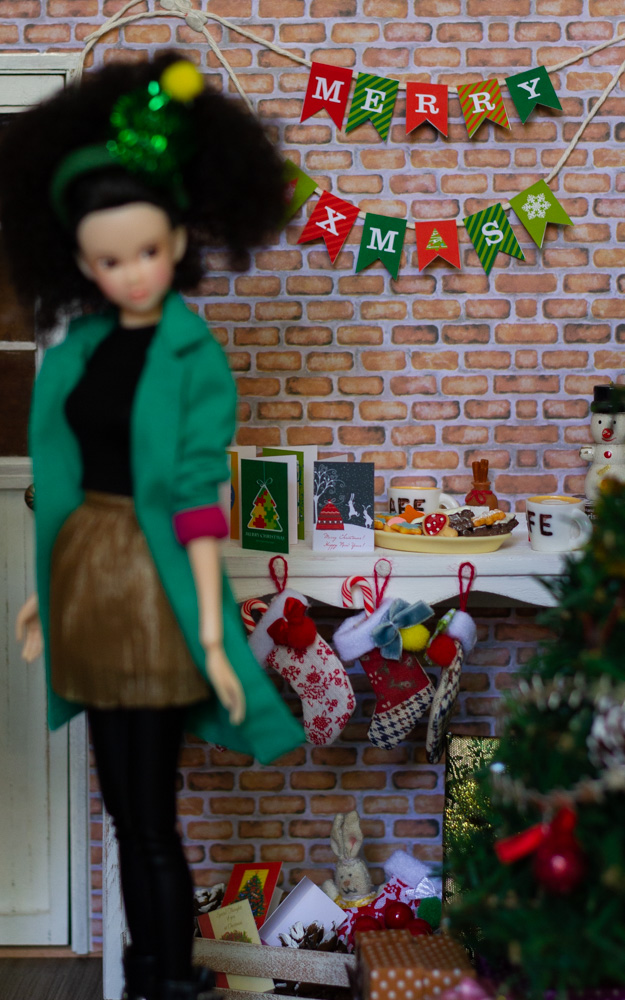
Now you are ready to set it all up.
Hope you enjoy this little gift. It was made with lots of love. Let me know if you use it on your projects!


OMG you have been a busy little bee Alejandra. Thanks for the prints you have made it so simple for everyone . . . I am not so good as you at explaining all these things. 🙂
Big hugs,
X
Hahaha I was actually very busy on top of being sick, but this week is my relax week, hopefully. I tried to explain it as best as I could. And I’m not too happy with the photos of the set up, but I had to rush the post 🙁
Maybe I’ll replace them later on.
I loved how your cards turned out too! So thanks for those~ Hugs!
What a lovely Christmas diorama! You’re amazing! You must have some special power to stop time. 😉
I always lack free time so I have to postpone many craft projects. Those printables are really nice. And you inspire me a lot. I often look for graphics at The Graphics Fairy. I don’t think I manage to prepare 1/6 Xmas set since I’ve just caught a cold. I made Christmas cards for Barbies using the miniatures printed on the back of cards I got. I’ll try to take some pics of them.
Hahaha I’ve been working on Christmas stuff for a month now xD Every weekend, little by little 🙂
I have so many craft projects on my mind, it’s hard to do it all, especially when I’m not that good at crafting myself.
I’m glad I’ve inspired you, can’t wait to see what you come up with!! I’ll be stalking your blog, as usual 😀
Great idea for the cards too!
Oh, wow! This is great! Thank you! I know, though, that I will not be able to make anything for this Christmas (but you never know), so I will save these for later on (there is always next year). And you are good at crafting – I have several of your blog posts to prove it! 😀 Enjoy the Holidays!
It’s okay, I put them up in case anyone would need and someone on IG already used them which made me very happy. Thanks for the compliment, I hope to get better at it 🙂
Enjoy the holidays you too!
I love all your ideas! Thank you for sharing!
The last photo is just perfect! It’s so beautiful it can be a Christmas card for sure! 🙂
Thanks! I’m glad you like them 🙂
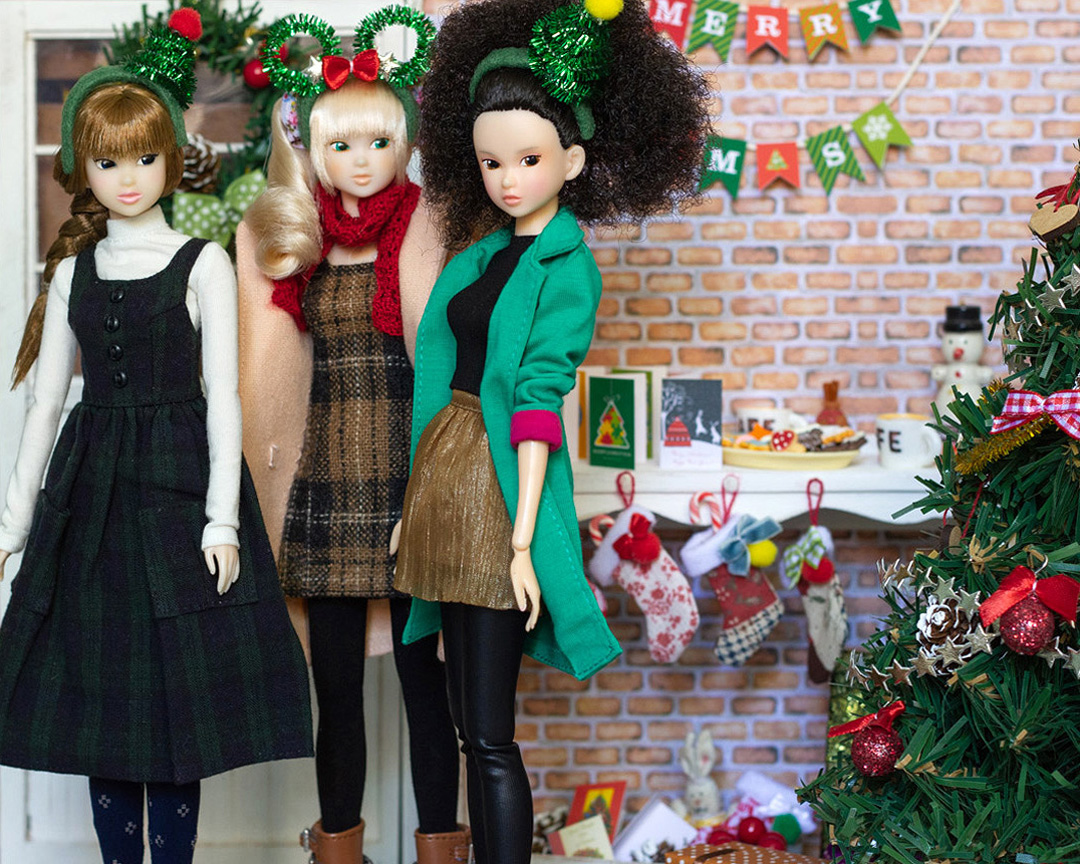
The last photo might be the most christmassy photo I took this year, probably haha,
It was a paint to keep them all standing and not falling off on my set up (which they did) lol
Thank you for sharing yet another great tutorial! This is when I wish I had a colour printer. I’ve been trying to convince my husband but so far he is not budging on that. Maybe in the New Year. Would have loved to have been able to make Christmas cards for the dolls. Maybe next year I will be able to if I convince you know who to get us a colour printer…
Love the Christmas feel to your photos in this post.
Maybe you could get a cheap printer. I bought mine for around 15 USD, it’s the cheapest HP model (deskjet ink advantage 1115) and it comes with a bit of ink, enough for some projects. The ink catridges aren’t too expensive either (I had to buy because I’ve had this printer for a while now) and it prints really good, especially for the price.
There’s always next year though 🙂 Hope you get more free time next year.
Oh this is super cute! Thanks for sharing the prints, I’ll save those up for later. 🙂 I love your Momoko girls in this setting, they look all so chic and pretty <3 I hope you had lovely Christmas time ^__^
Thanks! I had a very nice Christmas, thank you!
WOW Alejandra what a lovely job you’ve done on all these, and so much too! And thank you so much for sharing the links etc with us. I wish I had the space to make some dioramas but unfortunately I do not, so I will have to just look at yours and dream 🙂
xx
Thanks!!! I dont have much space either so I make individual walls and flooring that are also reversible (they have a different design on each side) so they don’t take much space and I only assemble them when it’d time for photos. It does get messy when photographing, but I make sure to tidy up as soon as I’m done~