
Hello everybody! As I promised today is tutorial day~ and I’ll show you how I made a tote bag and a bucket bag, using mostly felt, fabric and glue. Shall we start?
Materials
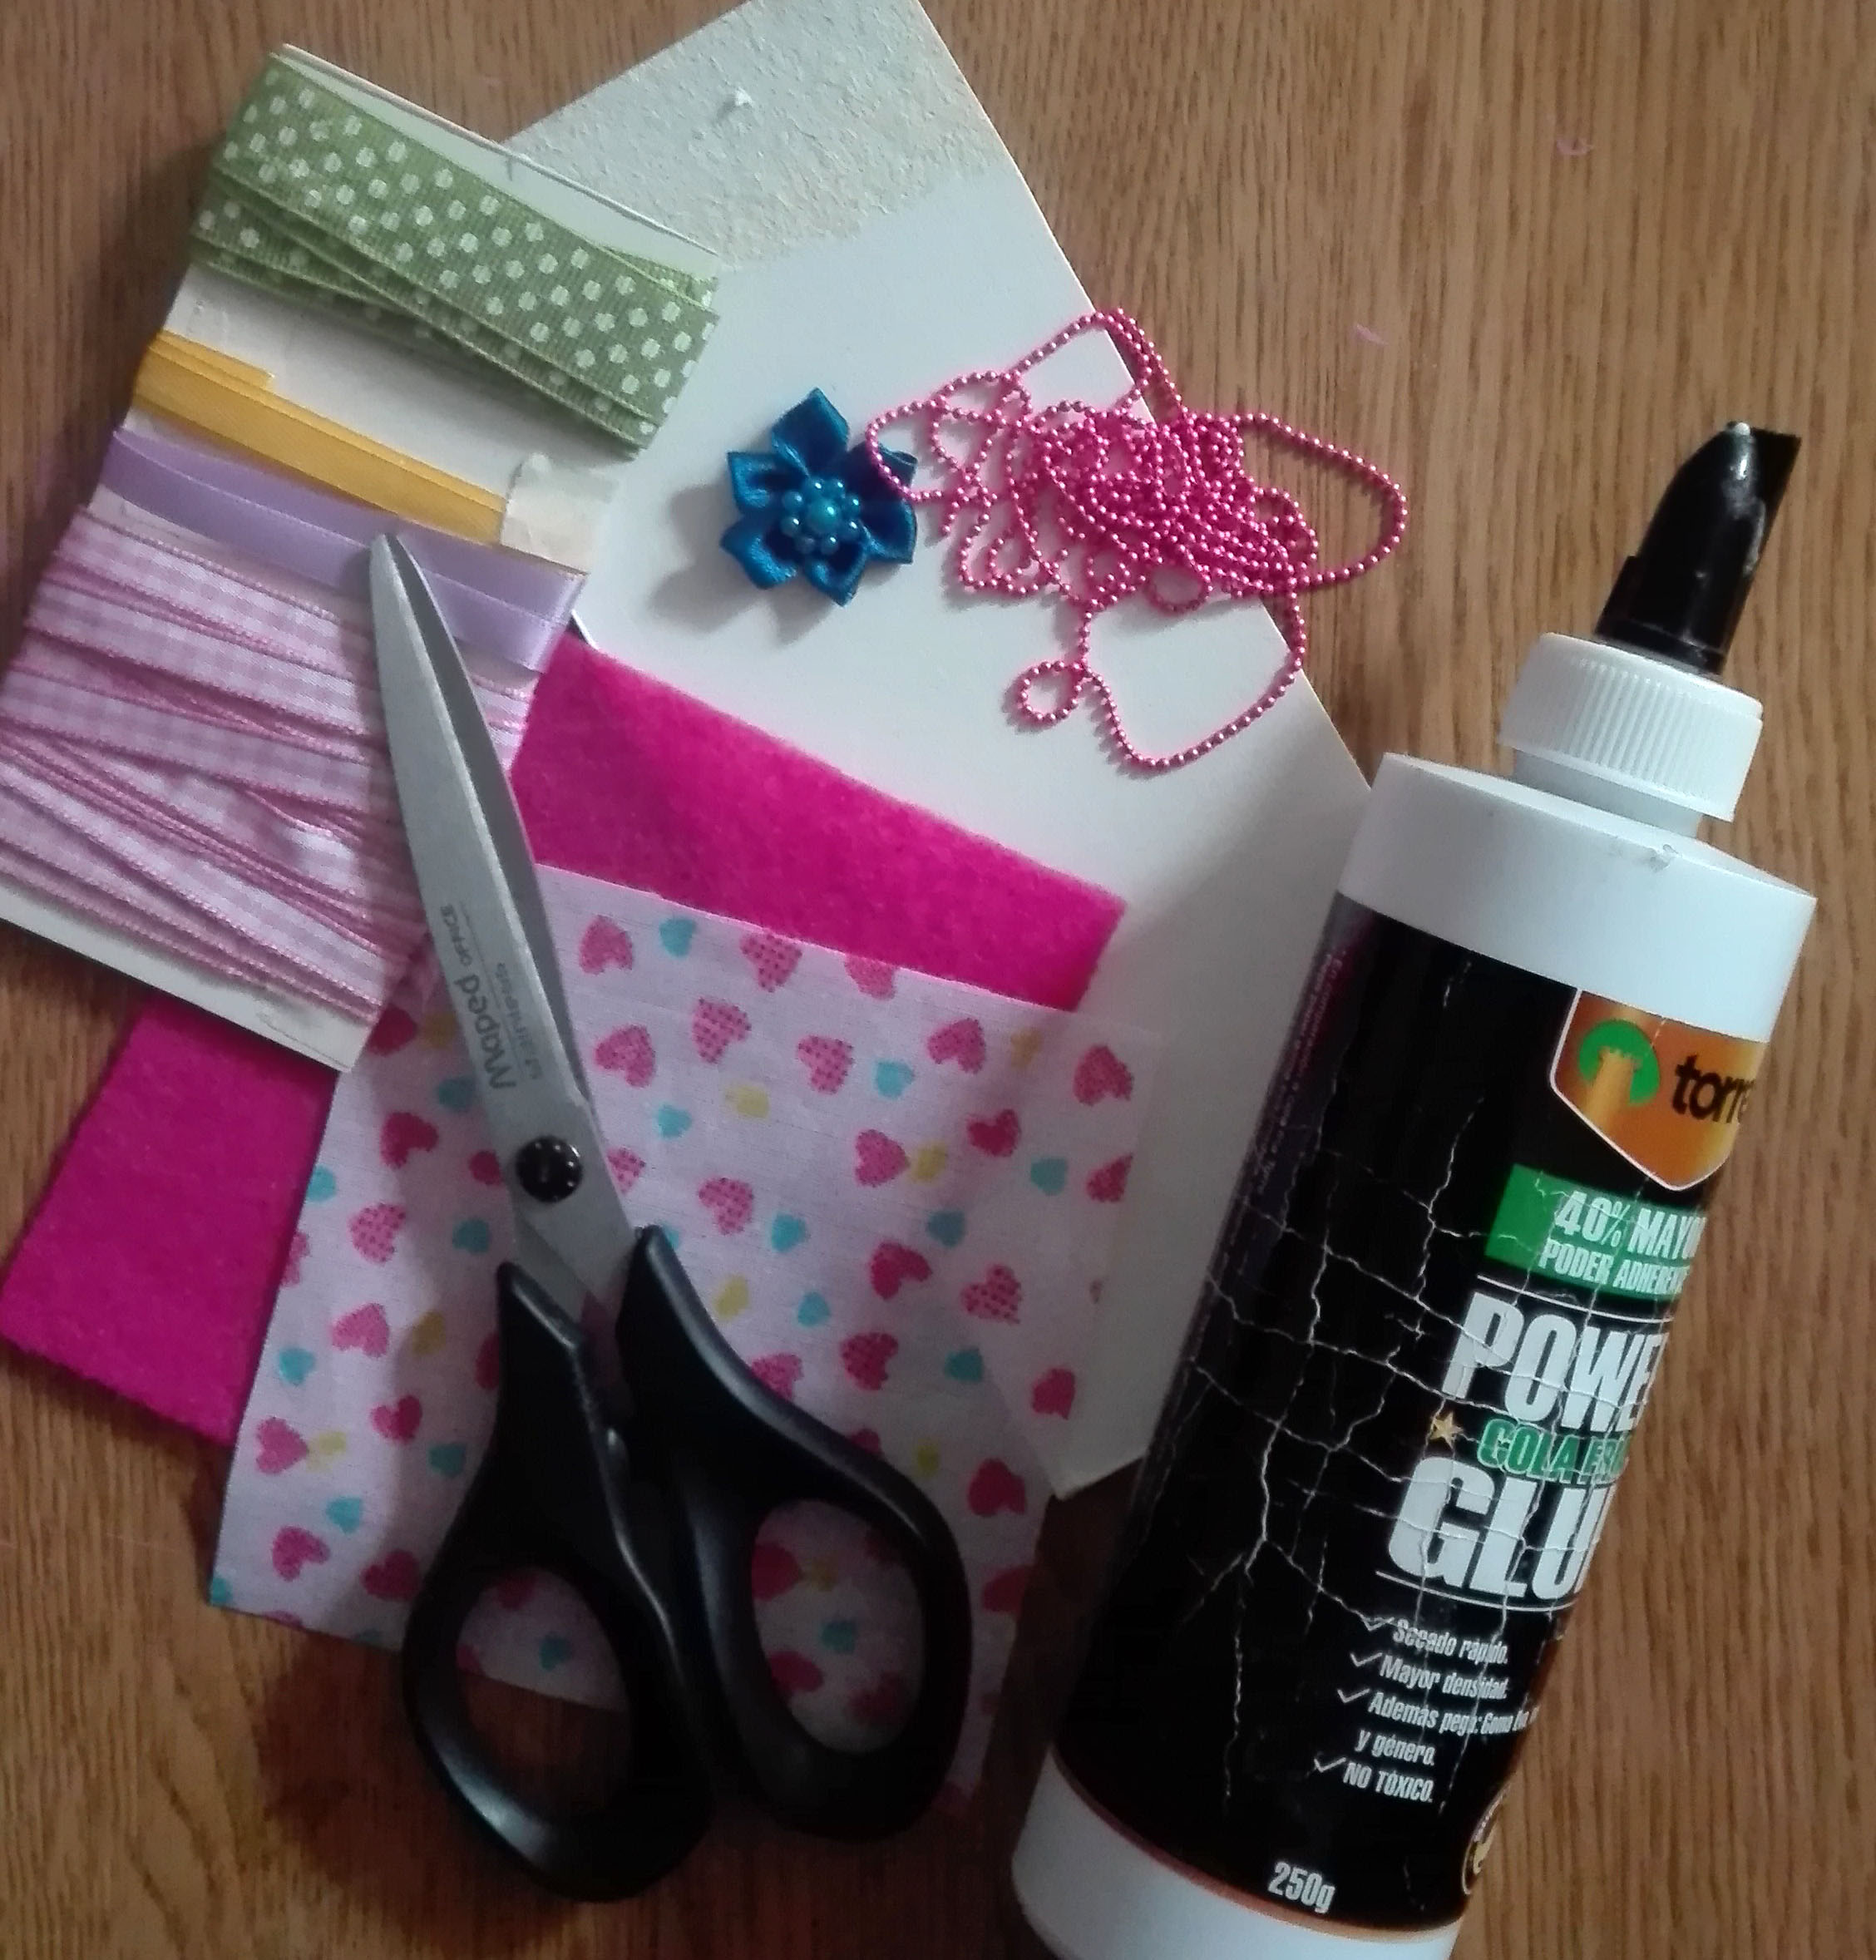
You will need:
- A piece of fabric. I used a 10×10 cm. scrap
- A piece of felt in a matching color
- A piece of cardboard. I used a piece from a box, yay for recycling.
- Scissors
- Glue (white school glue works for the most part, but I used all purpose glue and a hot glue gun for others)
- Ribbon
- Charms, chain, bows, whatever you can find to decorate (optional)
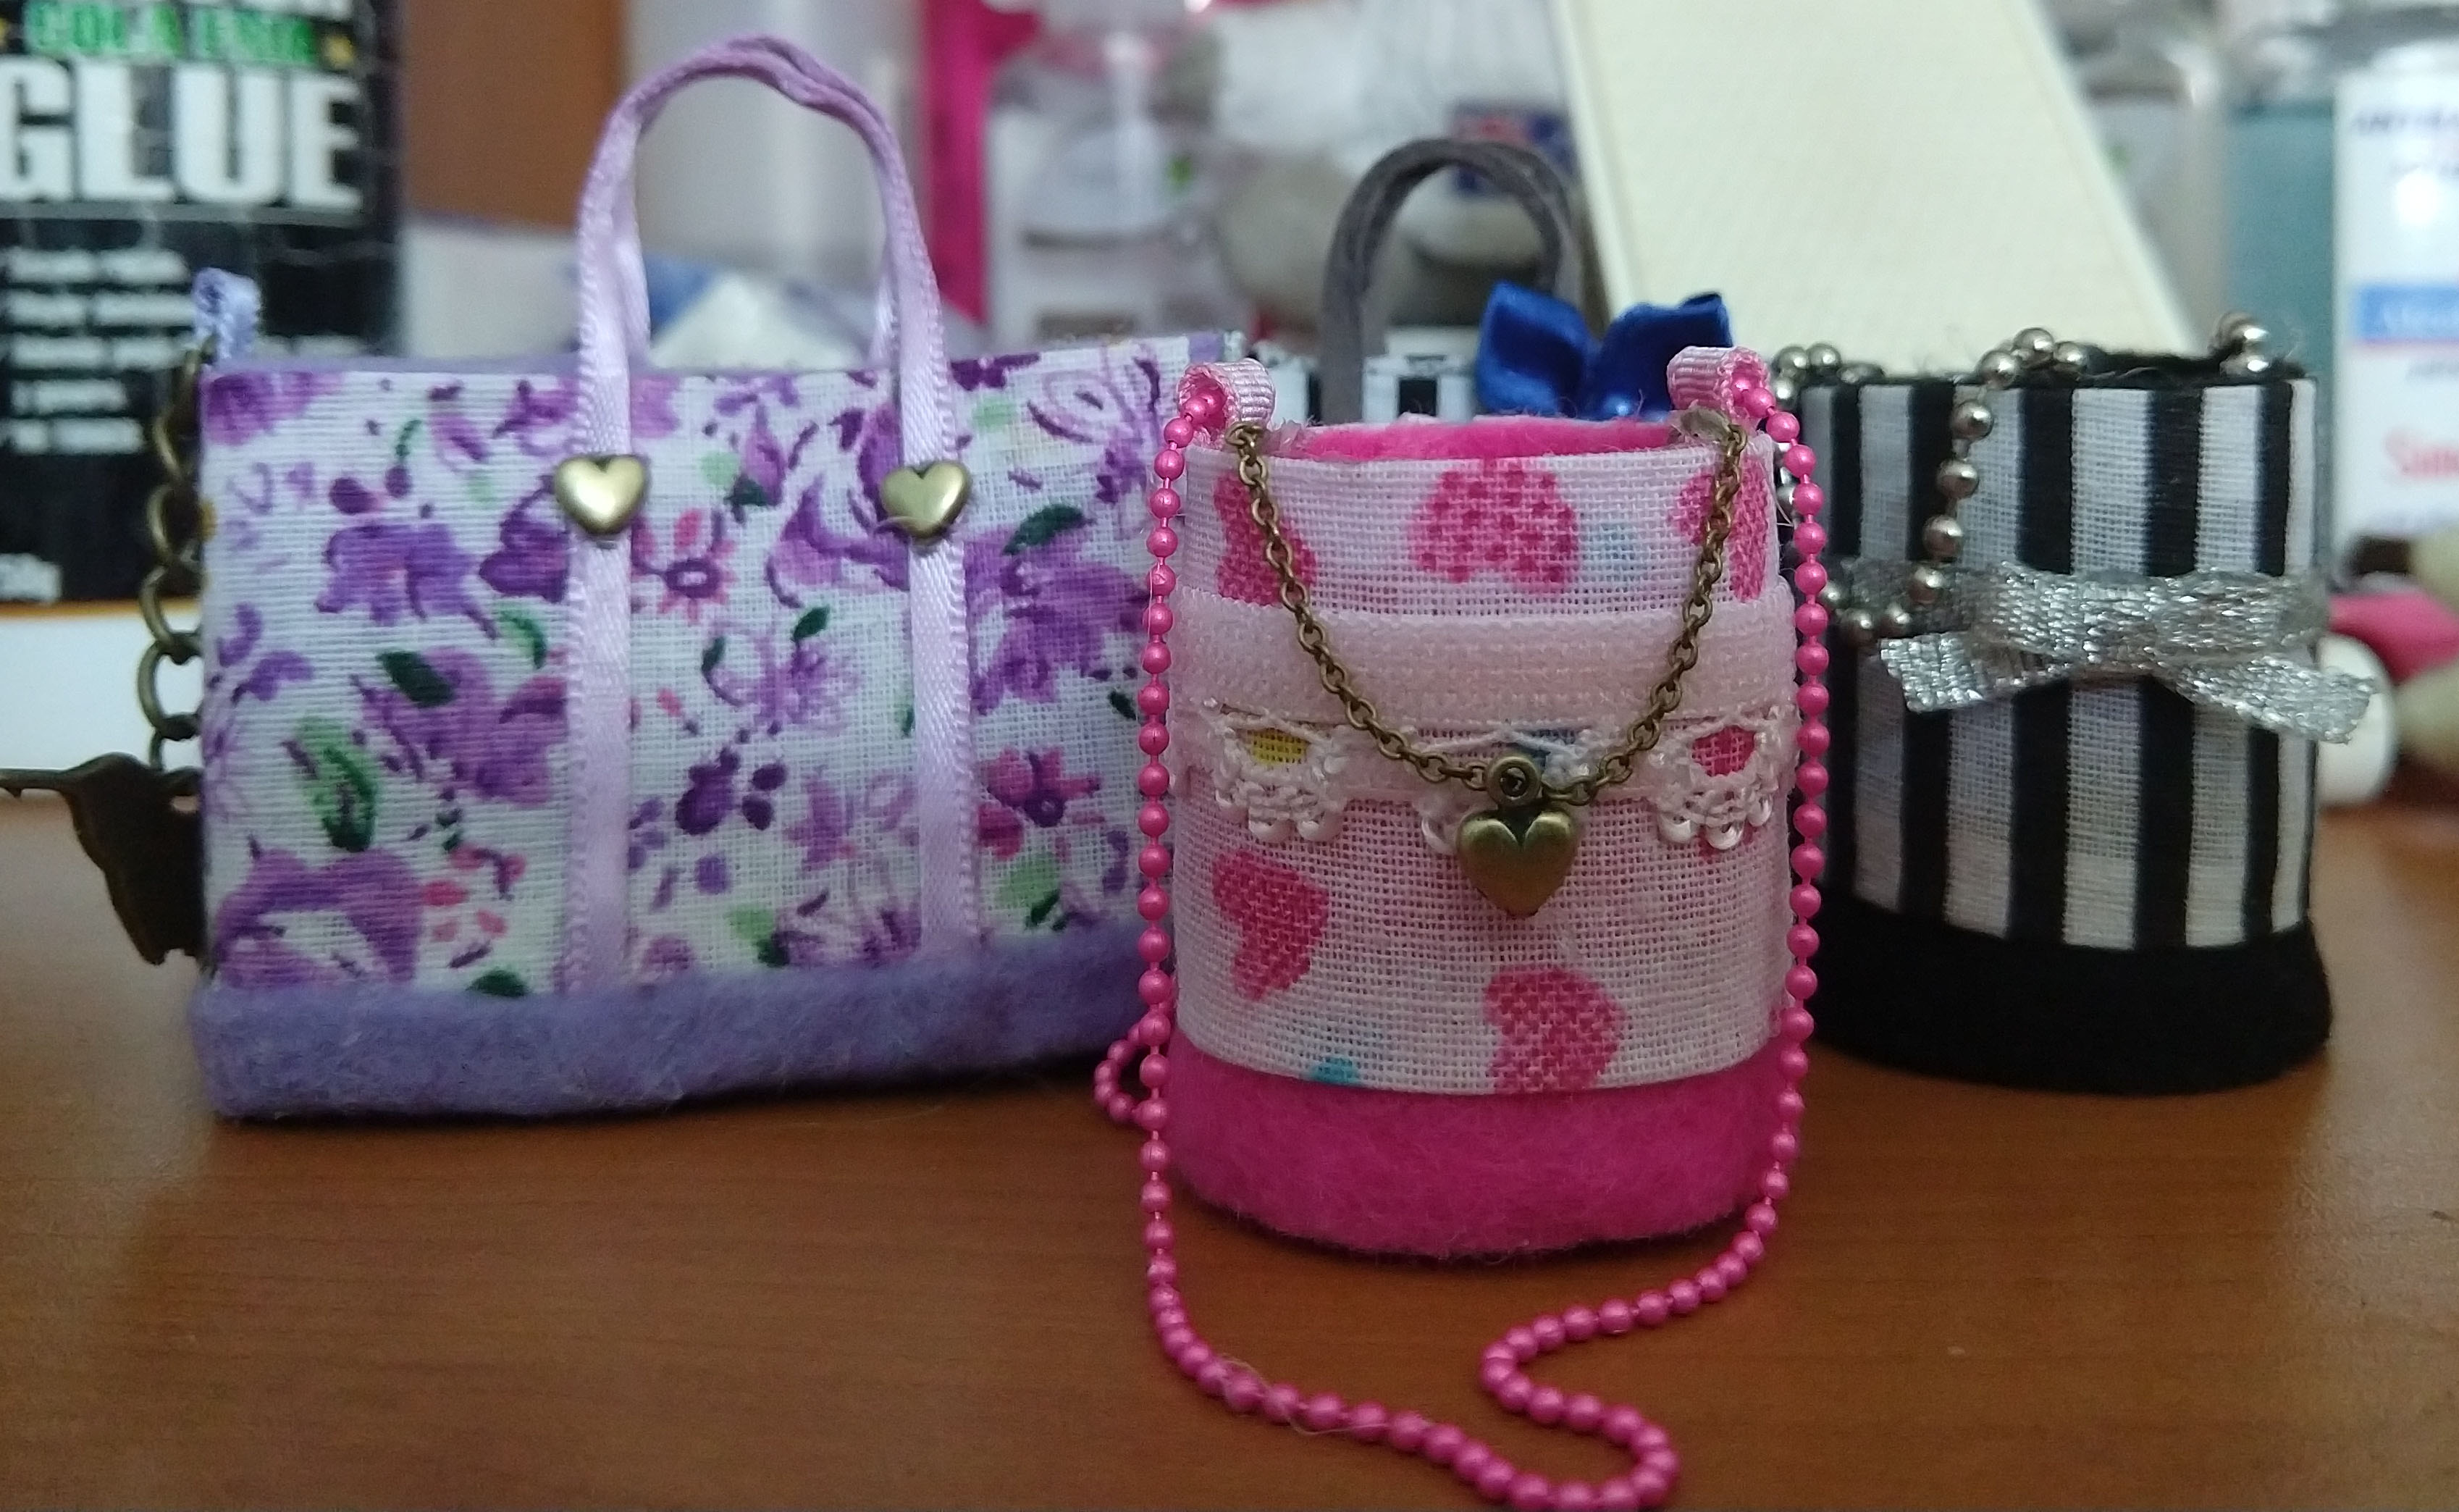
Bucket bag
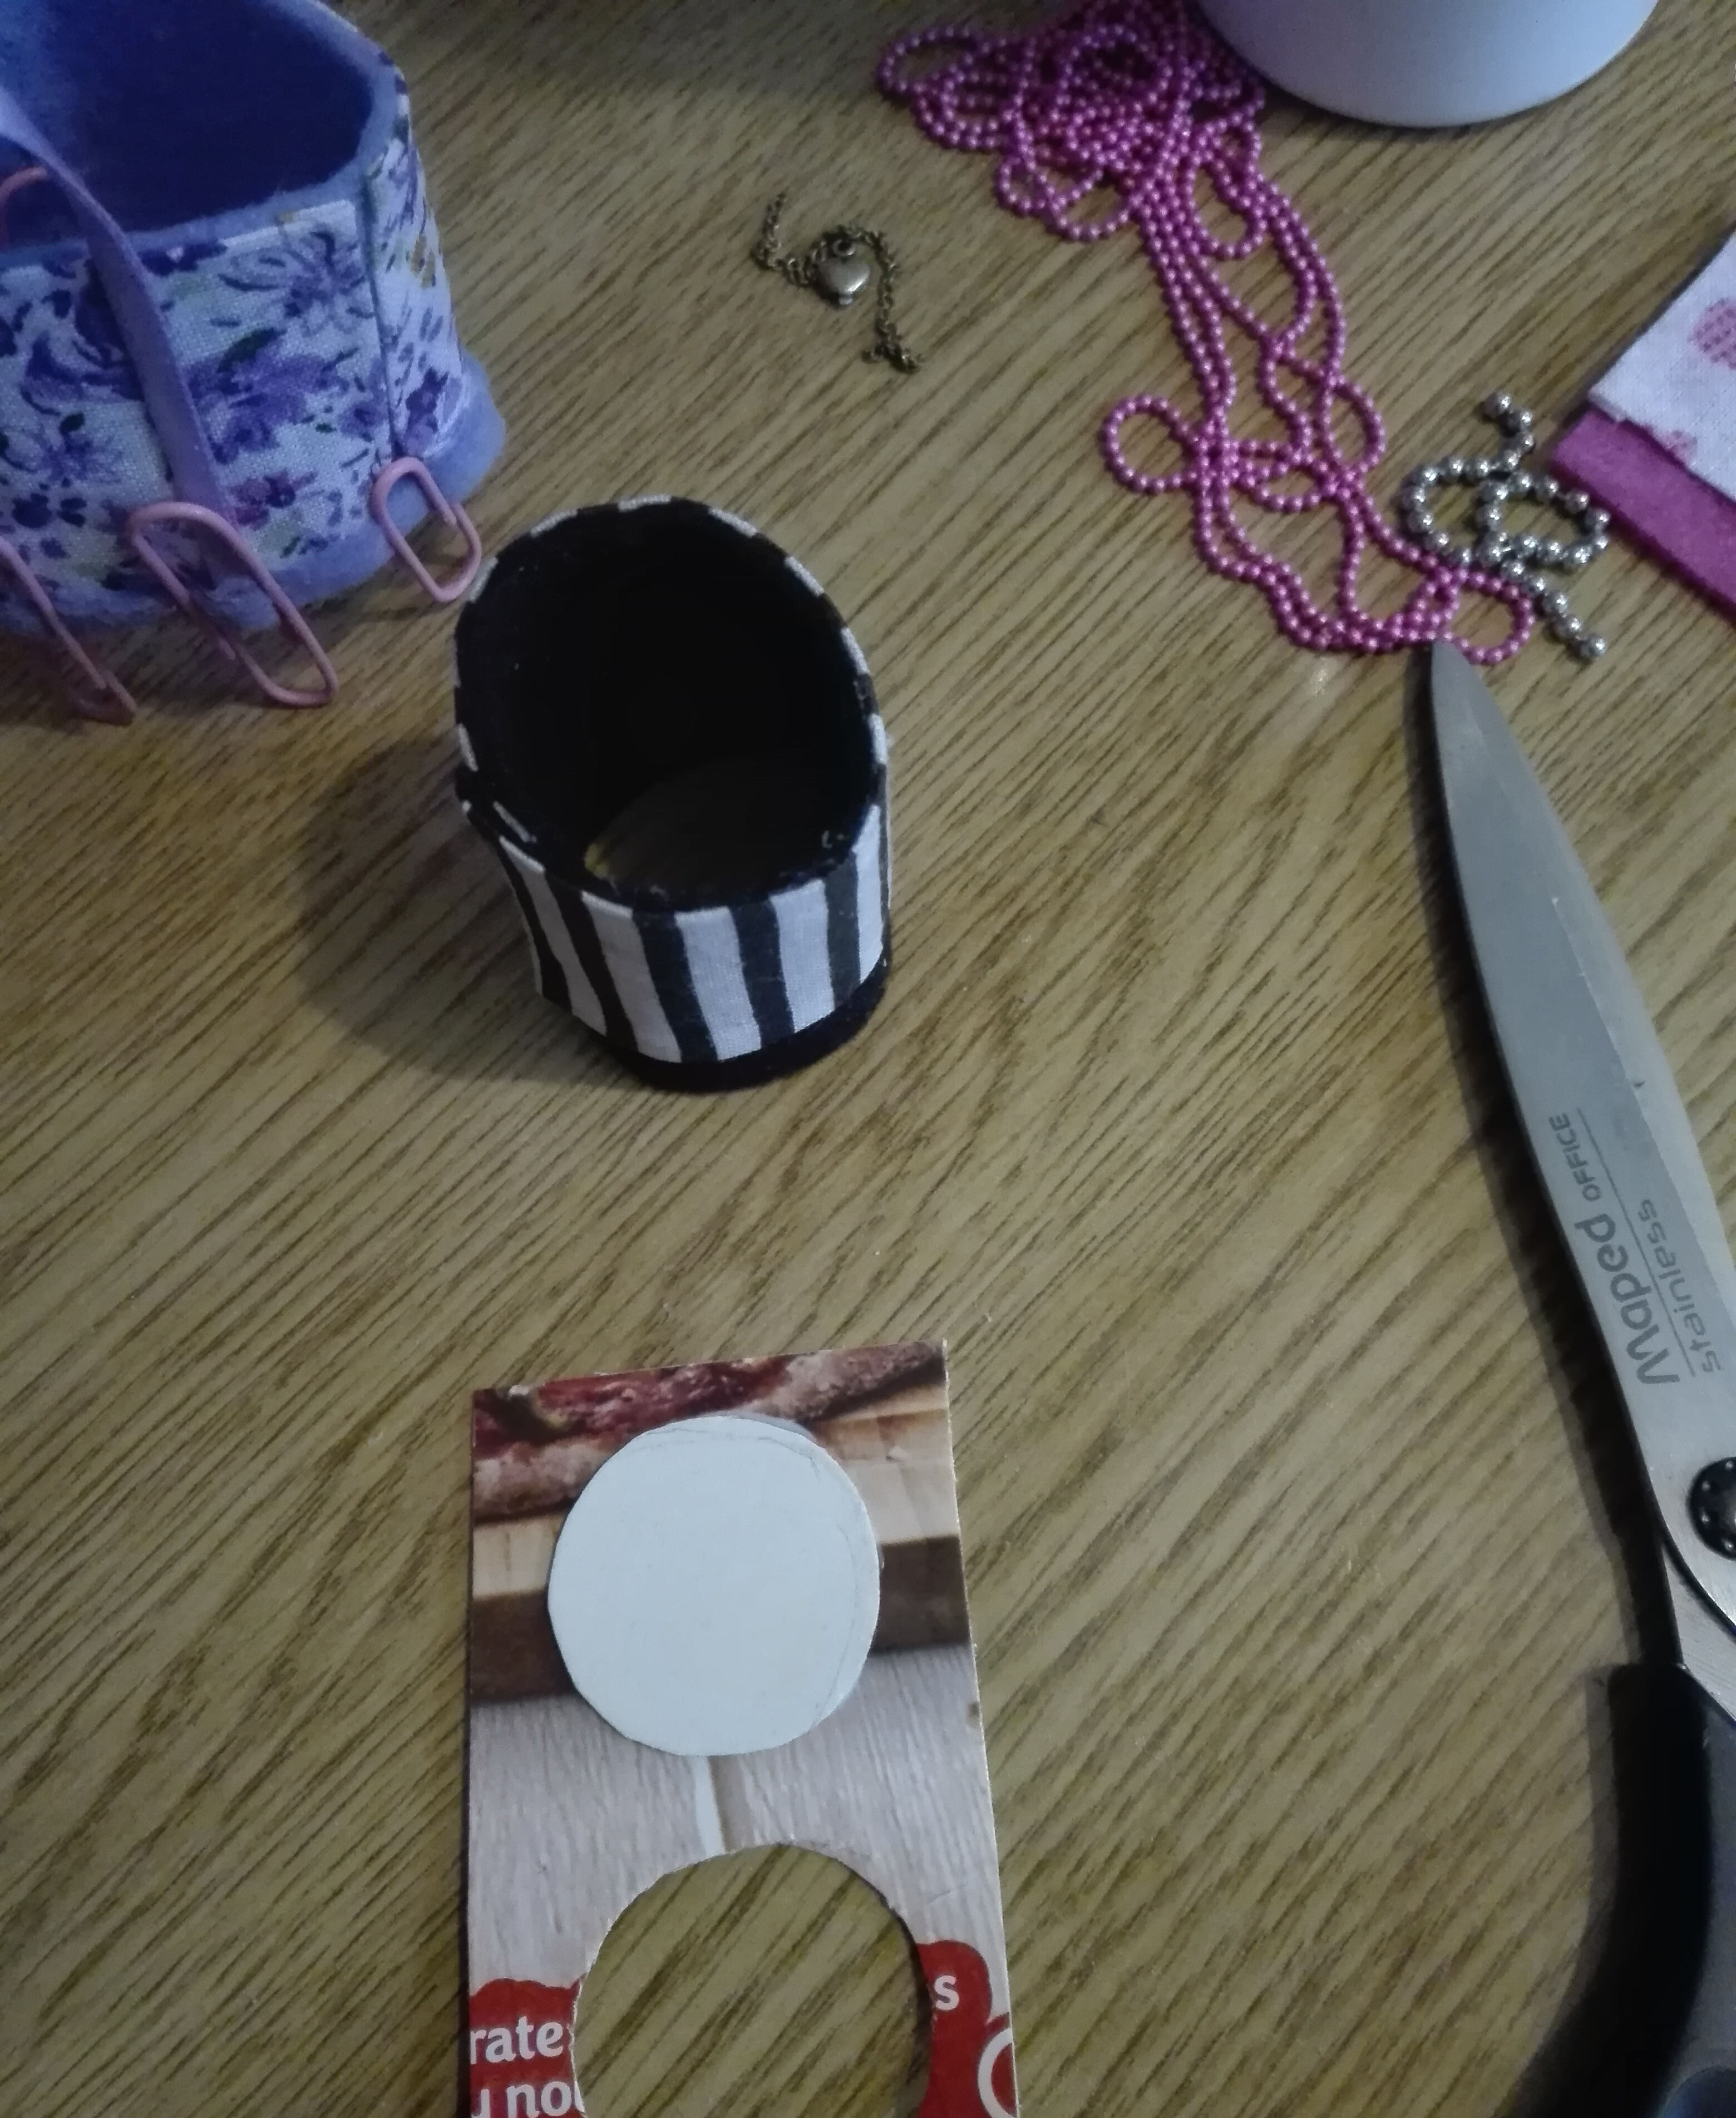
Let’s start with the bucket bag. Cut a piece of fabric that is 10 cm. long and 4 cm. tall. This will work for most 1/6 dolls, so if you want a bigger bag change the size.
Glue the top part.

And then glue the bottom part. Each fold I did was 0.5 cm. so we are left with a 10×3 cm. piece.

For this particular bag I wanted to make a chain strap, which would be attached to the bag with some ribbon. For this, I glued the ribbon to the inside of the fabric. Skip this step if you want to do something else. If you want the strap to be directly glued to the bag, this would be the time to do so.
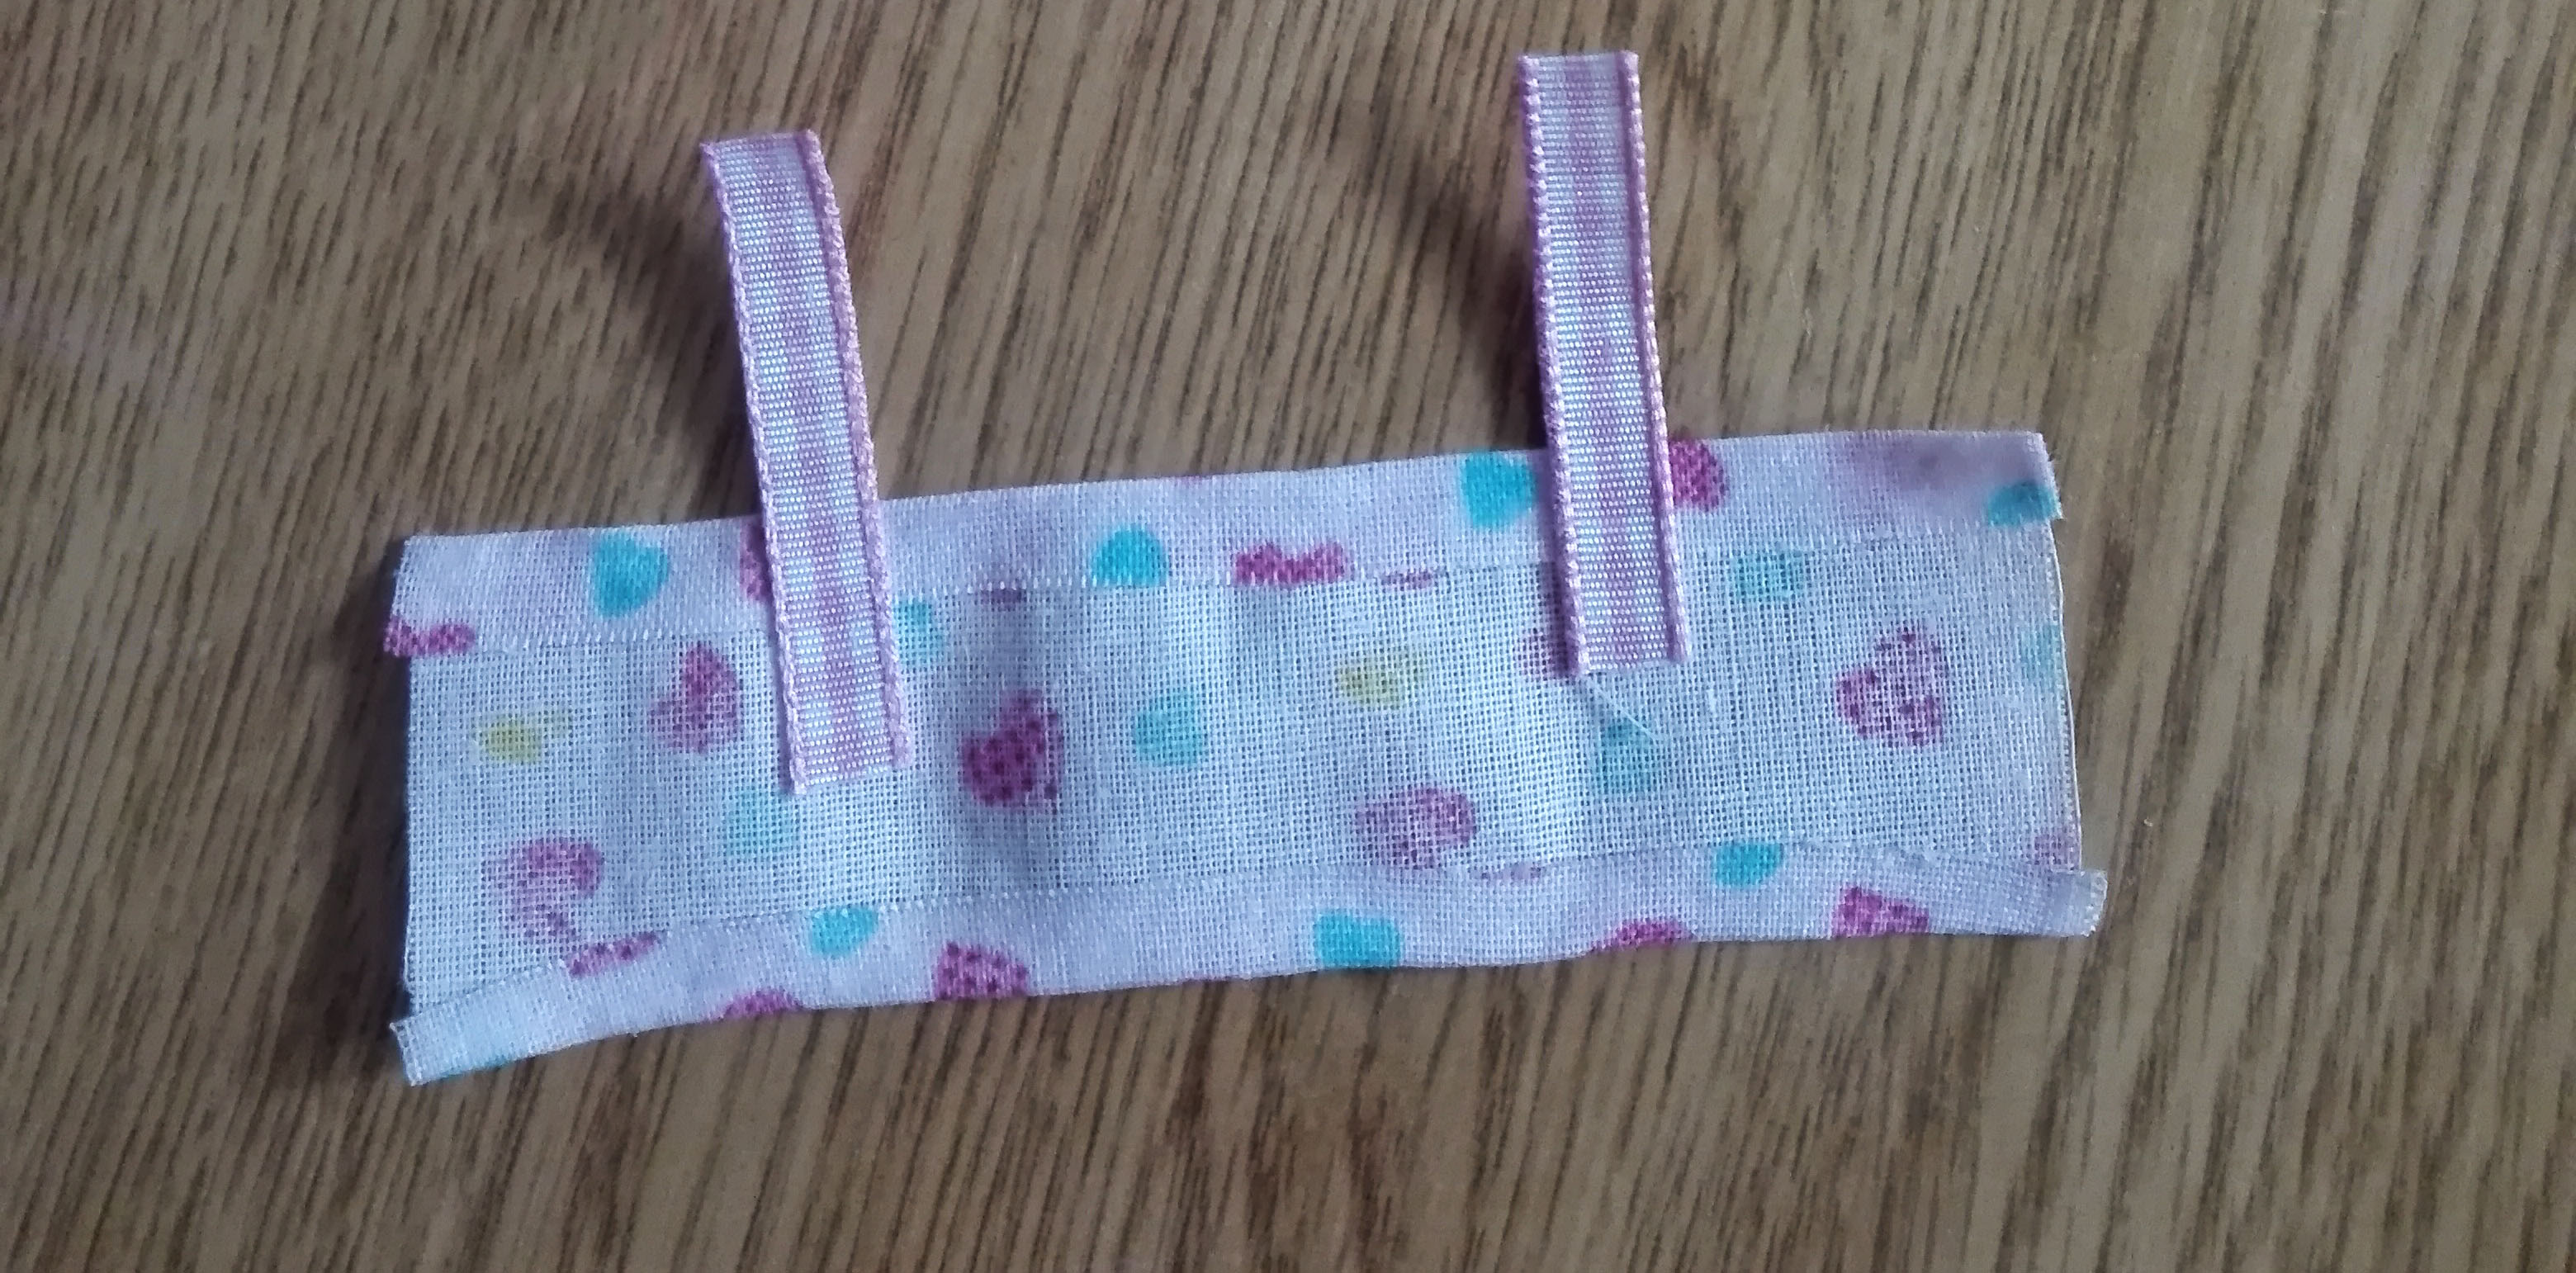
After the ribbon is glued, fold and glue again.
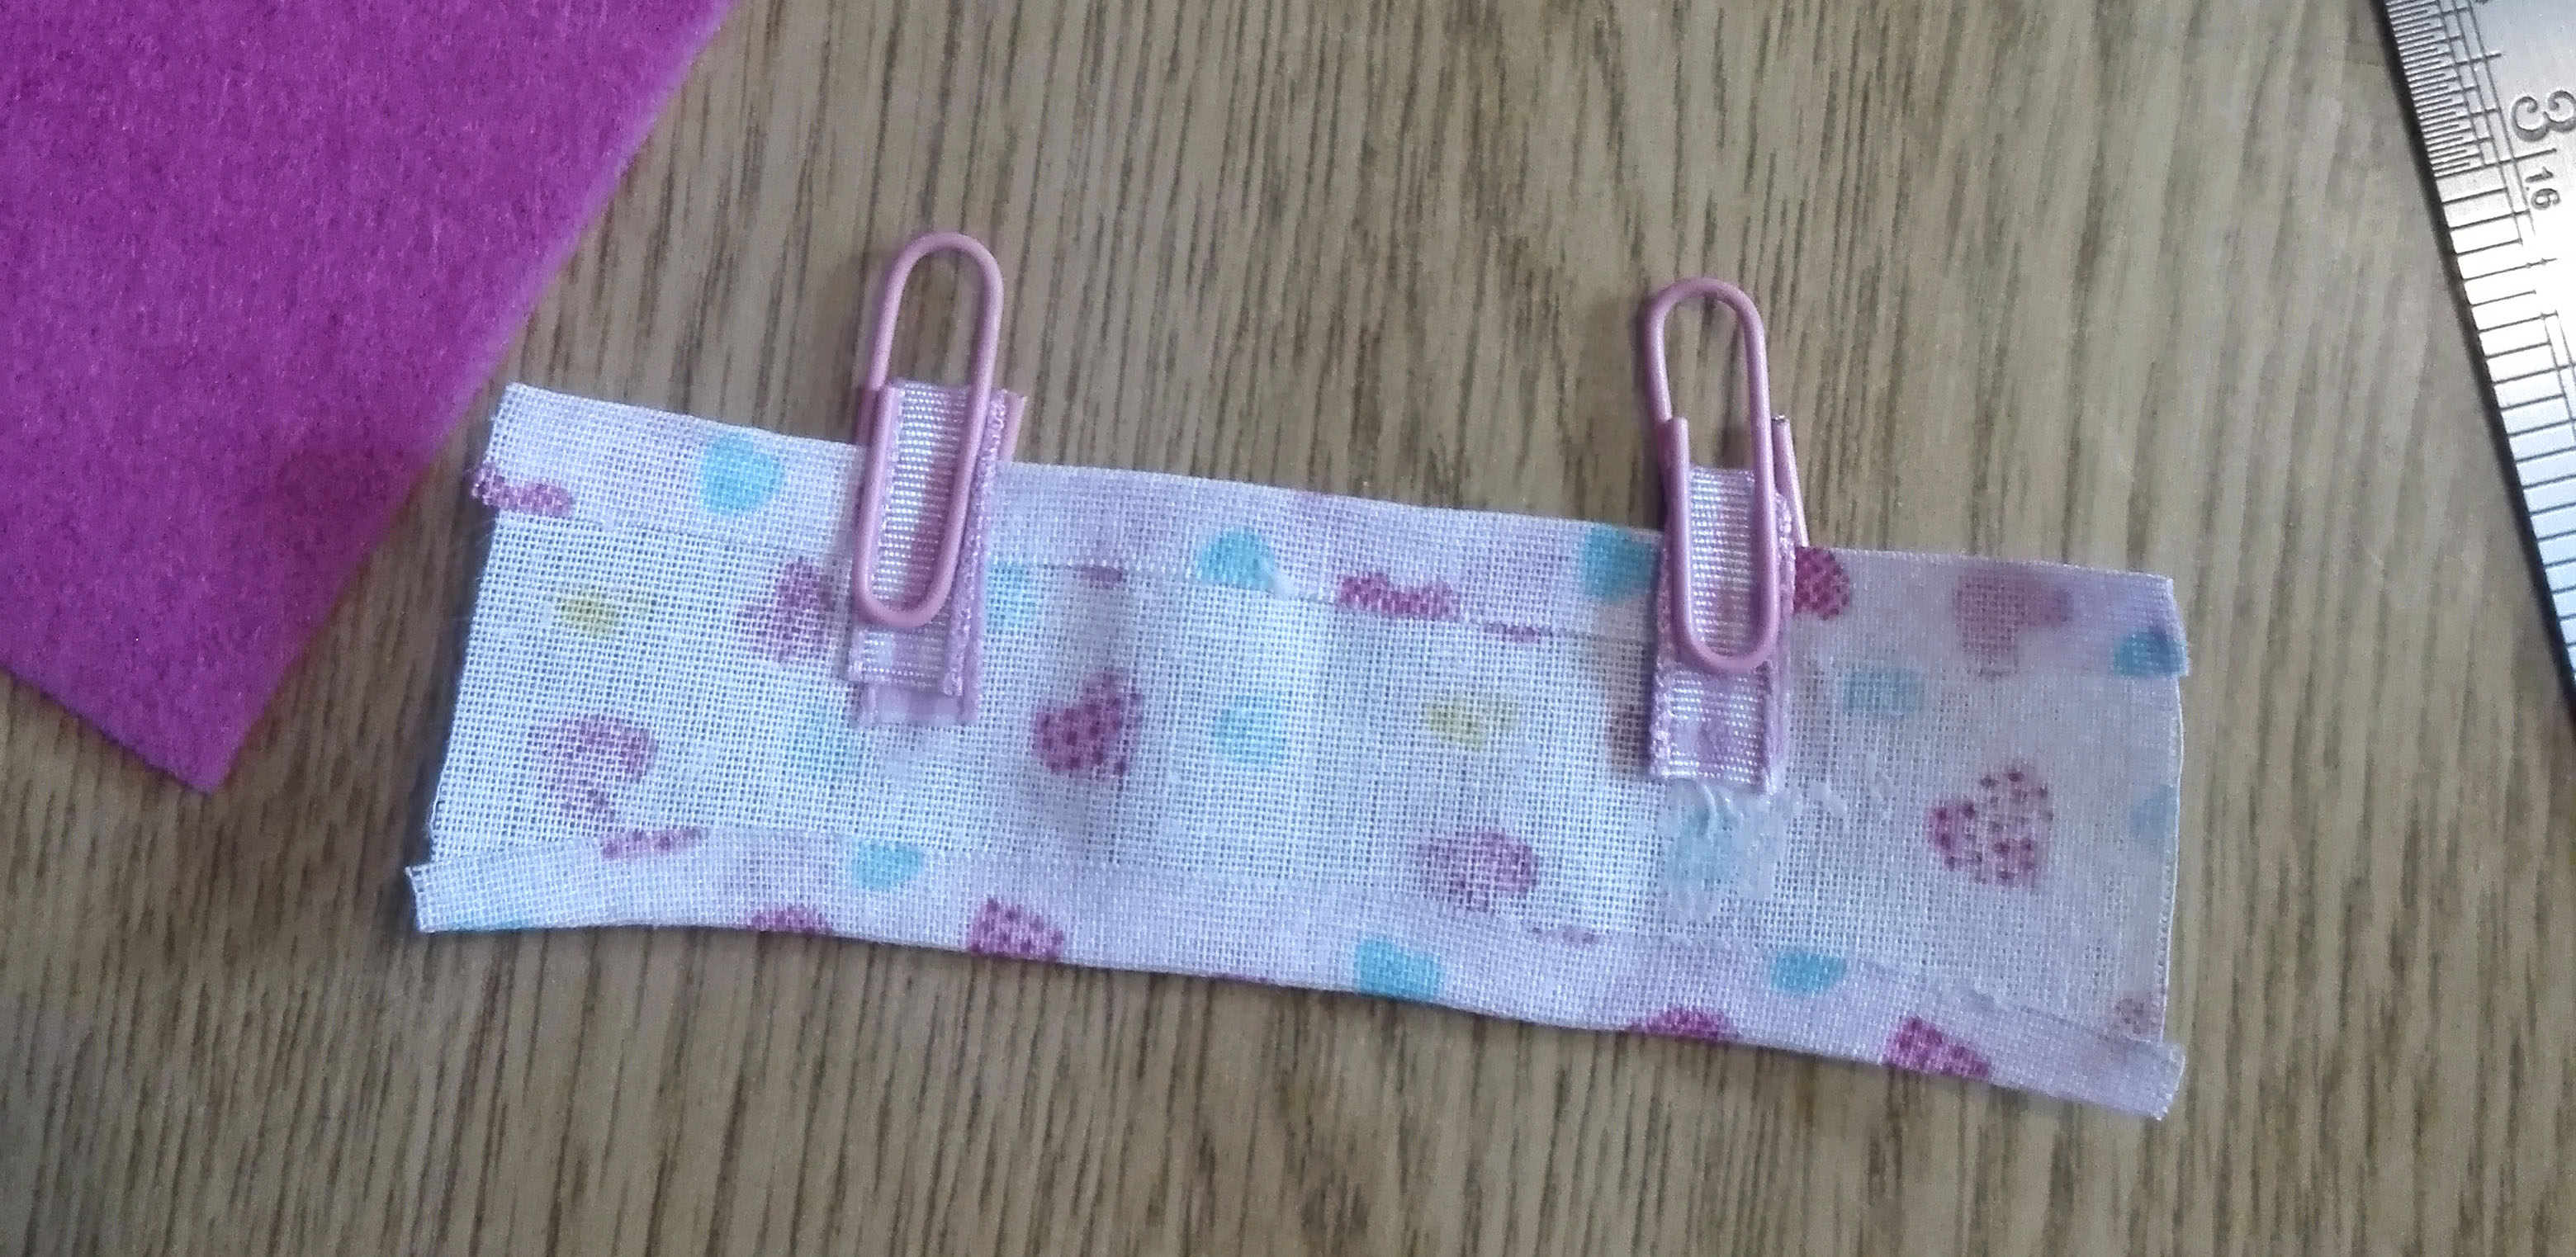
I kept it in place with some paper clips while it dried.

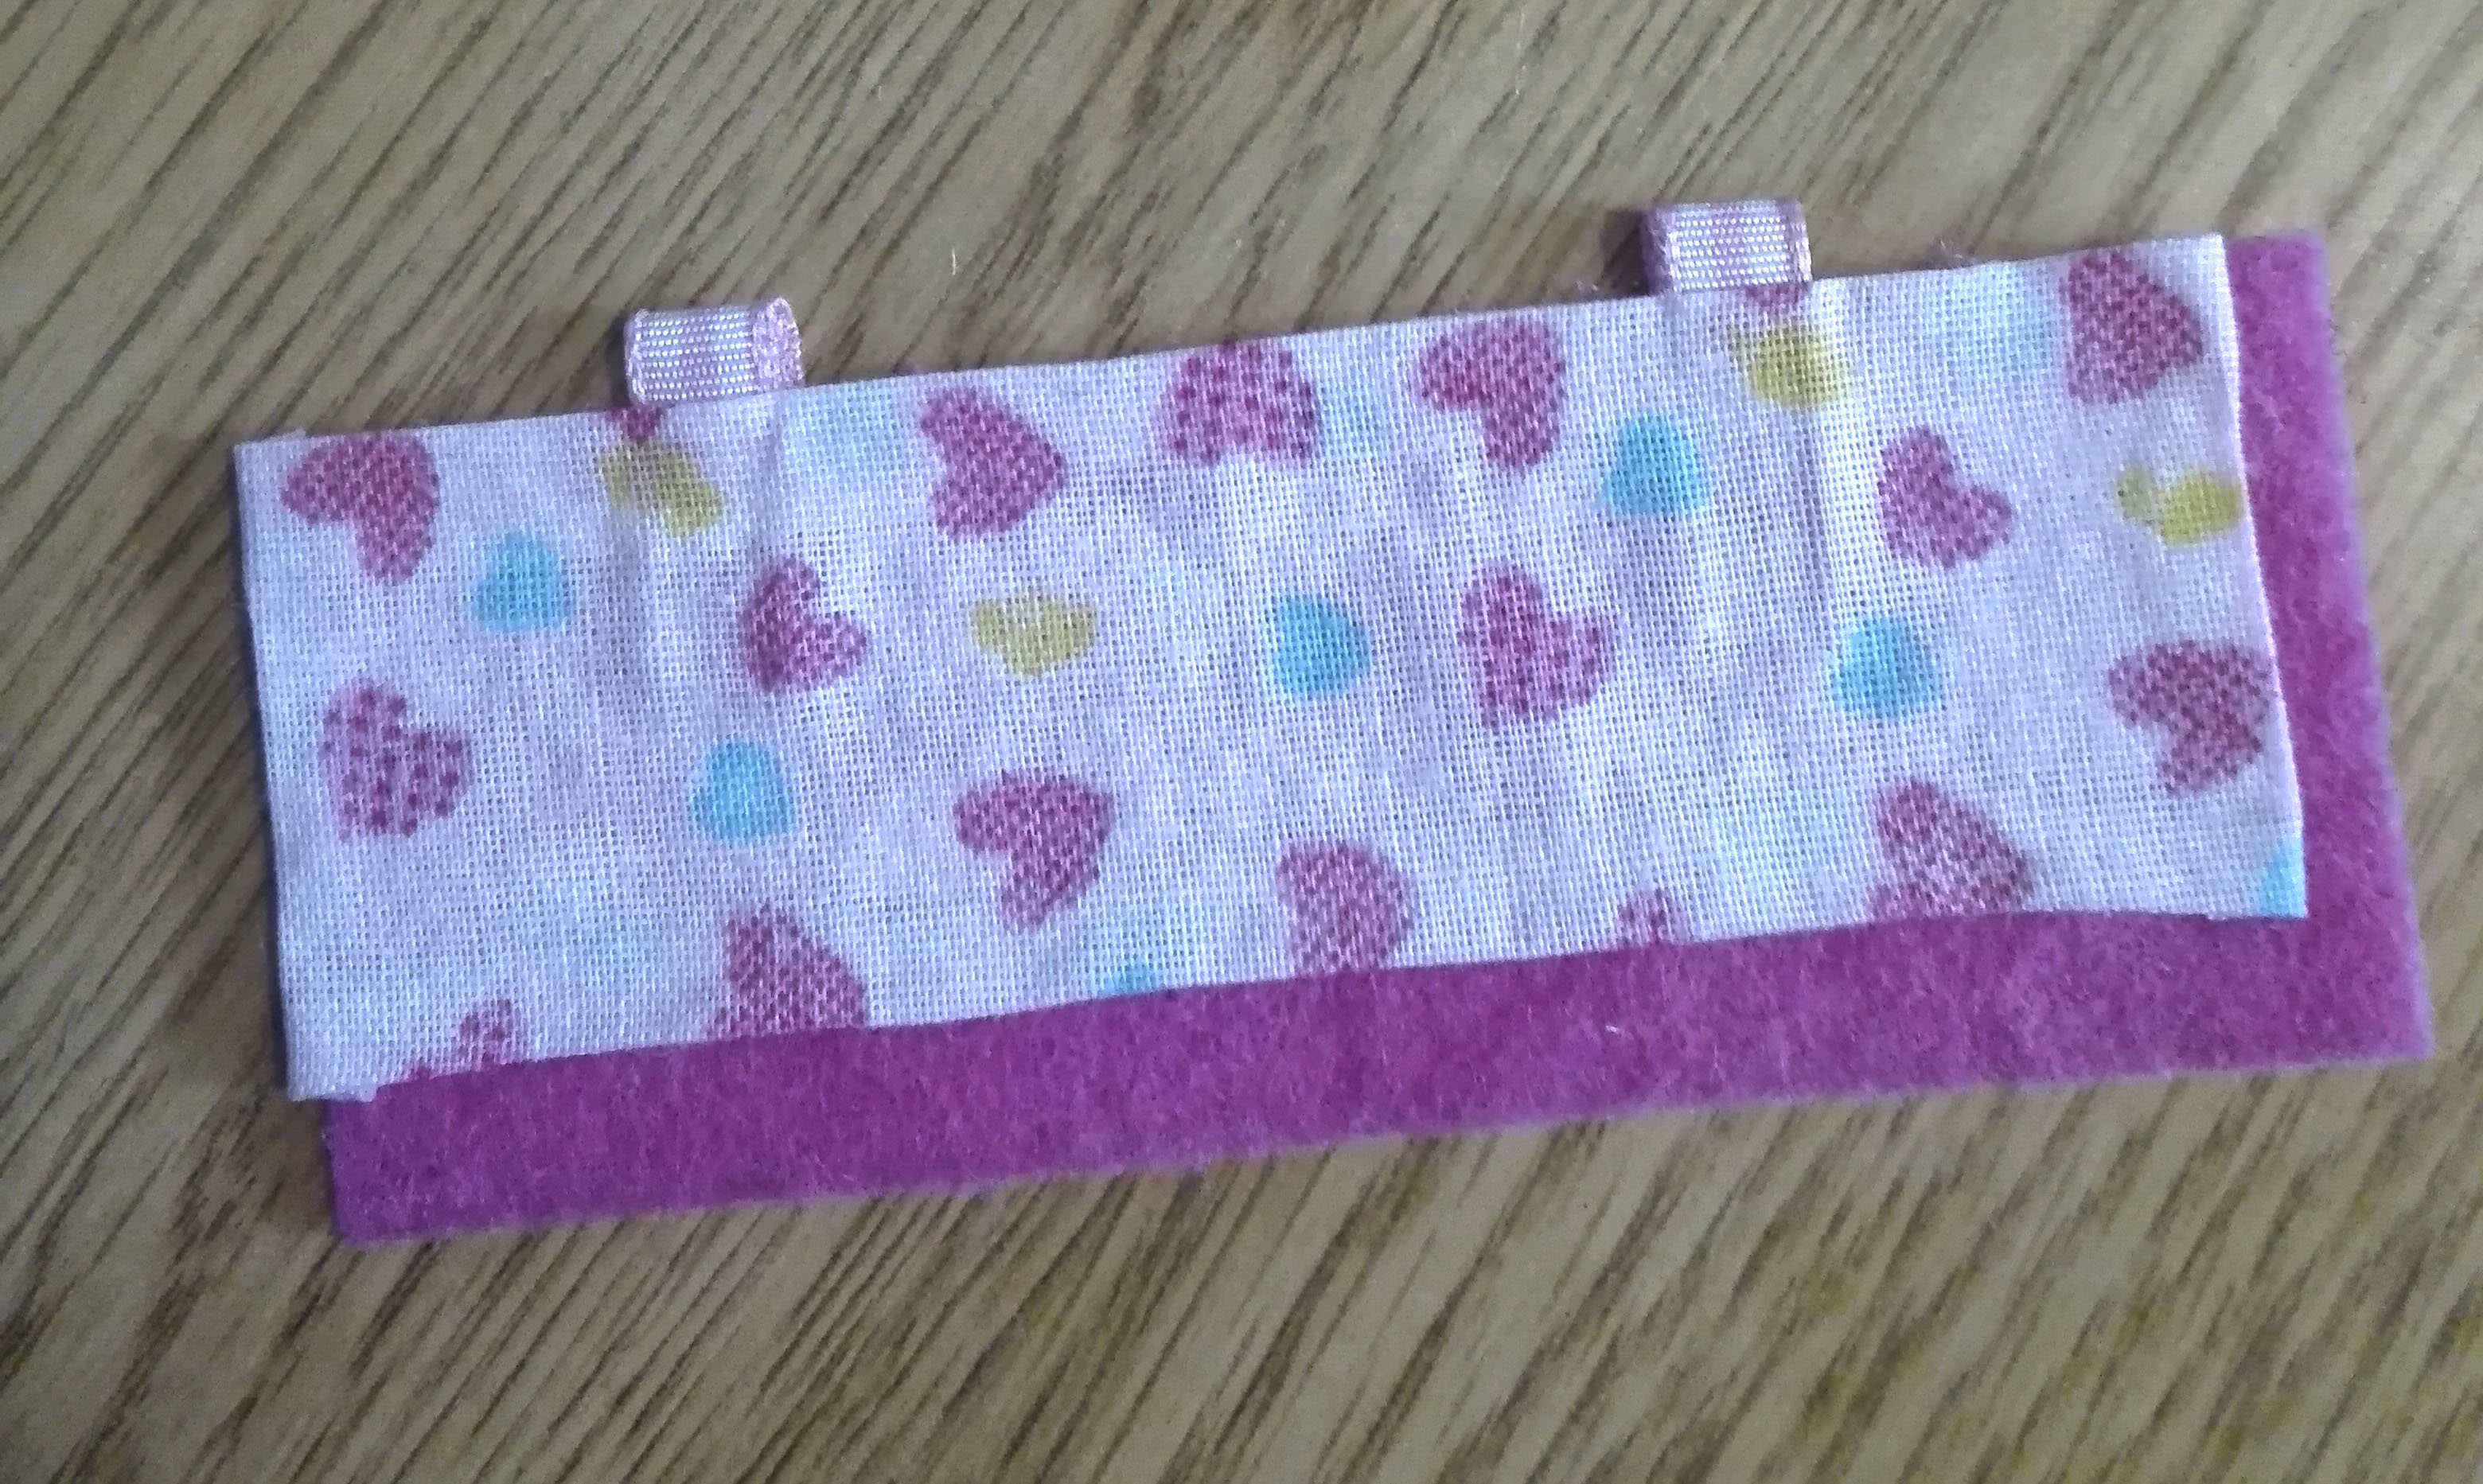
The chain will pass through the loop. Glue the sides too, to make clean edges all over. Then glue it to a piece of felt that is slightly bigger at the bottom and one side.
Let’s leave it to dry while we start the tote bag.
Tote bag
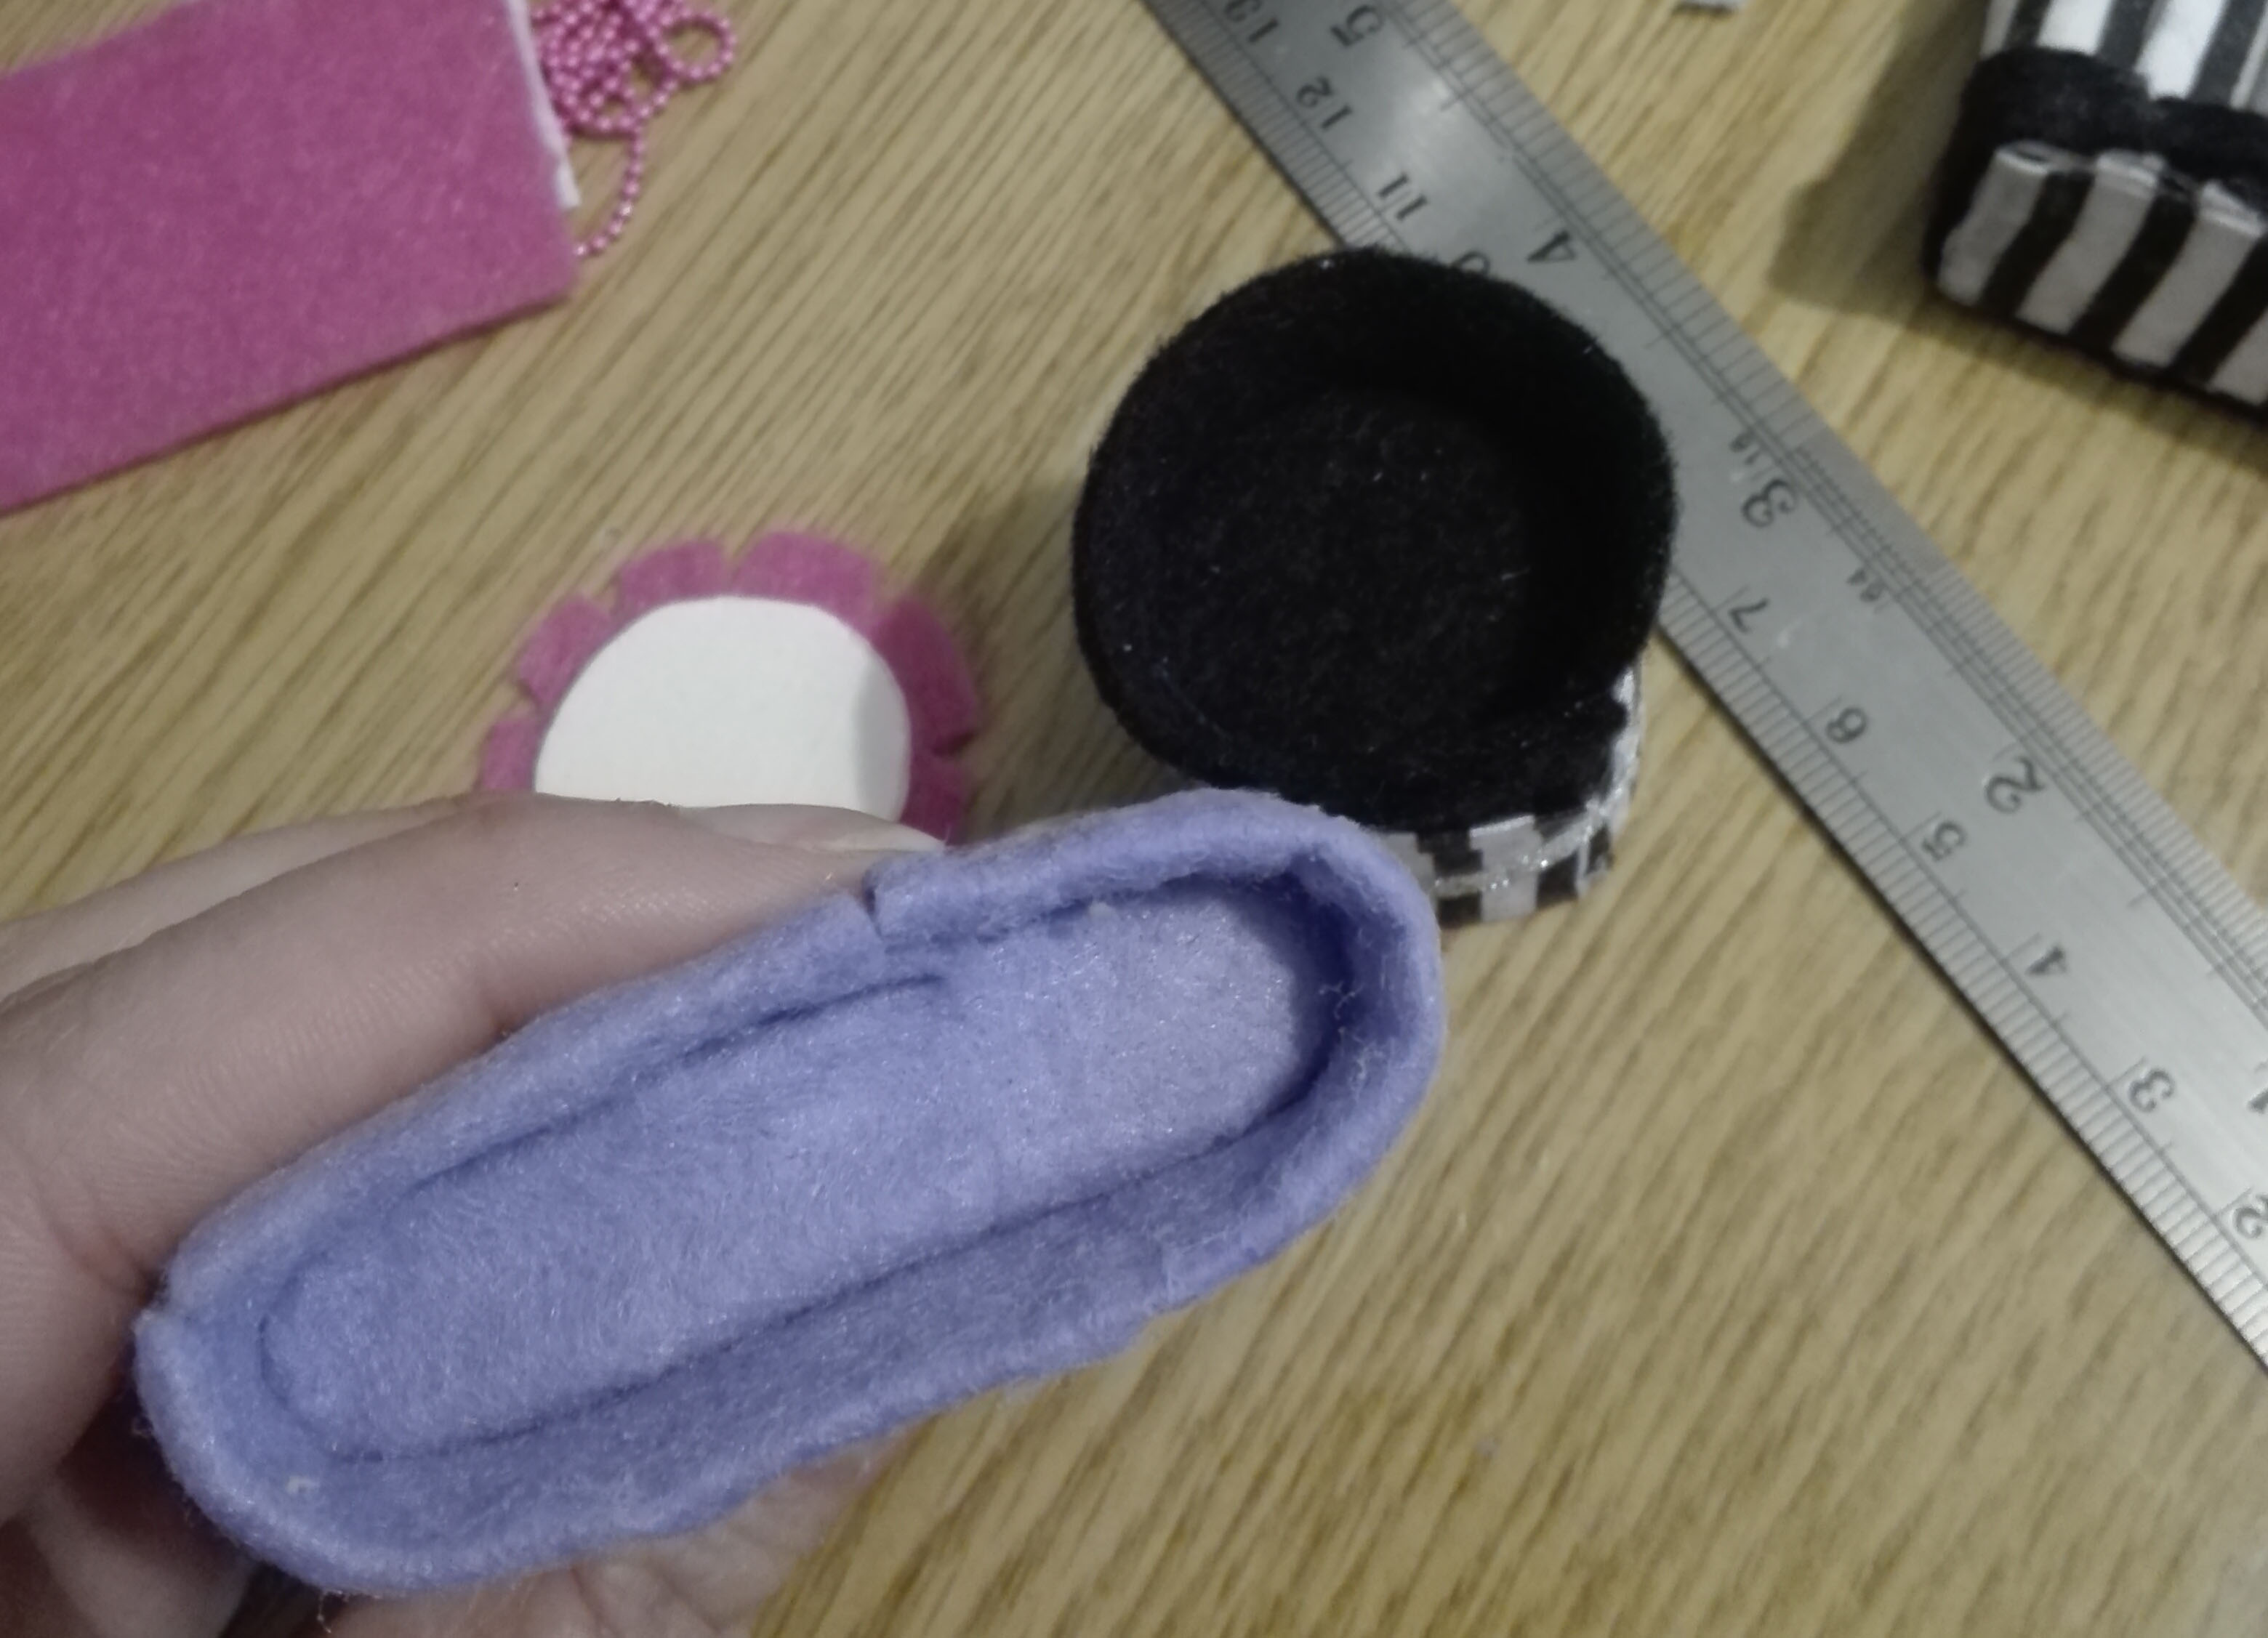
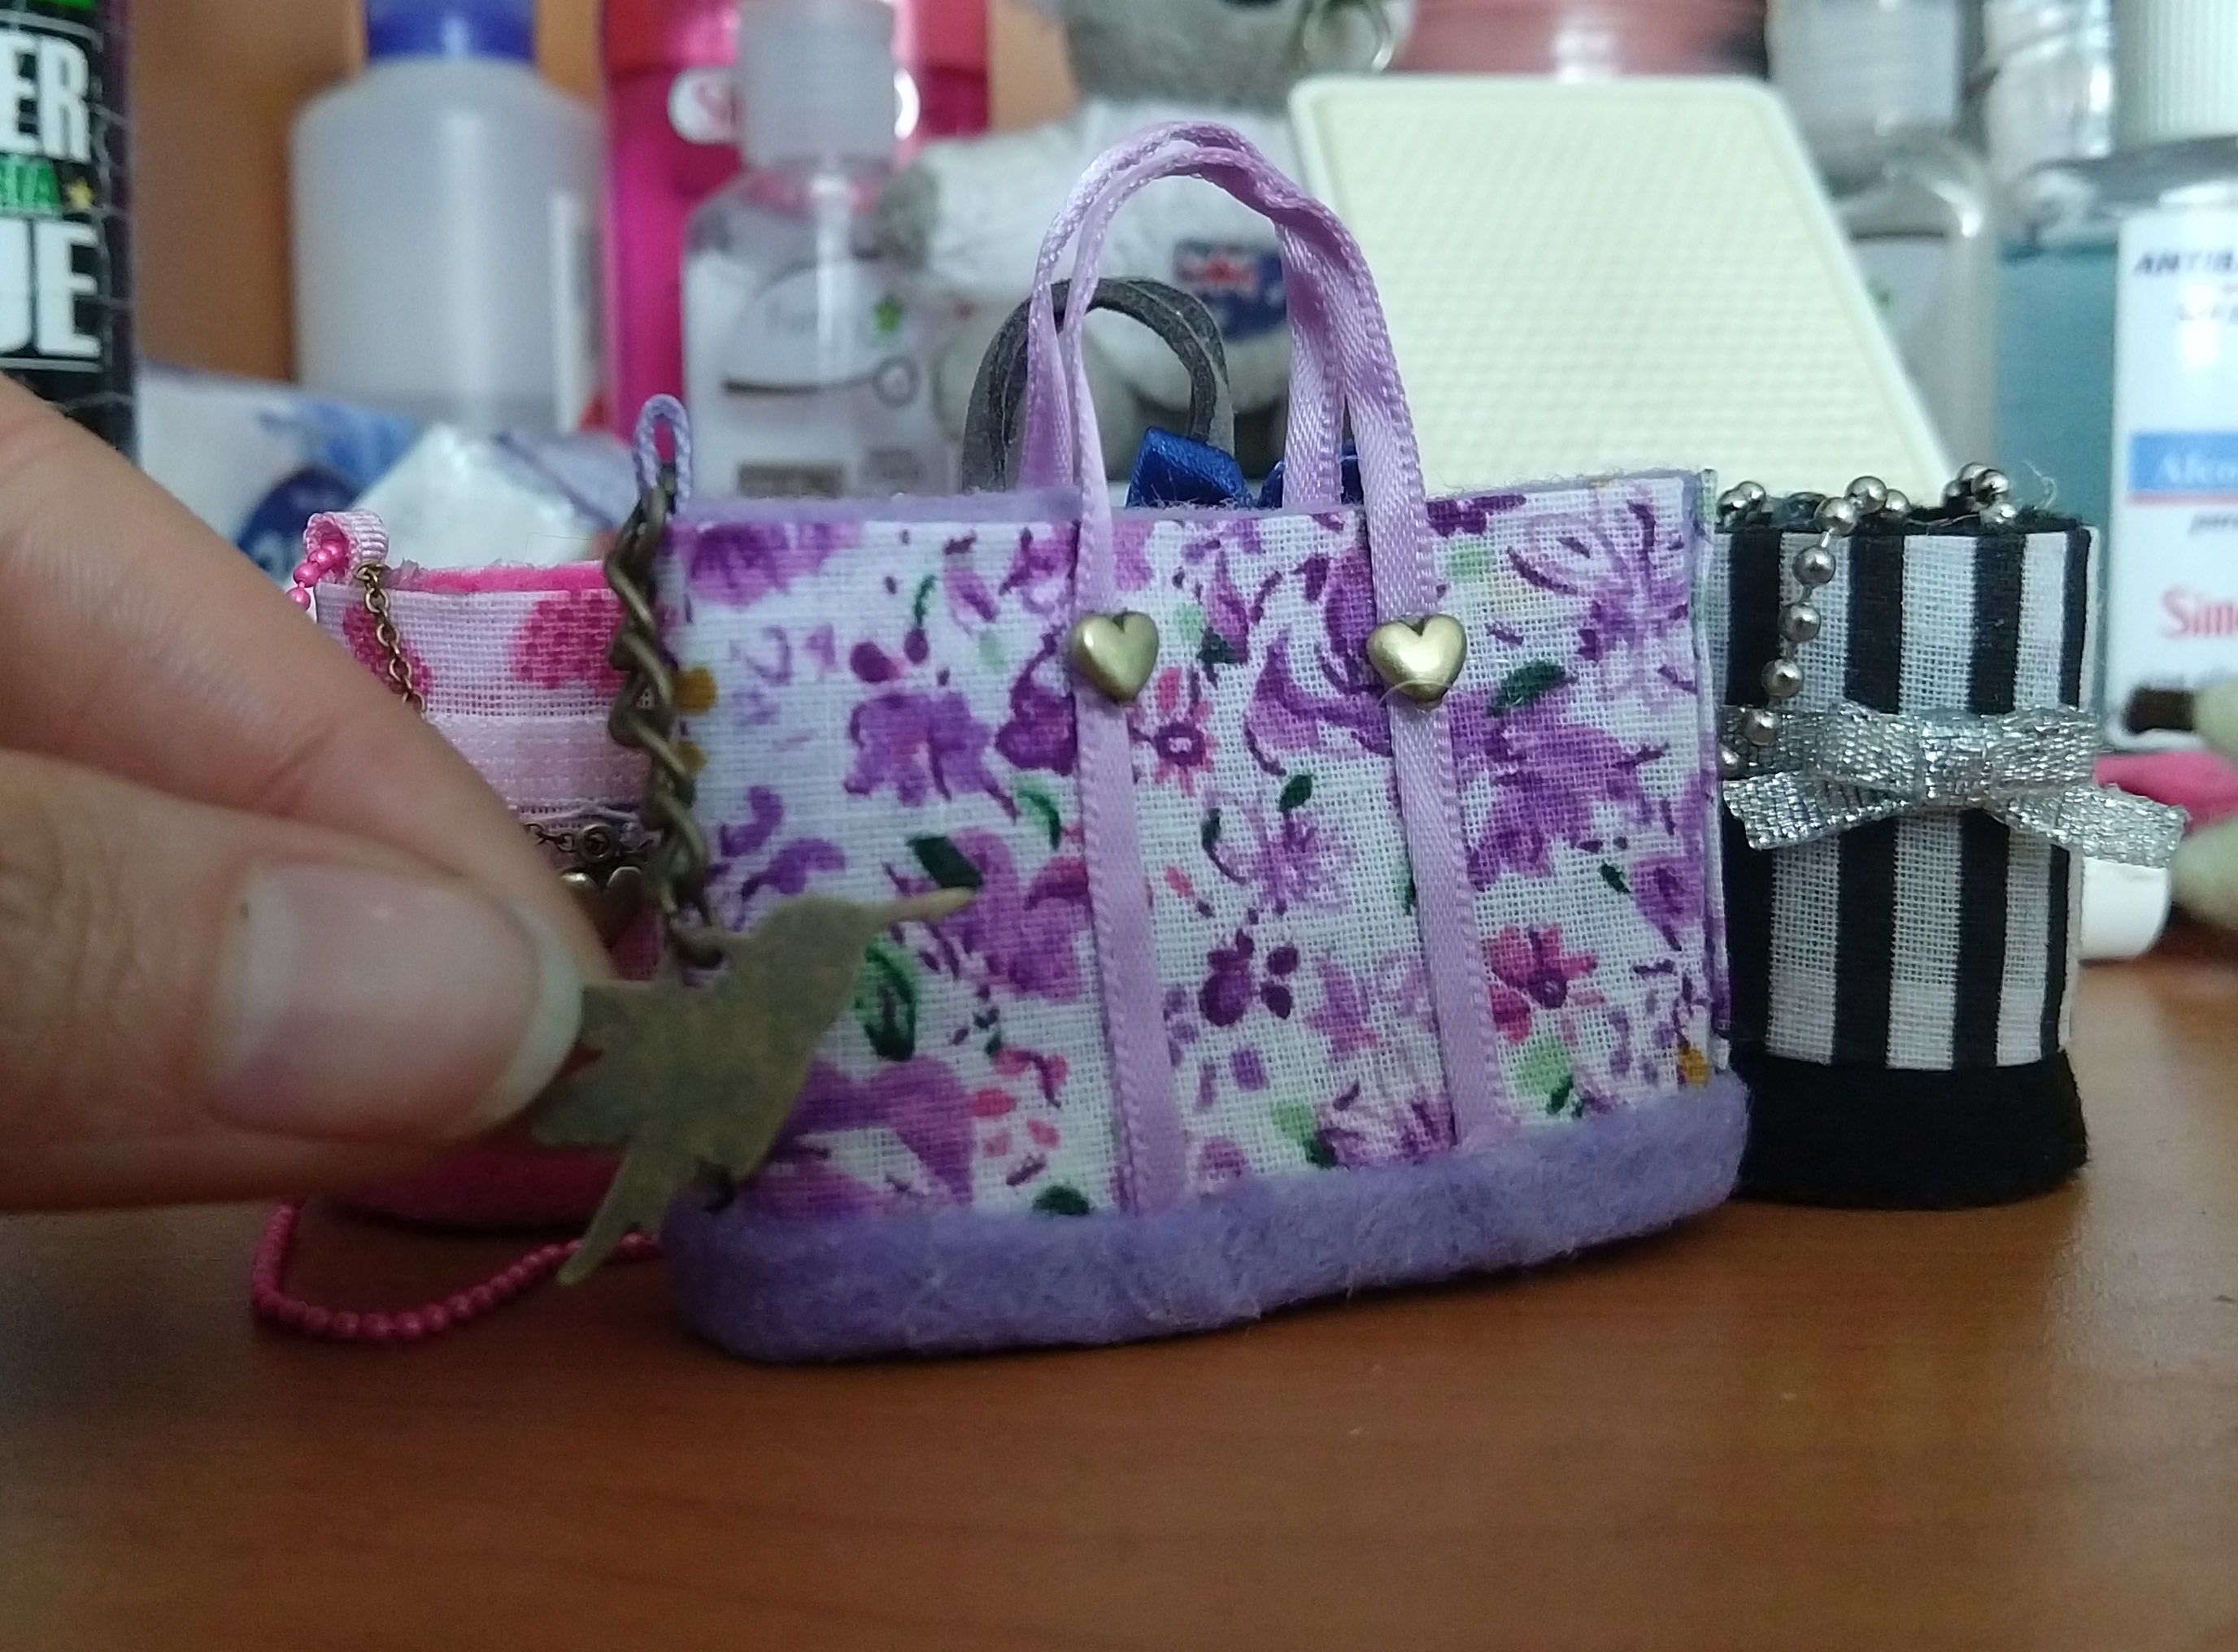
I followed the same steps, but this time I made a longer and taller piece of fabric and felt. Since I’m using 10×10 cm. scraps, I had to glue an extra piece to the side.

You can see I left more felt at the bottom, because this time I will fold it over. I also added a single loop of ribbon at the top, to add a charm later. It’s good to plan your bag before starting so you can add all those details before gluing the felt.
I didn’t have a ribbon thin enough so I folded the one I had in half. Here is when the white glue didn’t work to keep it glued together, so I used all purpose glue. Then I glued straps of ribbon in front to make handles.
I also glued both sides of the fabric together using the extra felt to the side and folded the bottom part too, using paper clips to support it while it dried.

This one is starting to look more like a bag already. Sorry I skipped a few steps in pictures, but hopefully it’s clear enough.
Both bags
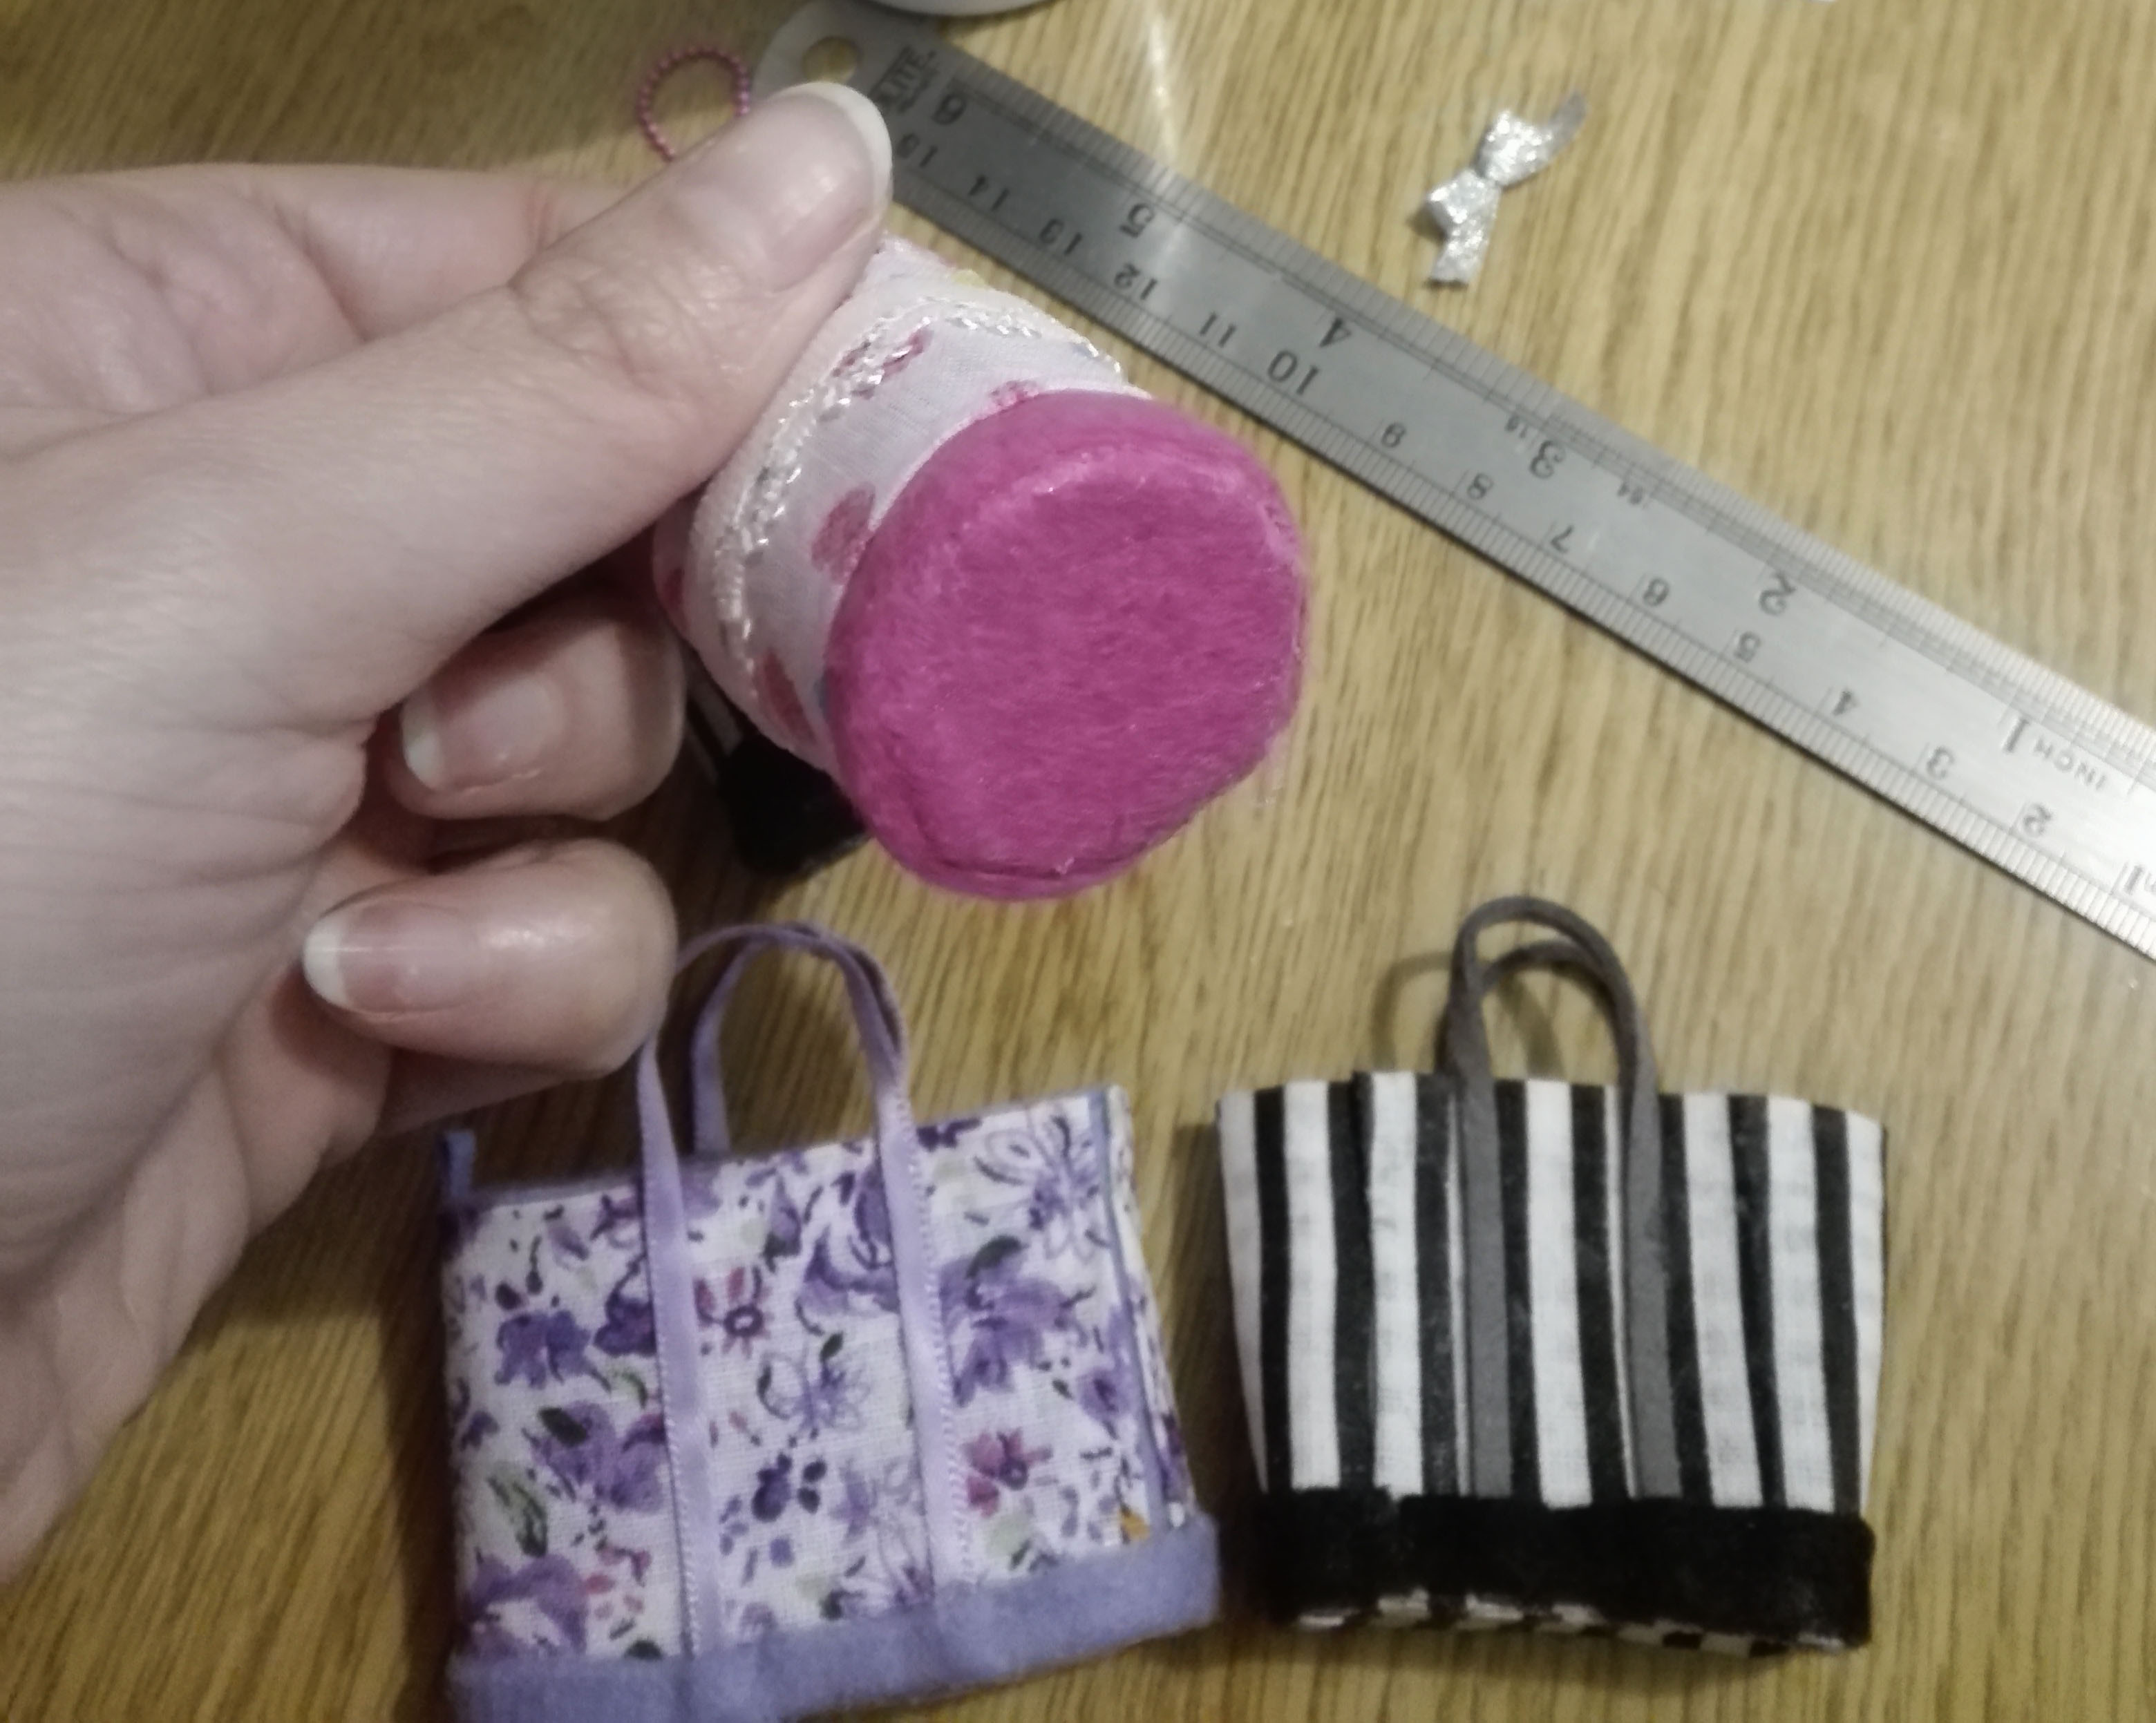
We already have the main part for both types of bags ready and drying, so let’s make the base.
Make a circle out of cardboard for the bucket bag and a rectangle for the tote. It has to be able to pass inside the bag with not much gapping. I made them double because one piece of cardboard was too thin.
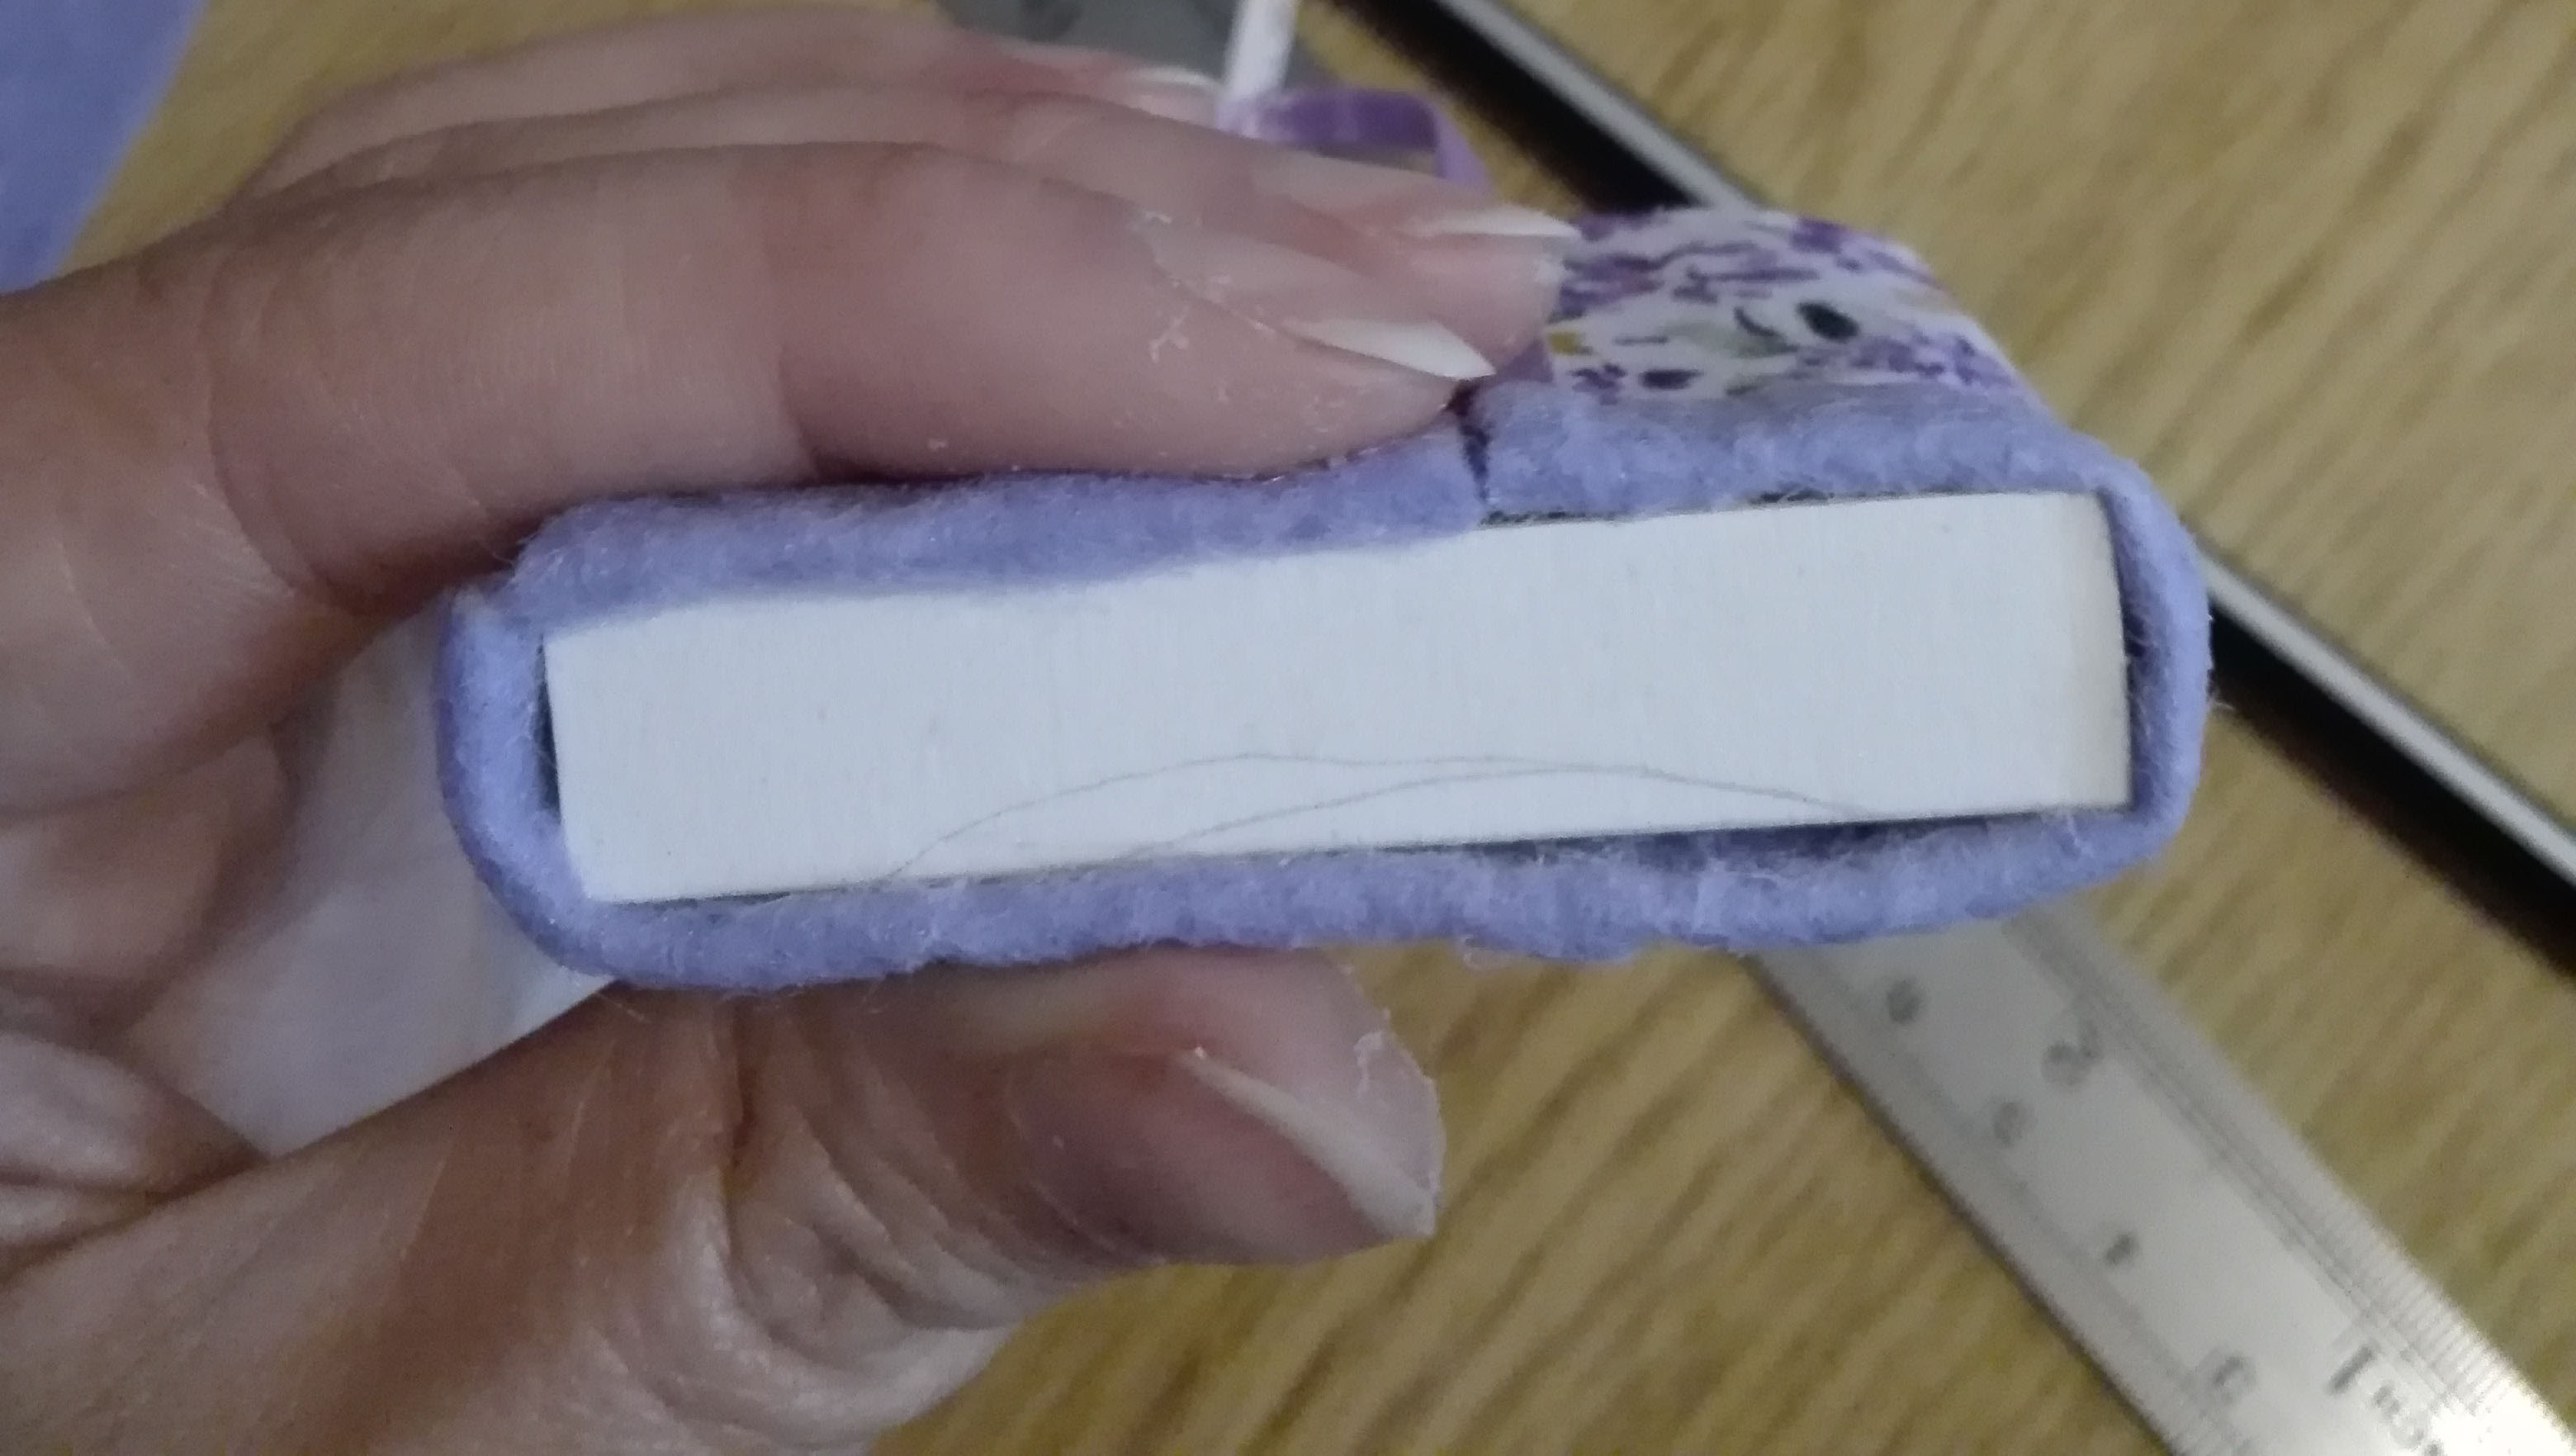
I rounded the edges of the rectangle after I made sure it fits inside.
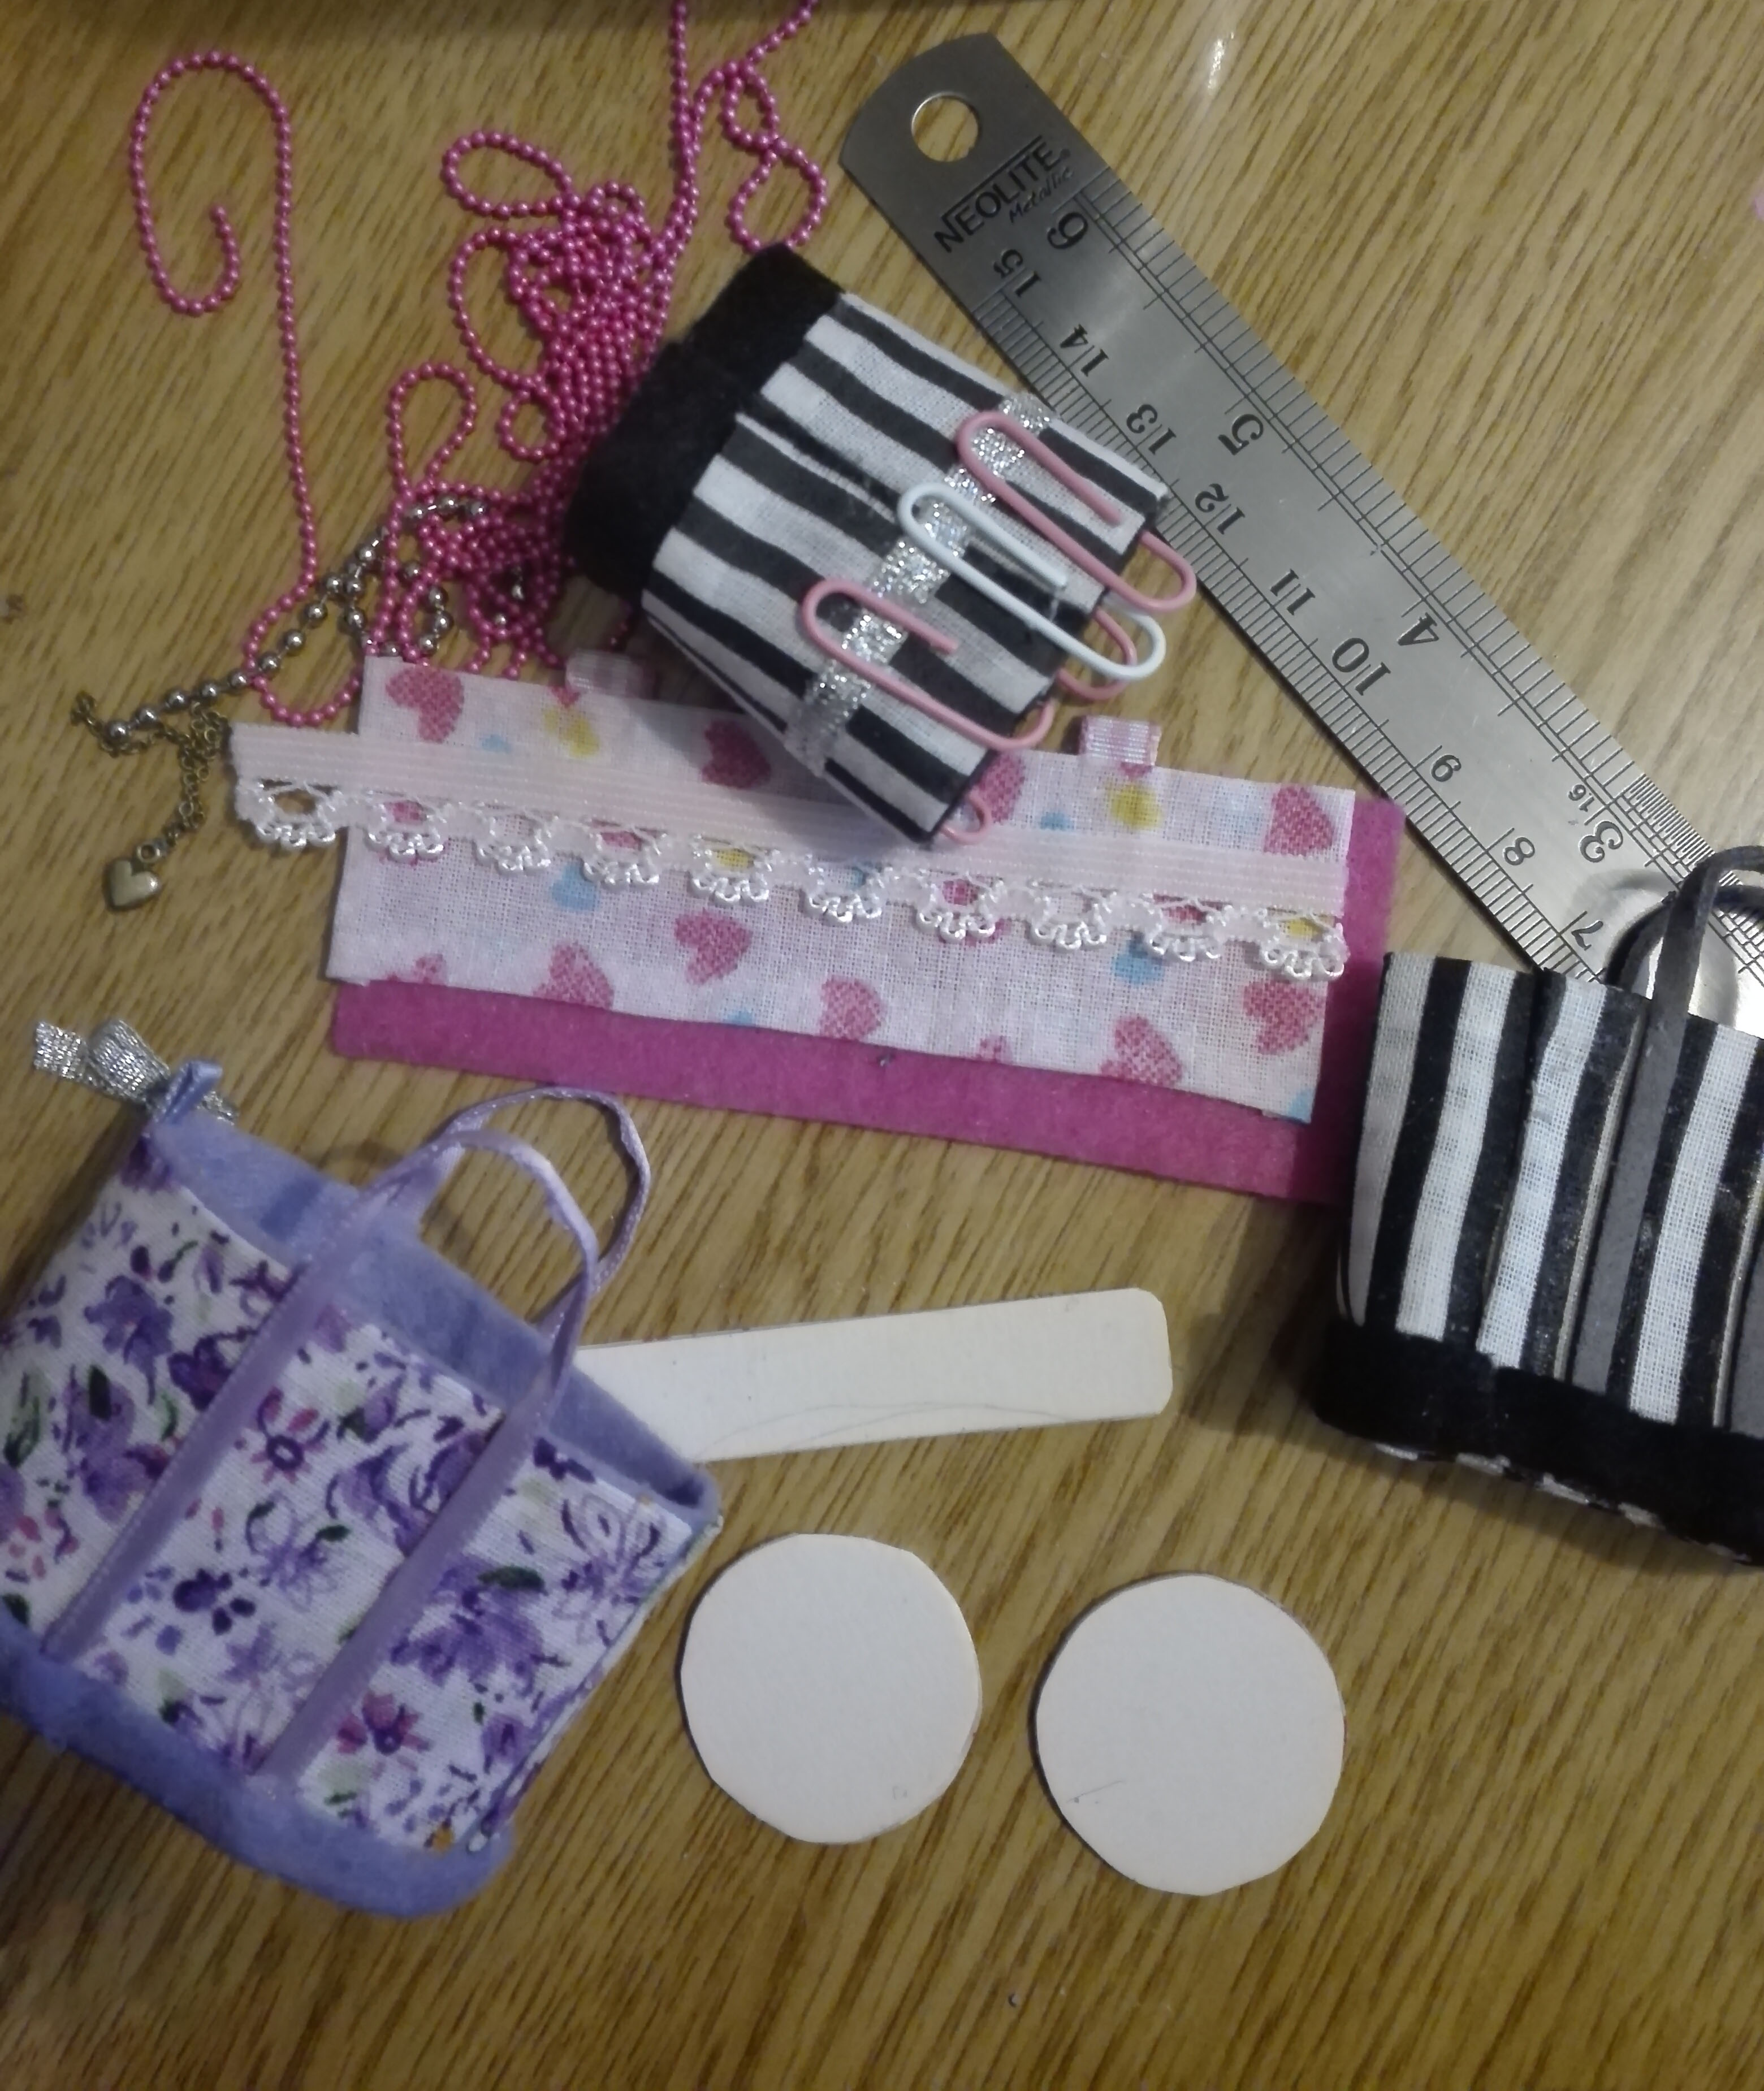
Glue the cardboard pieces to some leftover felt and cut it leaving some extra at the edges.
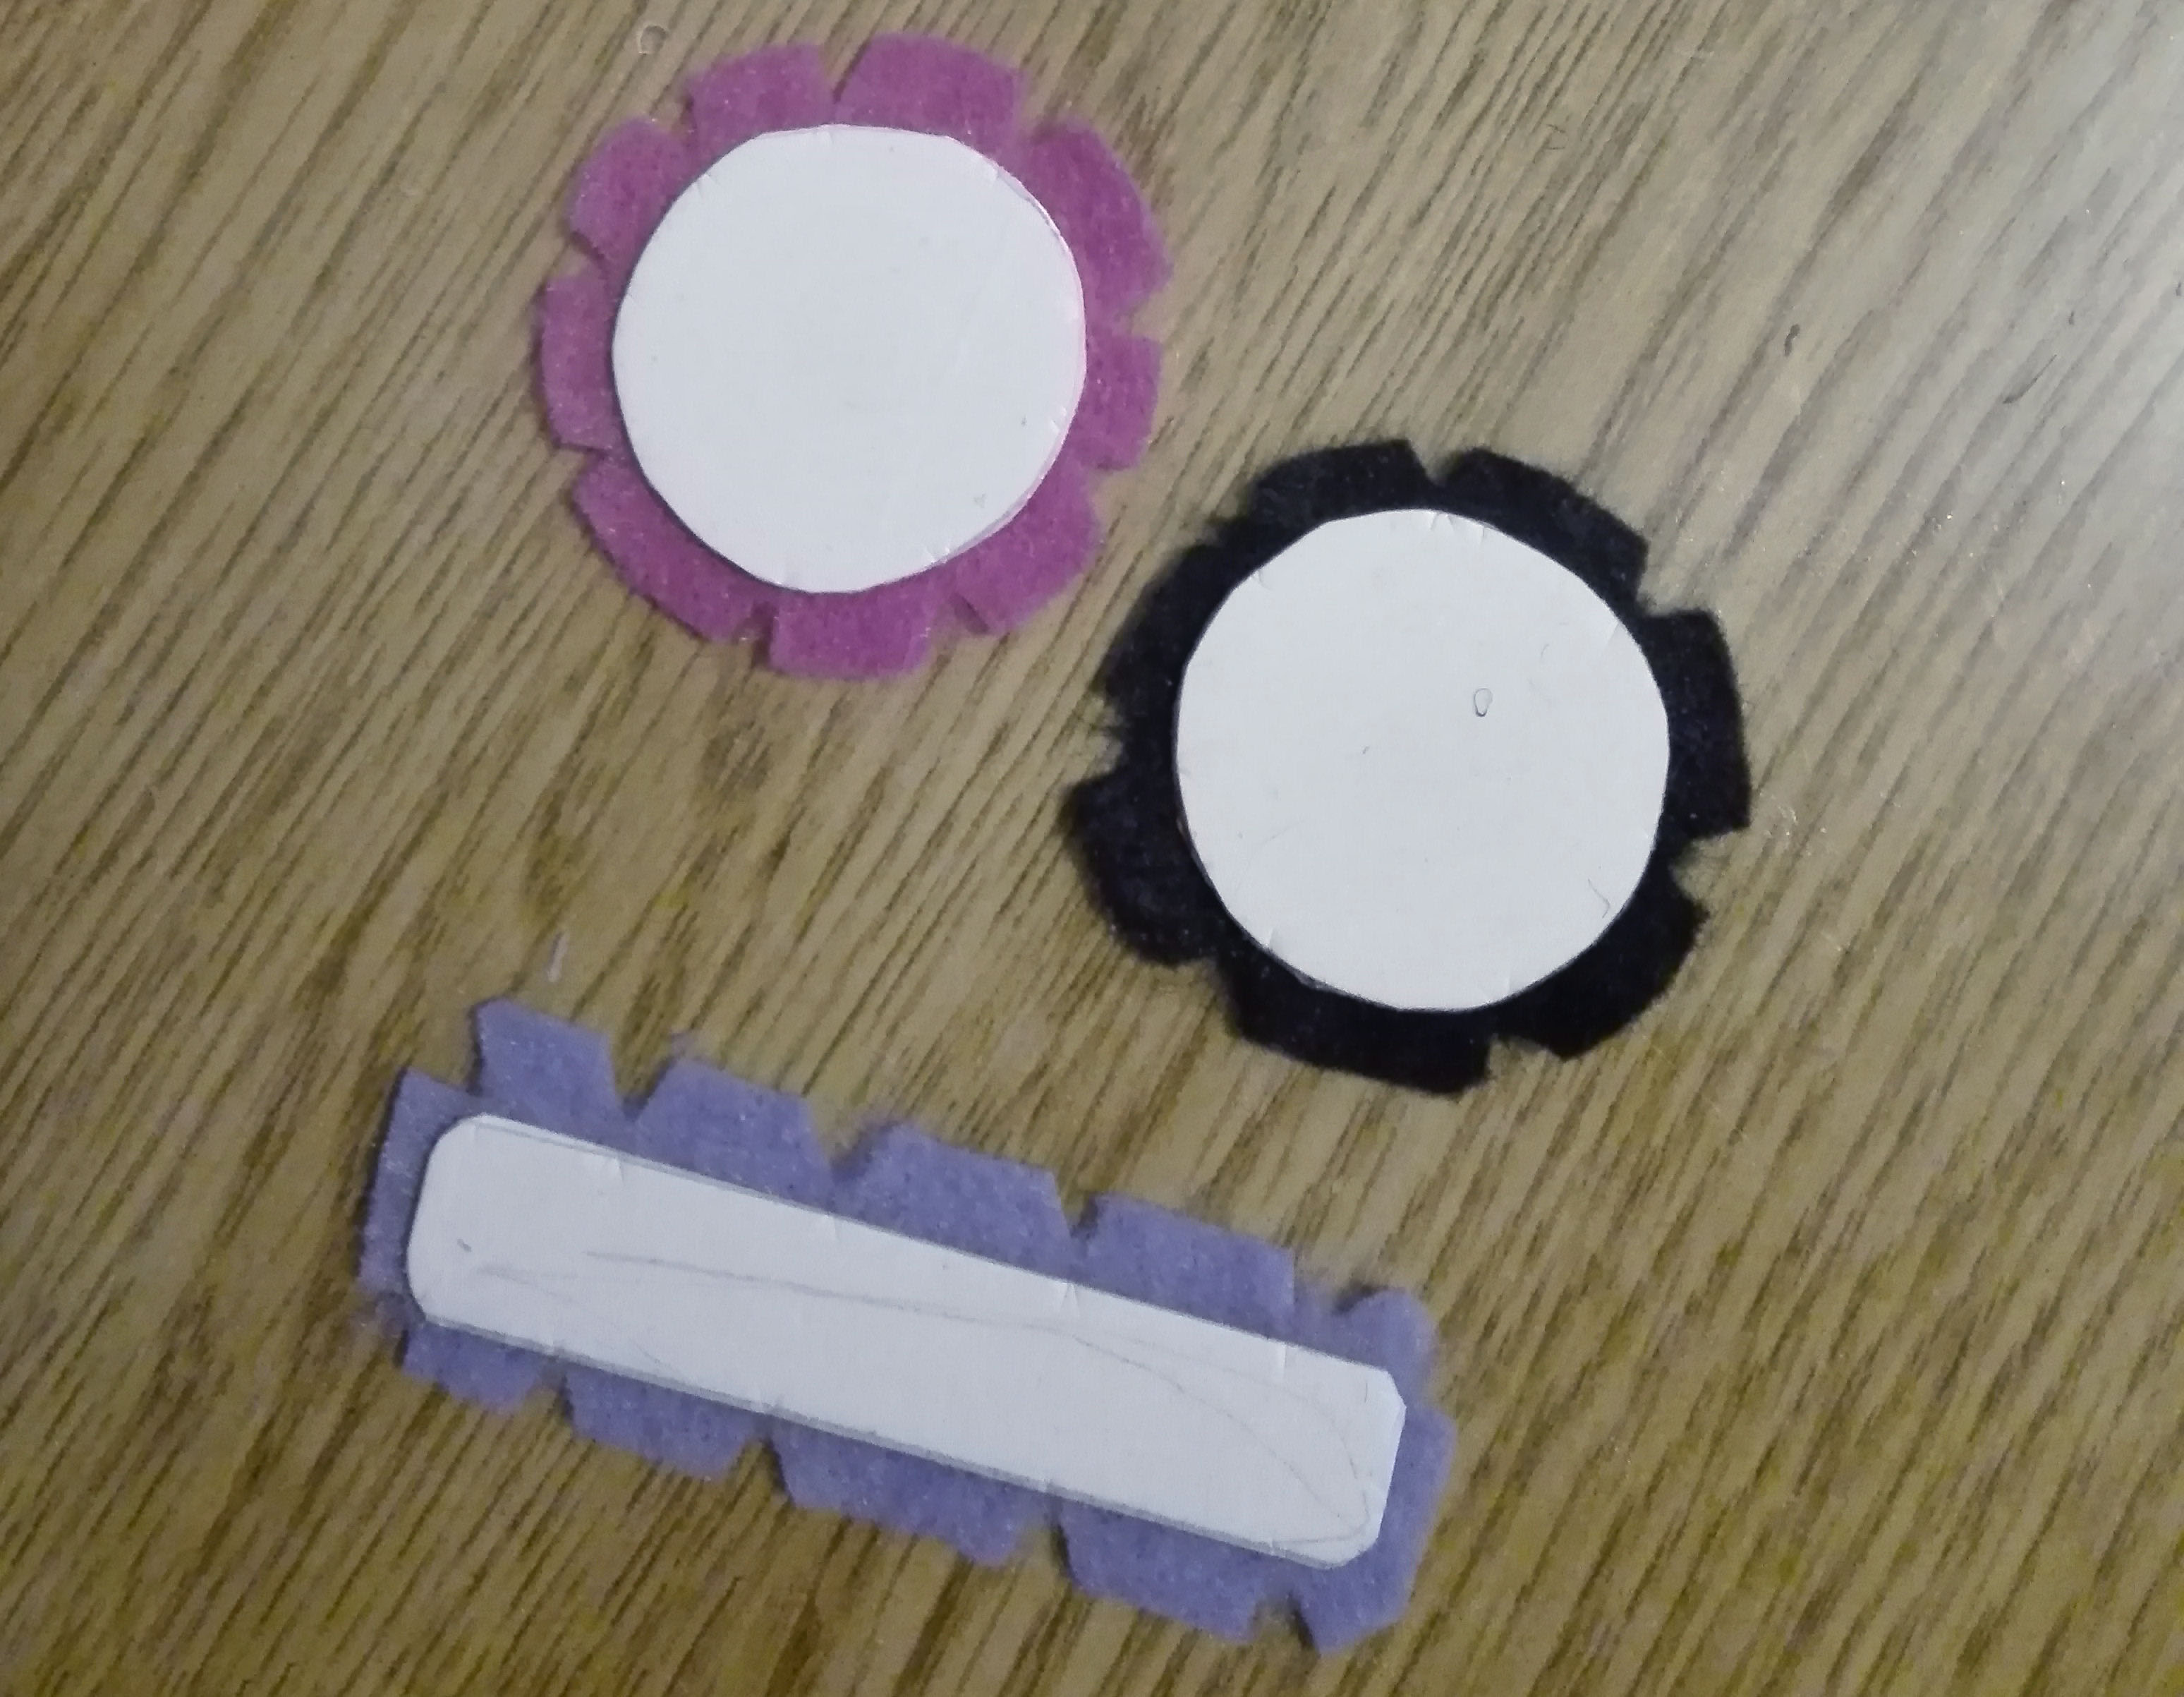
I cut it to make it easier to fold later and glue to the bags. Each piece belongs to a different bag.
Place the cardboard inside the bag with the felt facing outside, and push it almost to the bottom, but not quite.
Add glue at the edge of the bottom part of the bag, and push the cardboard to glue it in place. You can also leave the bag disassembled, and assemble it while you are gluing it to the bottom. Both ways work.
Now all our bags are almost done.
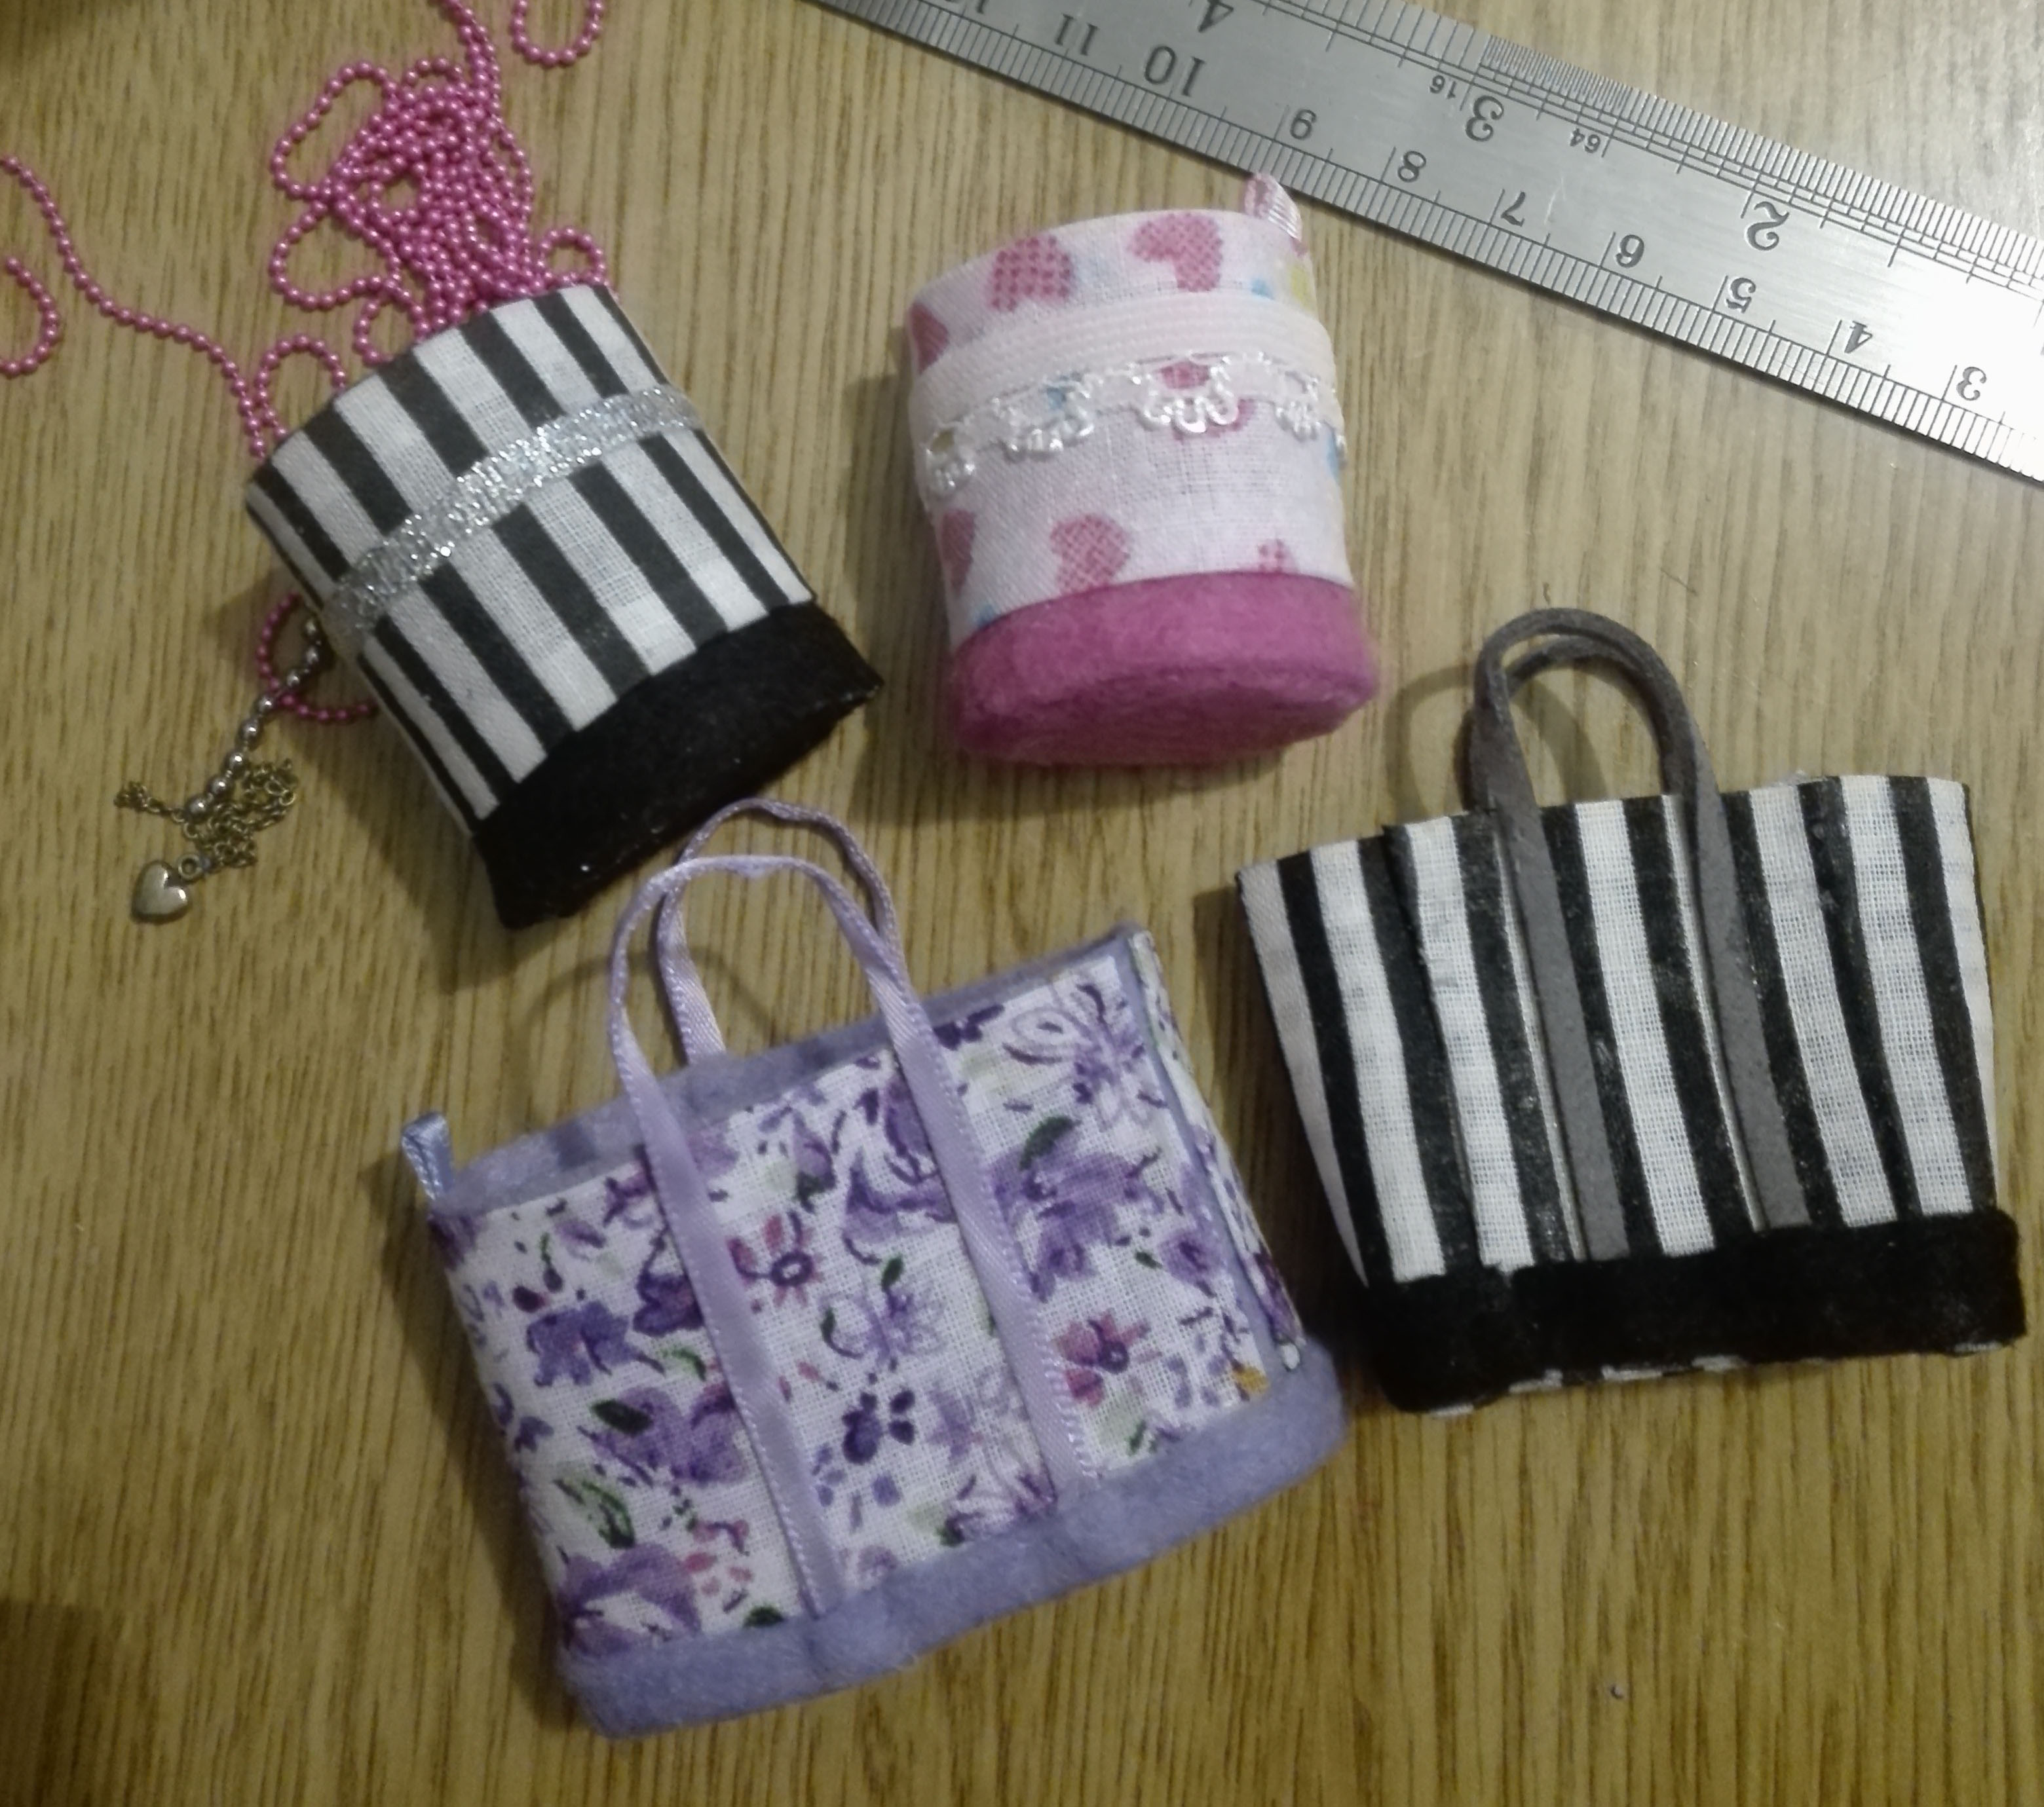
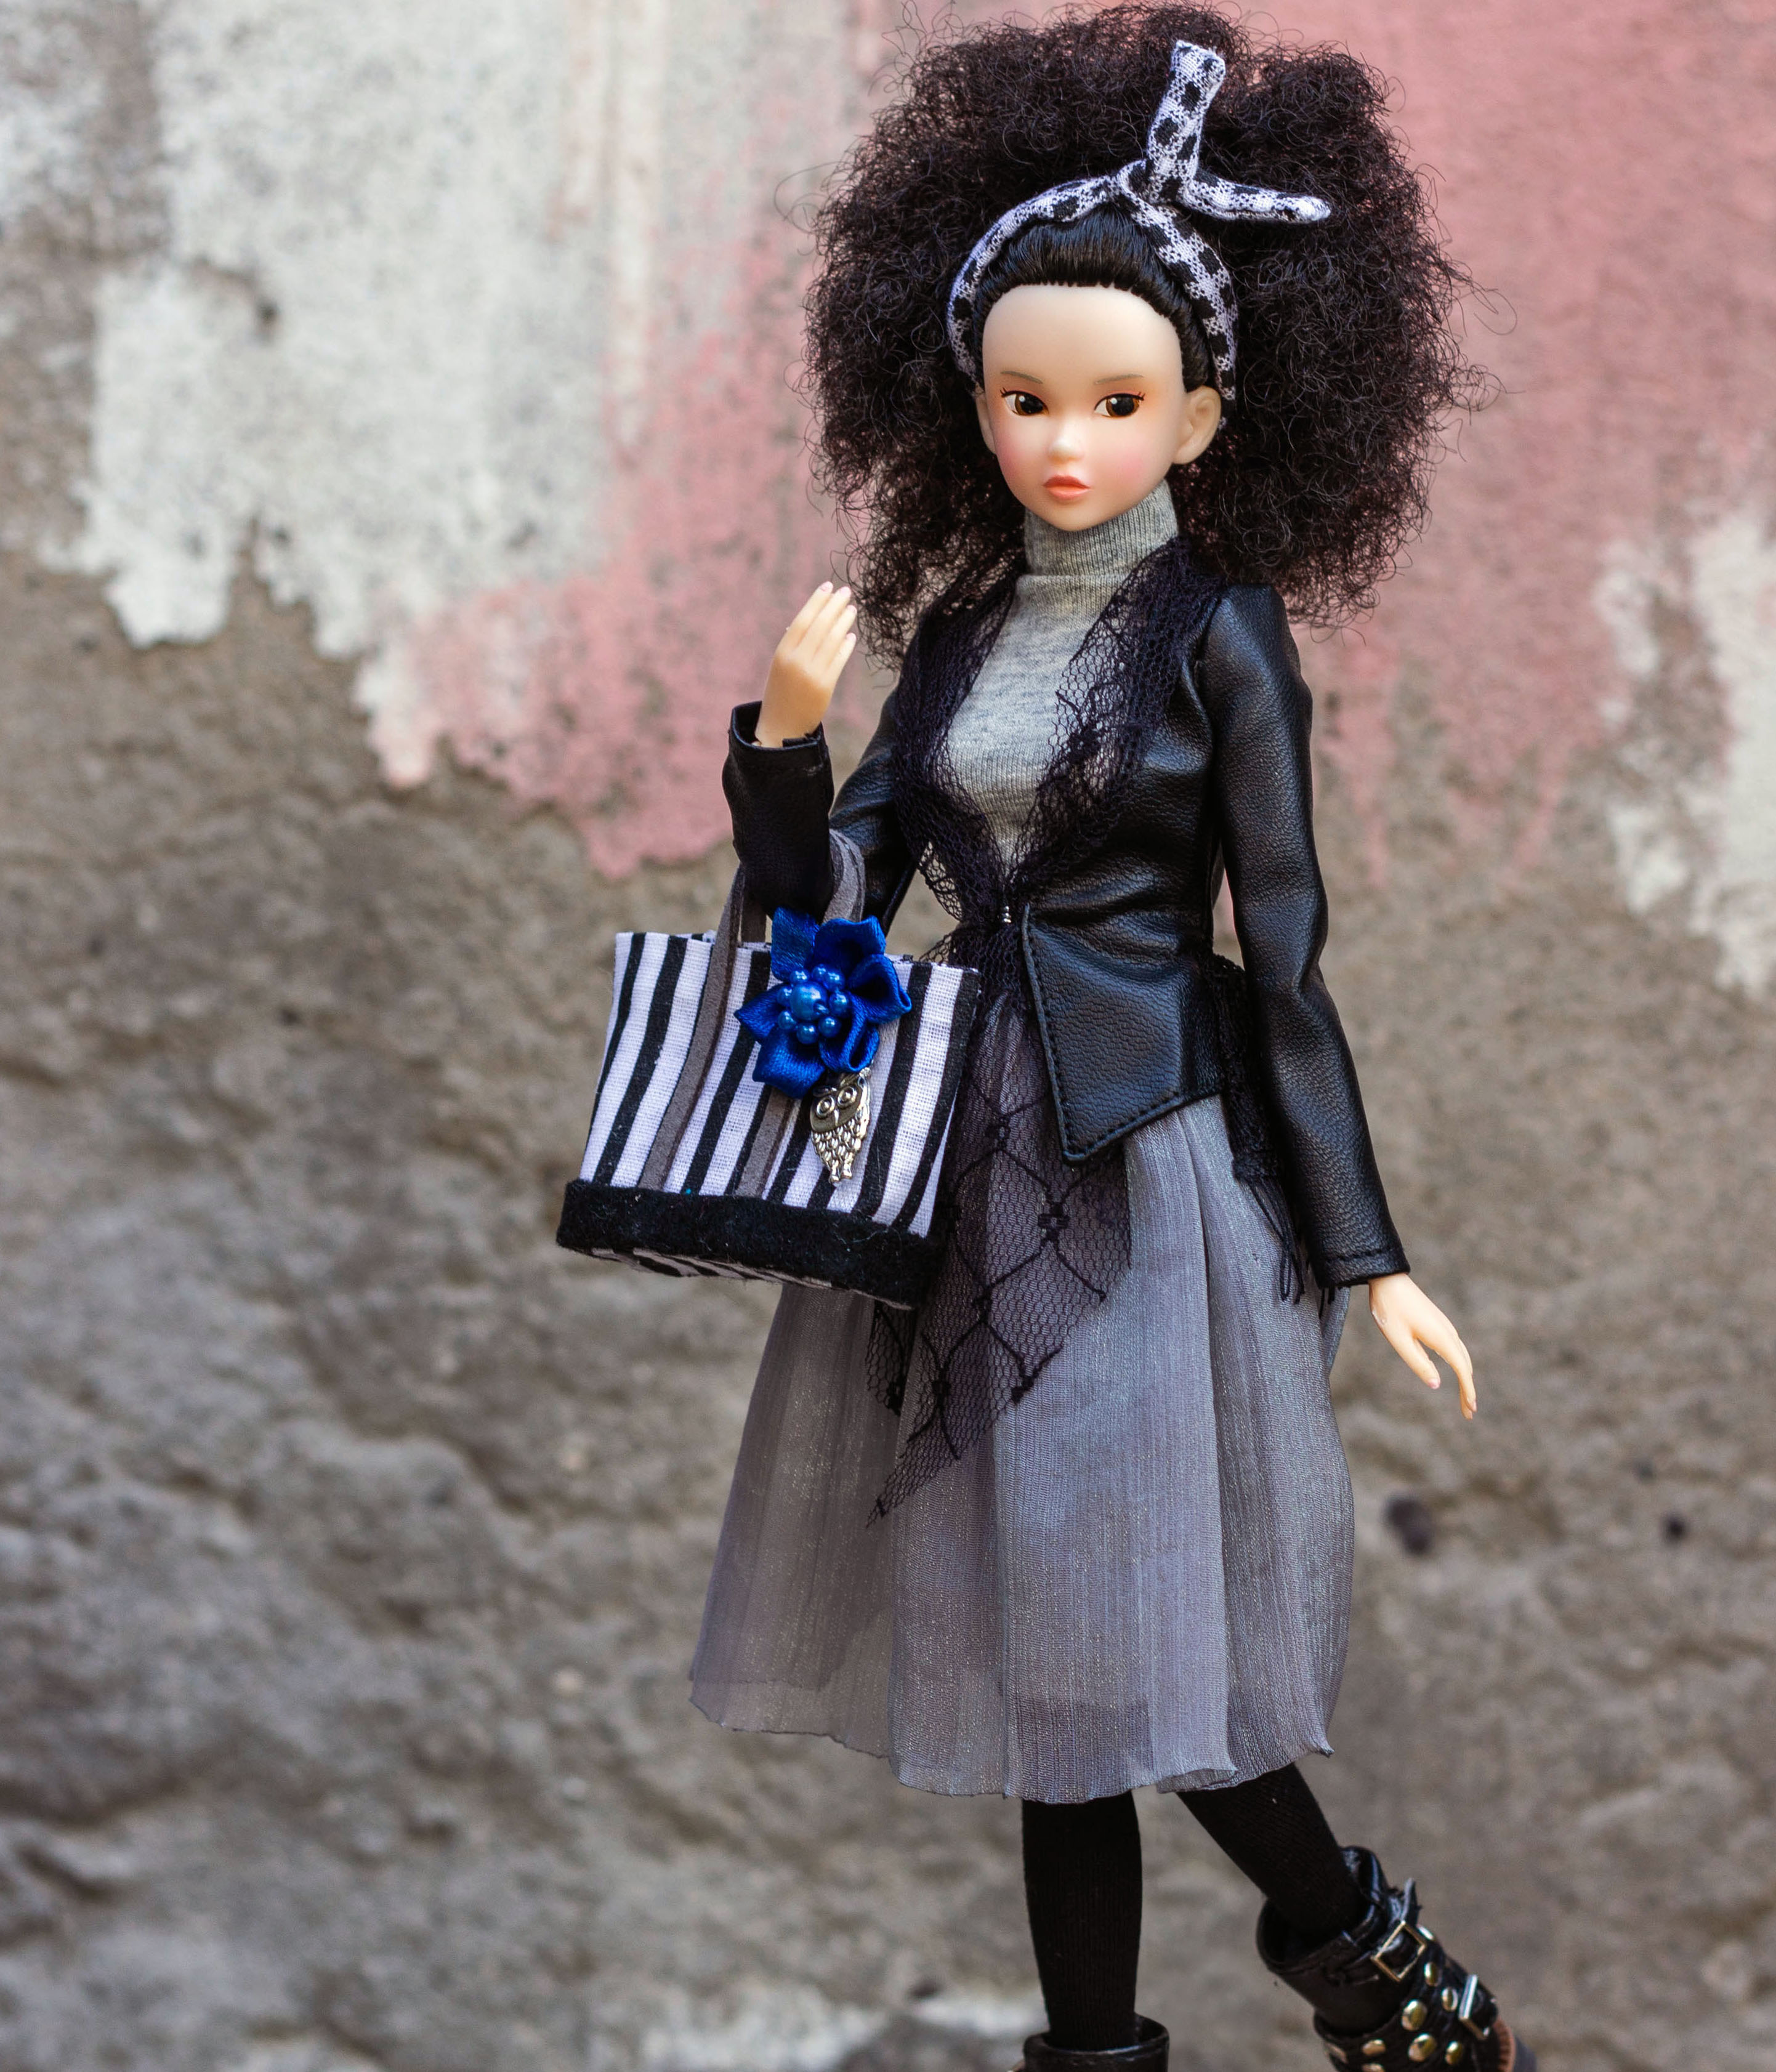
And here you can decorate however you like. I used charms and chains and glued them with a hot glue gun. Some of the things I used I took from clothing tags (am I the only one who saves any charm/chain that comes with the tags?). It is optional to decorate, but I think it helps a lot in the final look.

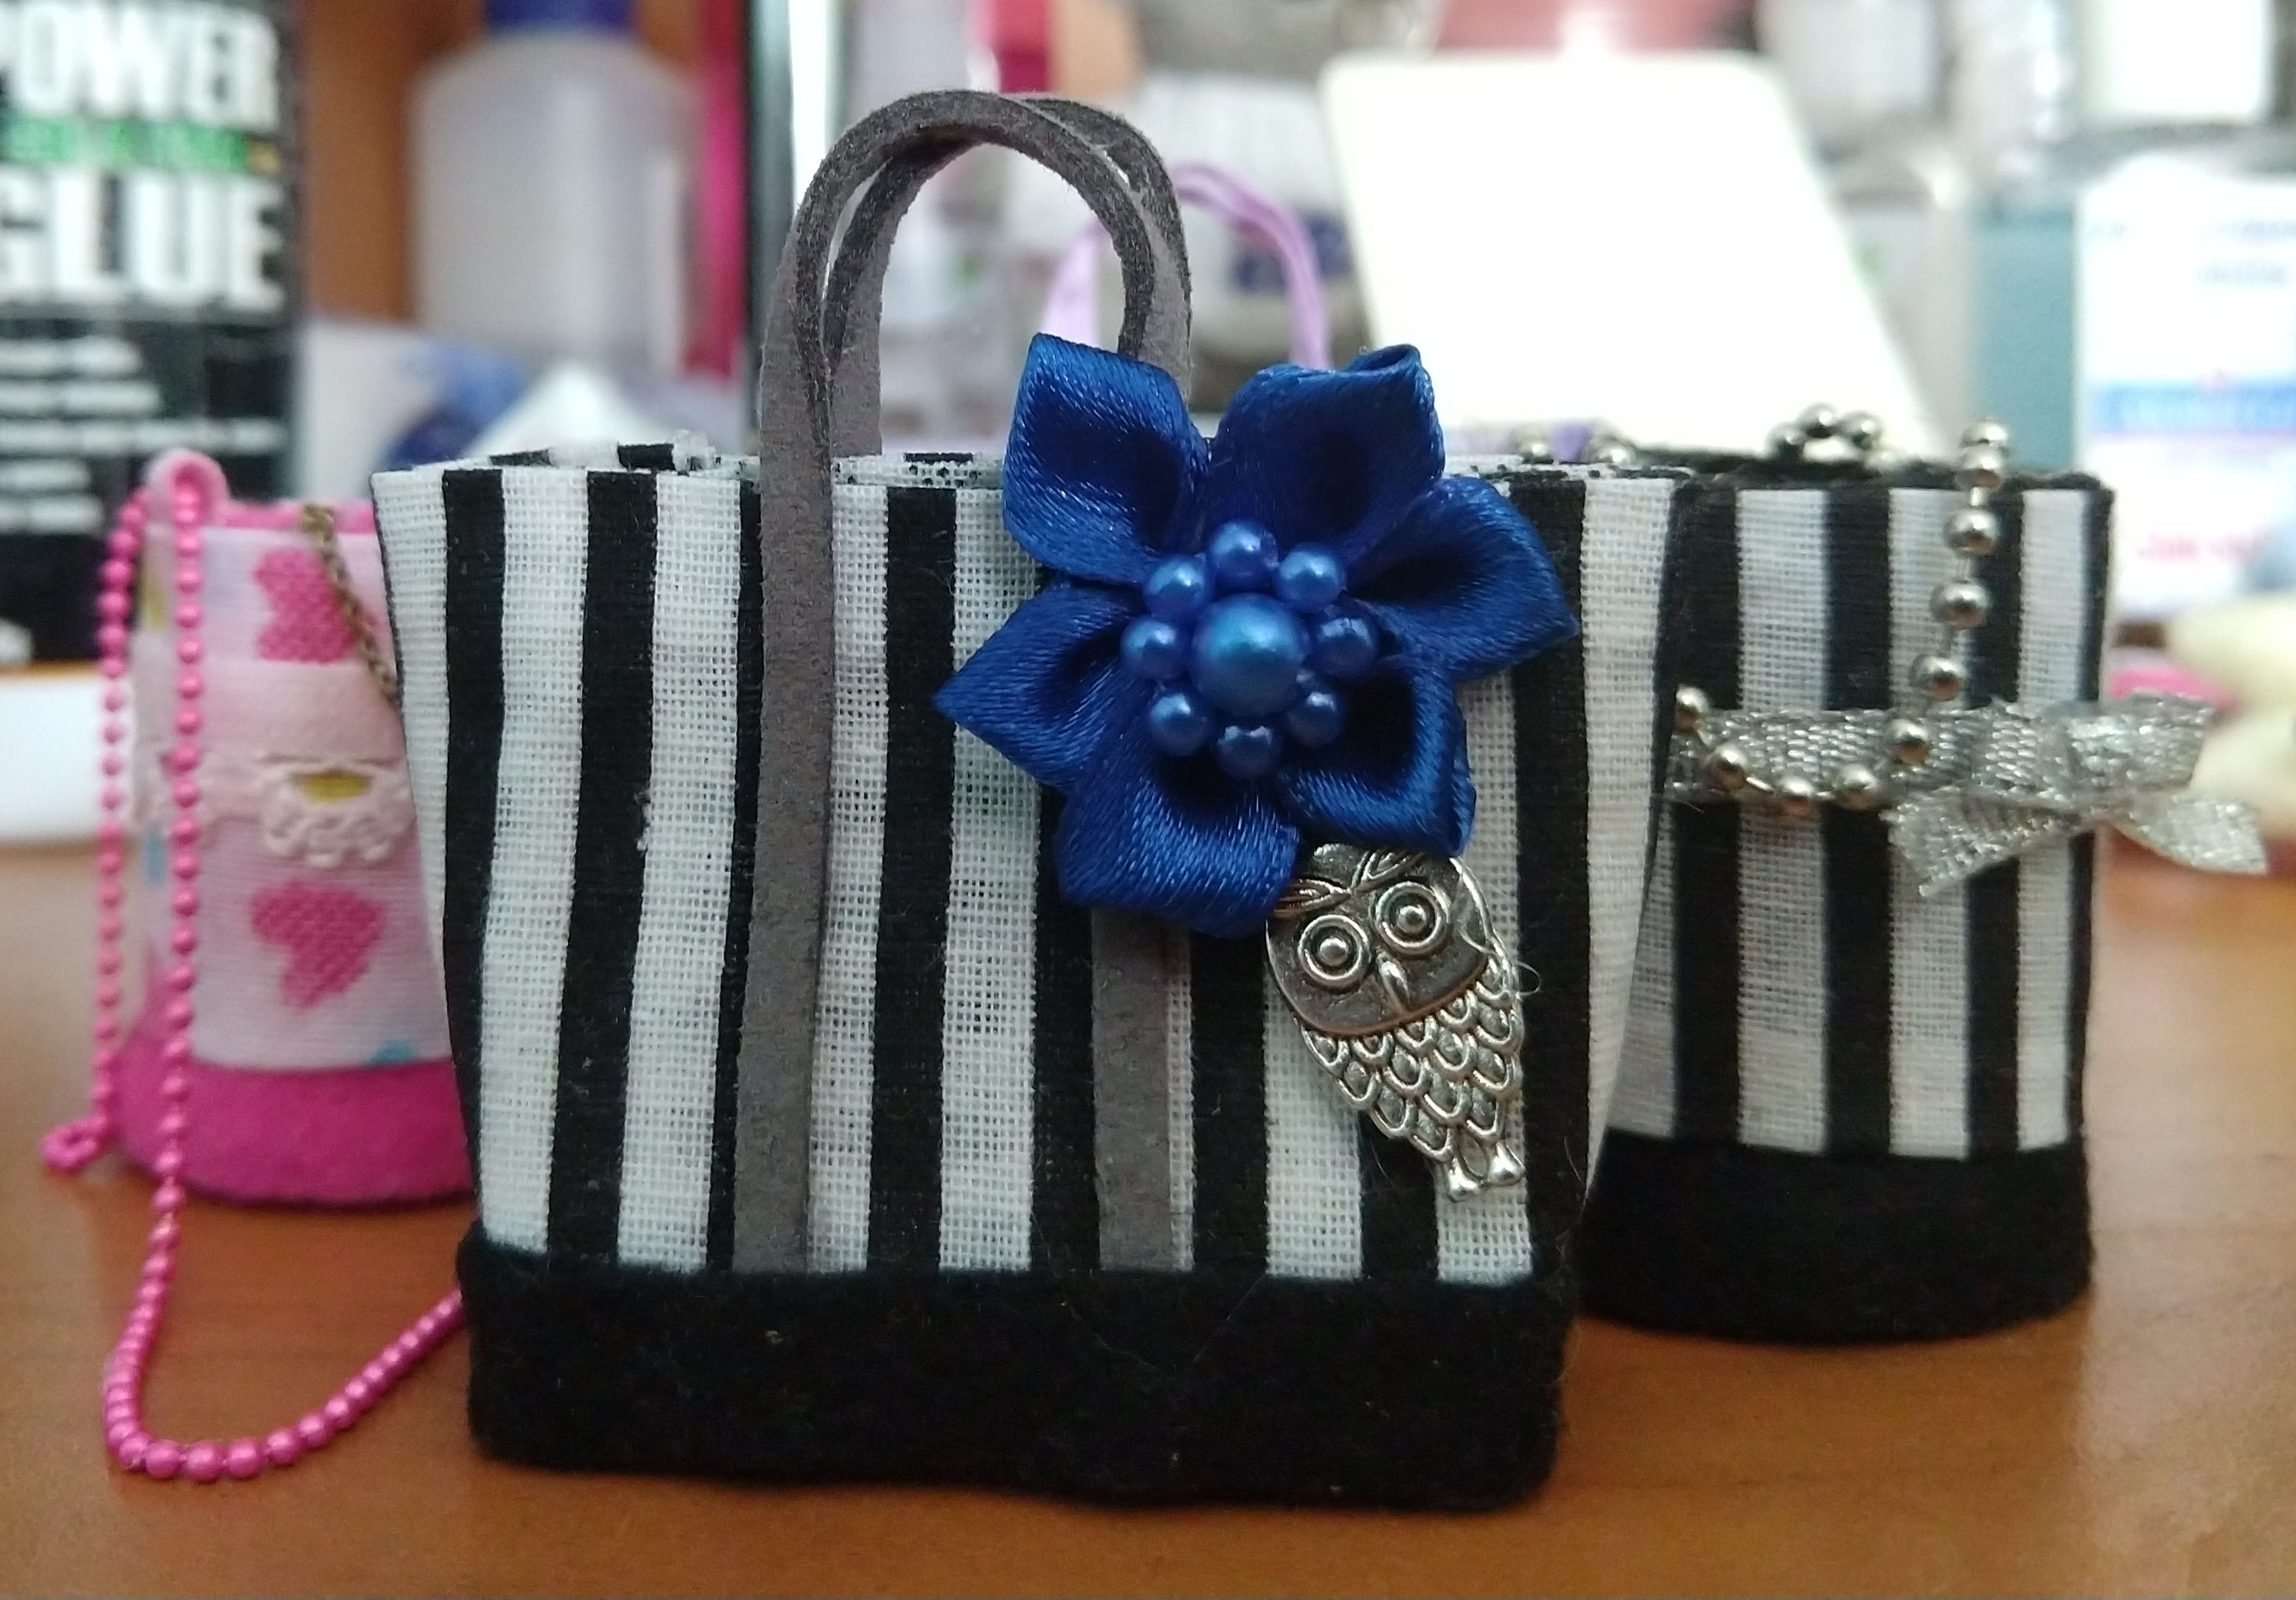
At first I wasn’t very sure if they would work out but they turned out okay. I’m glad I keep finding new ways to use my scraps of fabric. Someday I’ll finish them up!

Hope you give it a try! And if you do, let me know! I would love to see what you make with this.


Great tutorial.
Two bags – floral one and the one with blue flower – I could use myself. 😀
Hahaha thanks! I’m more a backpack kind of person, but I love bags ~ Thanks for reading my blog!
I like big bags that can contain anything. 🙂 So the floral one in human size would be perfect for me!
Hahaha yeah, those are practical and even stylish!
Thanks for this tutorial, simple and neat! Great way to use both small pieces of cardboard and fabric! Yay for recycling! And Nina, your doll, looks so fancy with her new bag! One can never have too many bags!
Hi Niina! You know I like to keep my crafts simple yet effective!! And recycling is always a good thing, we gotta use what we have! Nina needs more bags, hope I can find some or get new ideas 🙂
What a great no sew bag tutorial! I have to buy a better glue because mine sometimes soakes through the fabric.
I like those ball chains too. 🙂 Your bags are very Lolita style, or at least they remind me of the bags featured in Kera magazine. 🙂
No sew is my way of life hahahaha. Maybe you are putting too much glue? I spread it thinly. Or maybe it’s just the glue you are using. Mine is very similar to elmer’s. I wasn’t thinking lolita when I made them but I can see how they look like that XD I just weorked with what I have 🙂 Thanks for taking your time to read it~ hope it helps someone out!
Hi Alejandra!
Oh boy I love bags (have 8or9 totes of my own) so thanks for the inspiration. I’m going to make some bags for my dolls too, but you know what I’m like when it comes to glue (I get soooo messy and can’t stand it on my hands) so I’ll sew mine. 🙂
I rather like the black and white stripe one you made for your Momoko girl, it’s very elegant and it makes her look extremely stylish. Perhaps now you should attempt some hat boxes. 🙂
Big hugs,
X
Hi <3! I somehow imagined you would like totes for yourself as well haha. You can totally do these by sewing, you know my skills with the needle and thread aren't too good. I'm much better friend of the glue LOL! But you are very skilled so I'd love to see how and what you make.
Hat boxes uh? sure, they would look great in a diorama 🙂 thanks for the idea!
I'm glad you liked how Nina looks with the bag! Hope you have a nice day~ Hugs for you too!
Ah thank you so much for sharing your tutorial with us. They make such lovely bags for the 1/6 dolls. I love all the little details on them. And I always love tote bags over handbags for my dolls. I don’t know why. Maybe the handmade feel to tote bags? Hmm, I need to make one of my dolls a seamstress!
Alasse <3!!!! No prob, I'm glad you like it. I think with practice they would look even better, but I'm not sure if I'll ever attempt it again haha. I also prefer tote bags over handbags~ so much practical too.
That's a neat idea, you could do a sewing room for her too hahahah X) I would love to see that~
I will bookmark this tutorial. Thank you for sharing it 😀 <3
Hope you give it a try!