
Hello guys! Can’t believe how fast the time has gone this year! Halloween is behind us already, but I still wanted to show you how to make the yarn wig I used on Ailene’s rag doll costume. No pattern needed for it! It won’t work as an all day wig because of the way it’s constructed, but it is perfect for costumes.
I based my wig on this human yarn wig tutorial, but I’m not sure if my english sucks more than I thought, because I didn’t find the instructions nor the photos as clear as I wanted to, so that’s why I decided to do a doll version tutorial.
I apologize because the quality of the photos isn’t too great, I did this wig when there wasn’t much light and next to my computer so the conditions weren’t good to take photos. I tried to fix colors on Photoshop, but by making Ailene and the materials look good, I made my hands look kind of zombie-like hahaha. I swear I have healthy hands!
Now onto the tutorial~
Materials
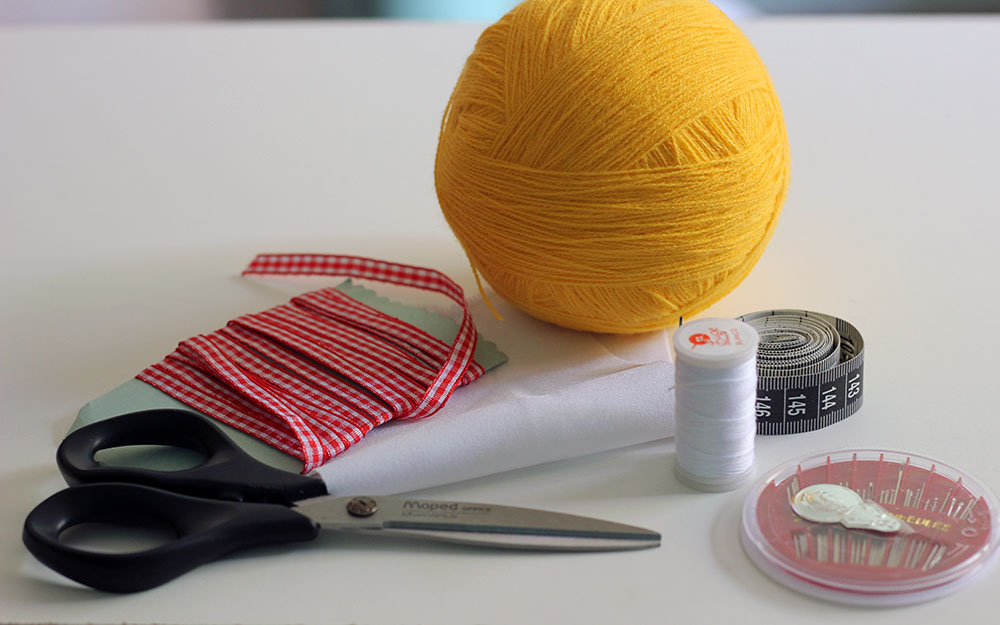
You will need:
- Yarn of the color of your choice. I used a thin one to make it look more up to scale, but you could get away with a thicker one as well.
- Scissors
- Thread, preferably the color of your yarn, or as close as you can get, in my case I used white.
- A needle
- A measurement tape
- A piece of fabric. It can be a scrap, you don’t need much.
- Ribbons or anything to decorate.
The wig
To start the wig we need two measurements from your doll’s head:

First we measure from where the wig should start at the front straight to the back.
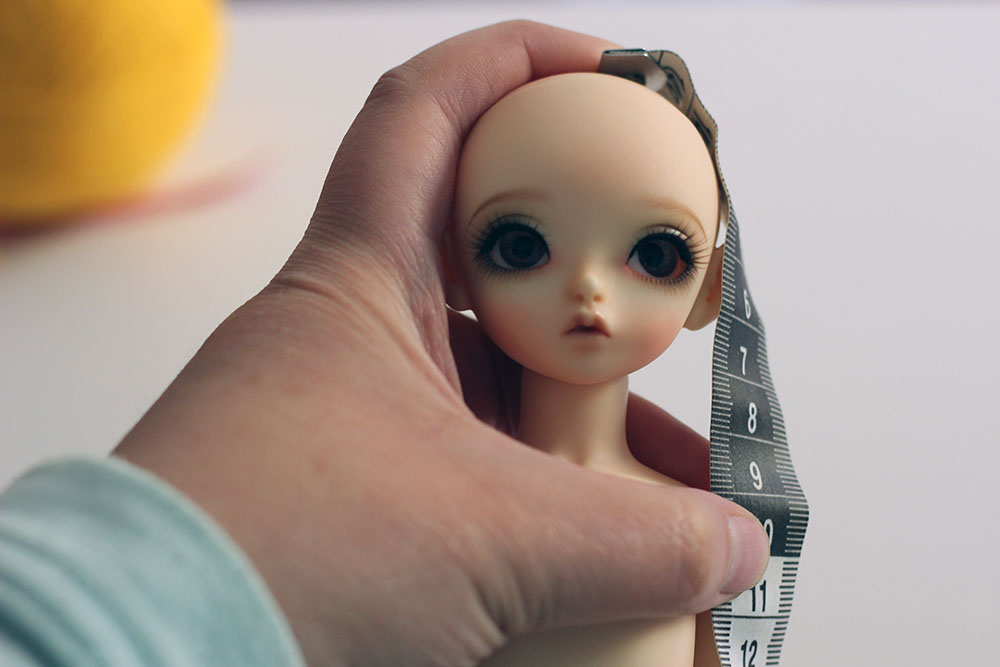
Second measurement is how long we want our wig to be from the center part of the head. I went for 12 cm. long.
We use the first measurement to cut the piece of fabric. We only need a rectangle really, we won’t be making a wig cap.
Then we cut several pieces of yarn doubling the size of the hair length. In my case hair is going to be 12 cm. long so I cut the yarn 24 cm long.
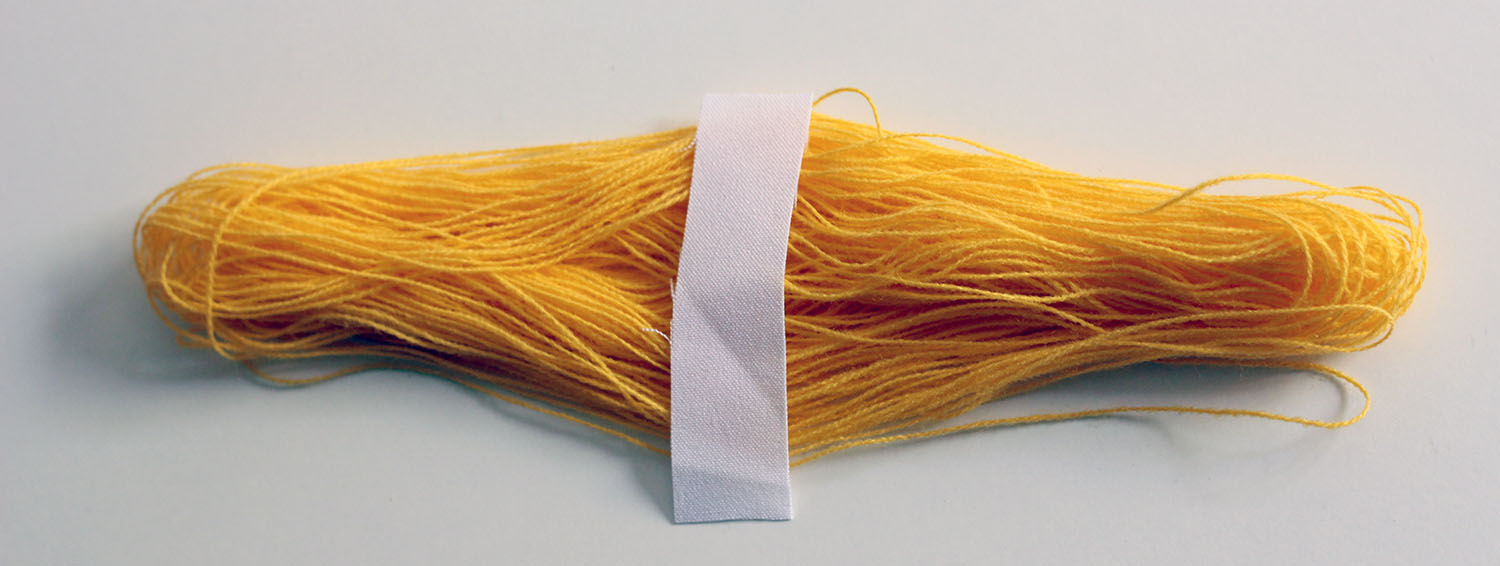
Cut enough yarn to cover the piece of fabric. In the photo you can see how much yarn I cut at first, but in the end I used a lot more. The thicker your yarn, the less yarn you will need.
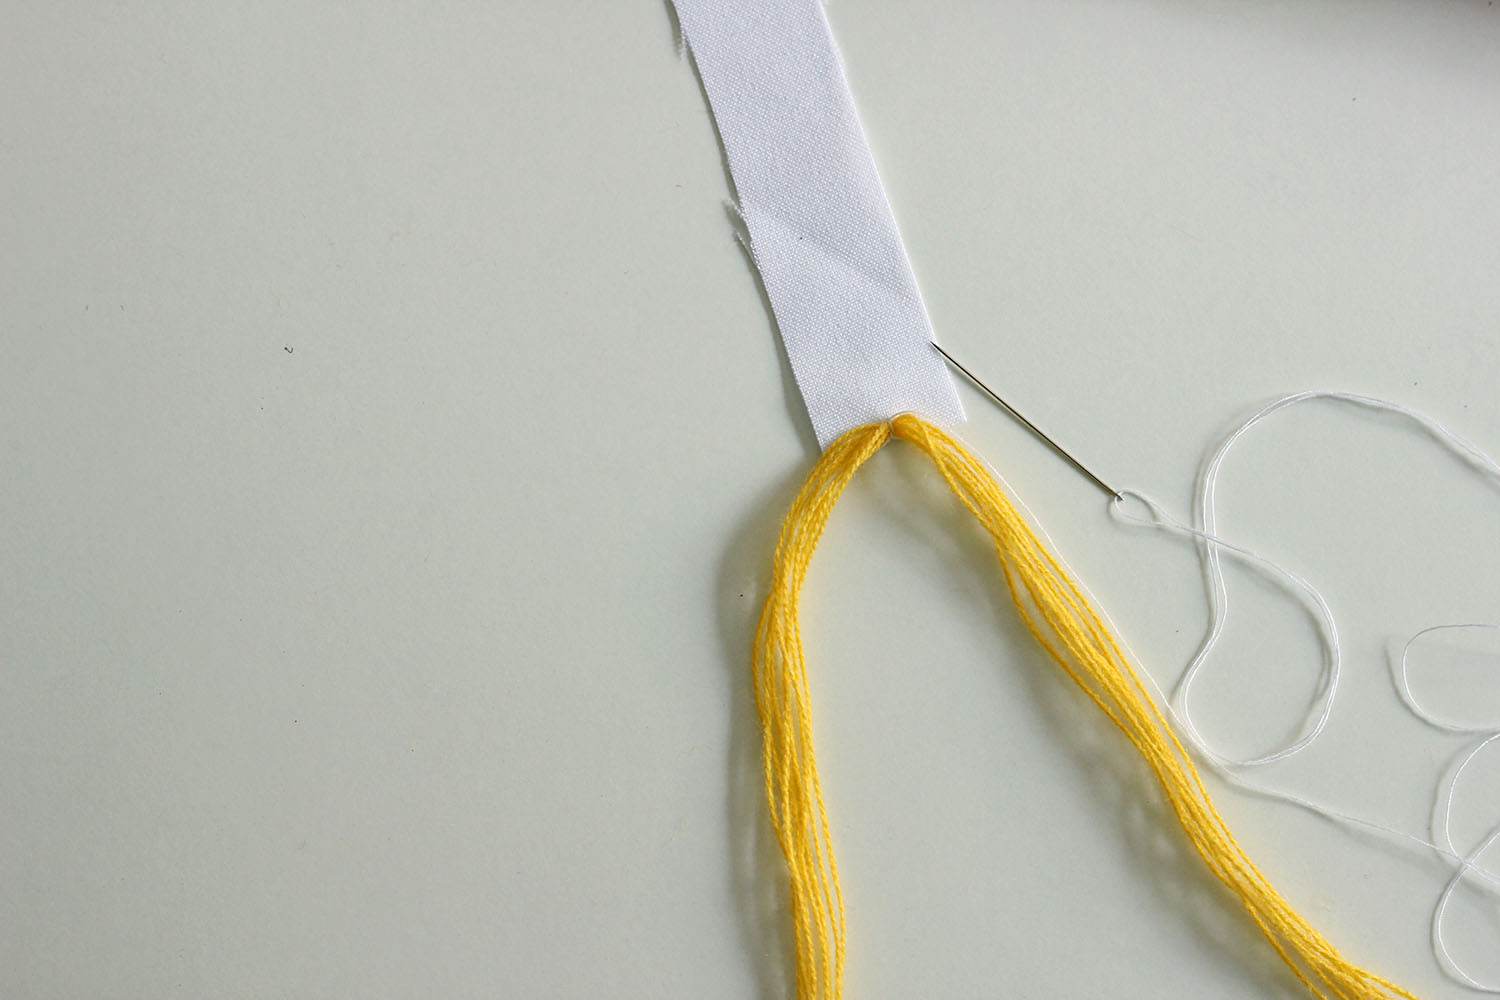
Pick a few pieces of yarn and sew them to the edge of the fabric. This will make the hair stay in place very nicely, but it will still move to the sides if you pull too hard, so be careful.
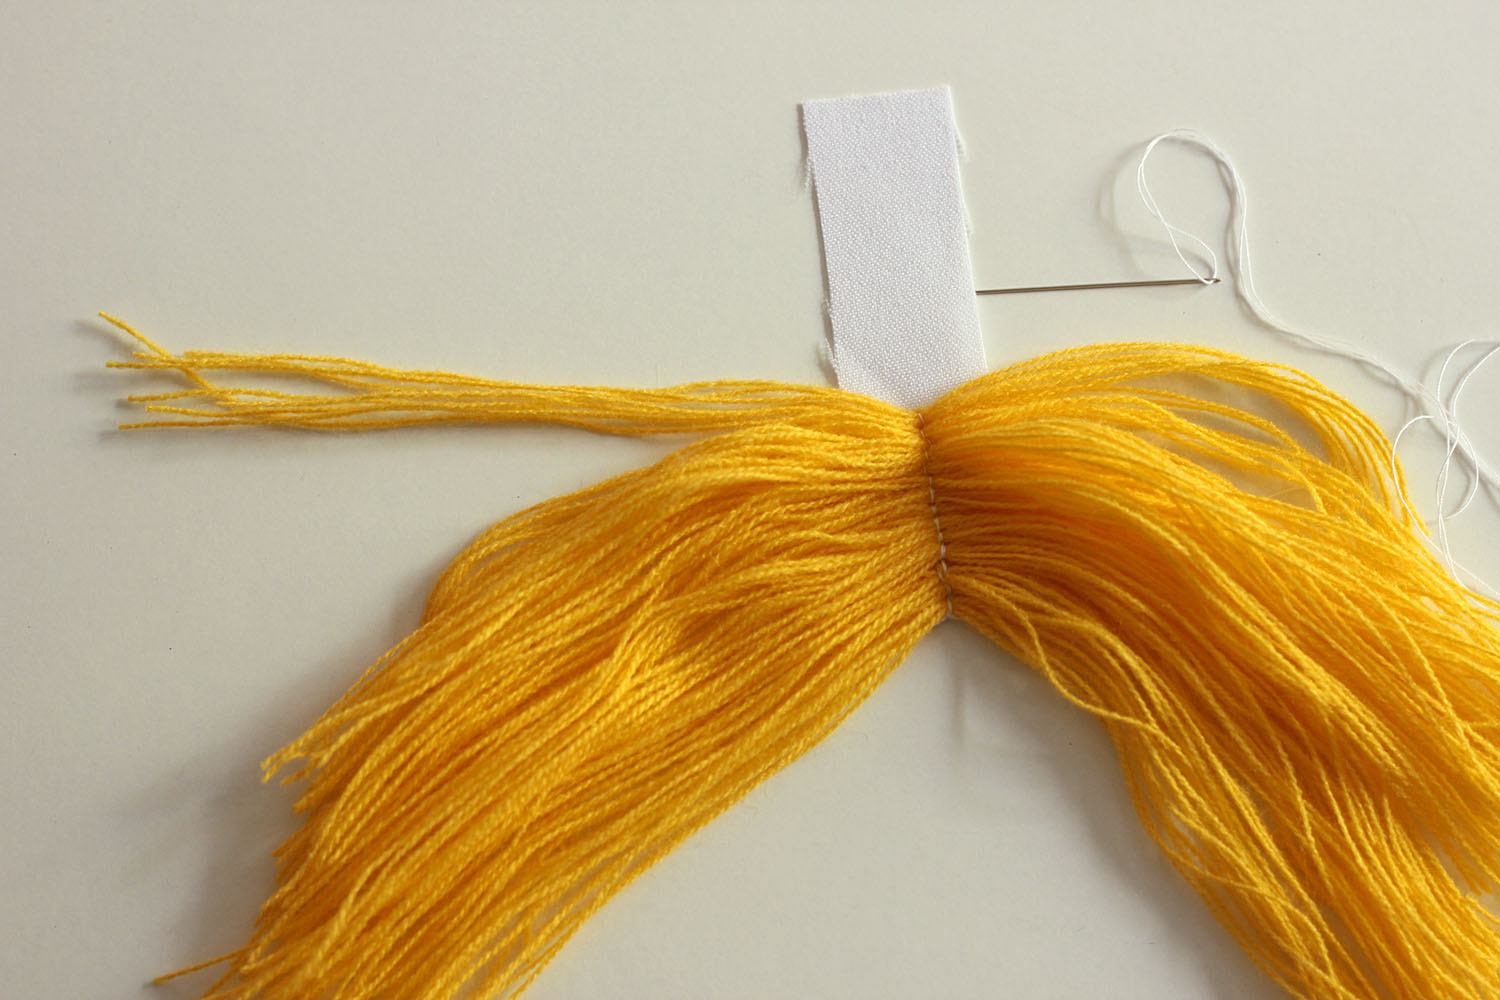
Keep sewing group of hairs little by little. It seems like it will take forever, but it’s quite fast.
If you enlarge the photo you can see the first part of the wig I was passing the thread twice for each group of yarn hairs and the thread was too notorious so I started passing it just once and it looks much better. Learn from my mistakes and don’t over do it!
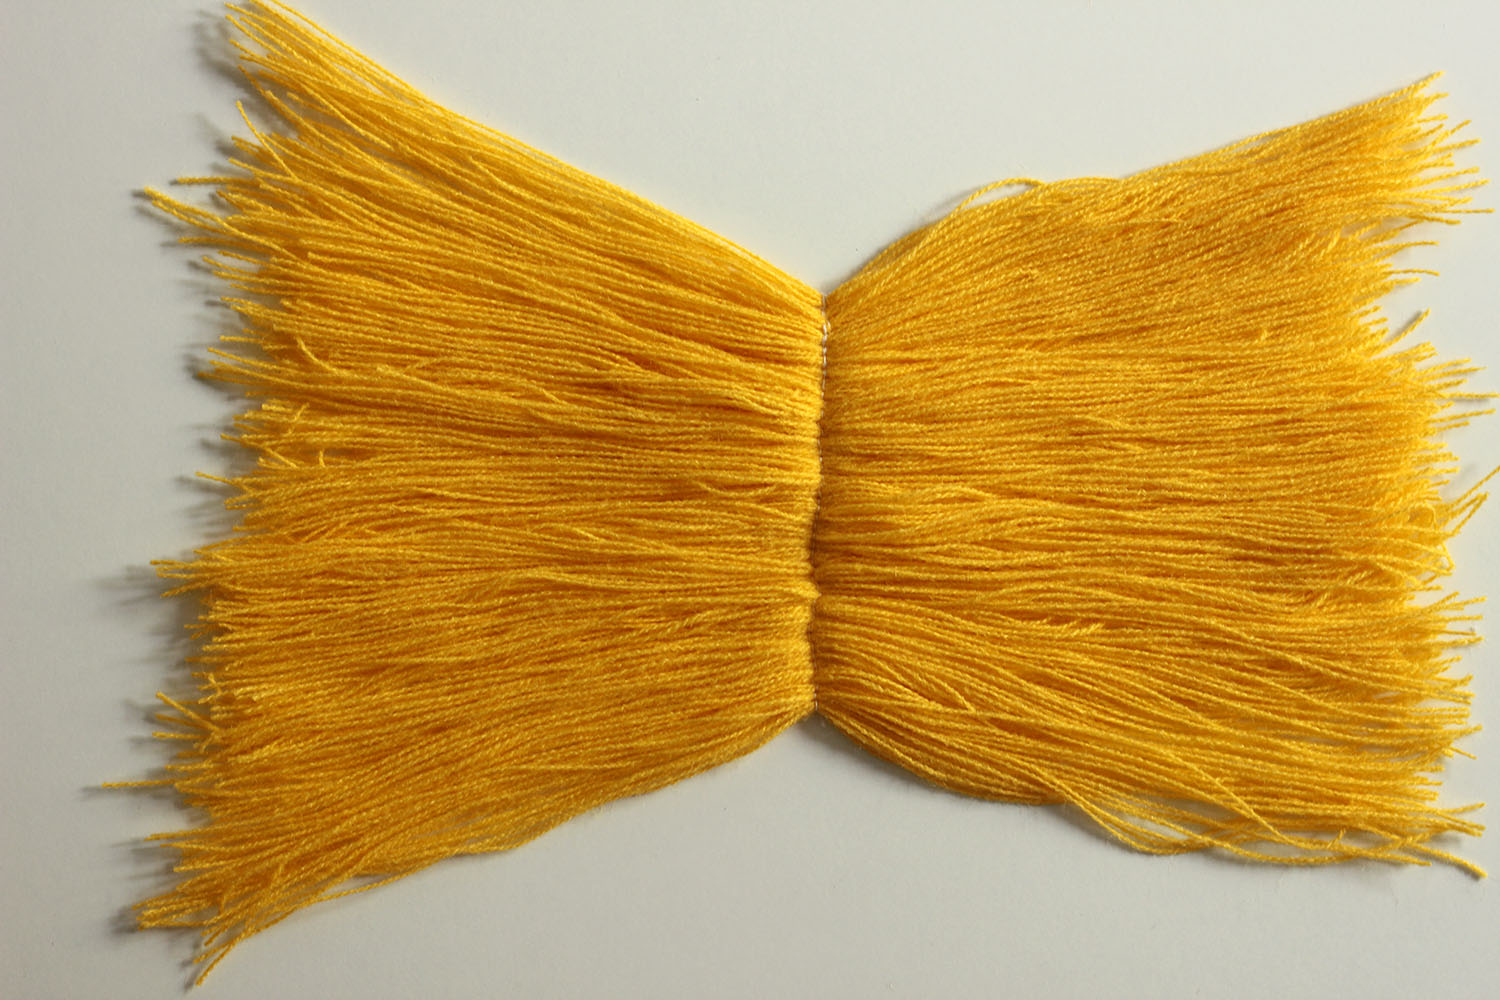
Once you reach the other end it will look like this!
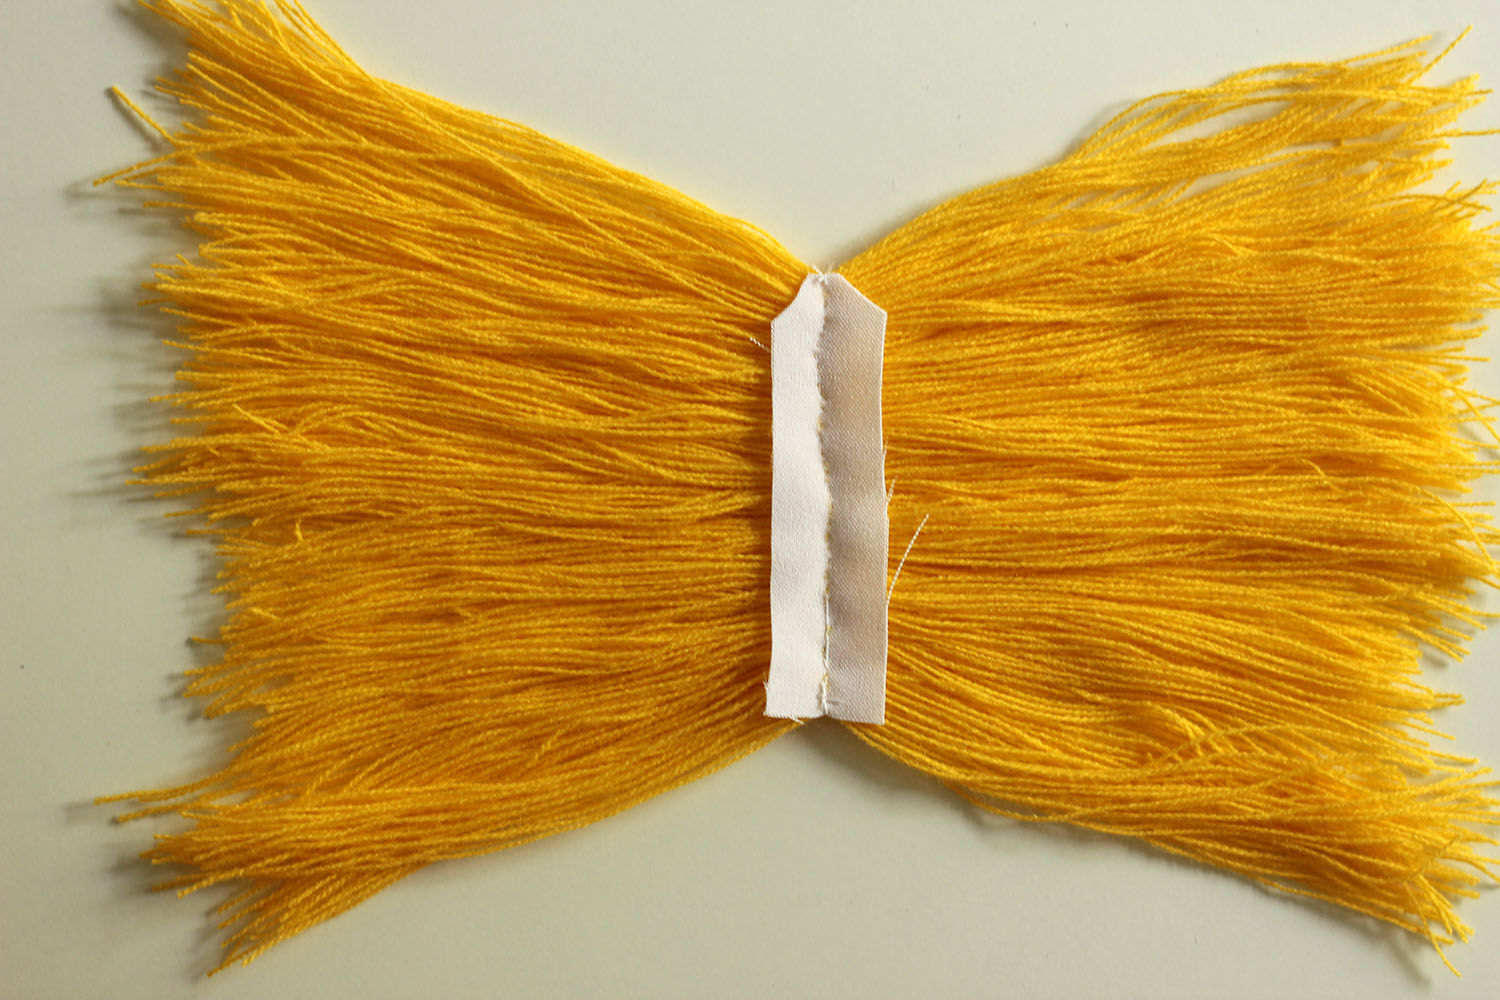
I cut the edges of the fabric a bit on the side I decided was going to be the front part so it wouldn’t show on Ailene’s forehead.
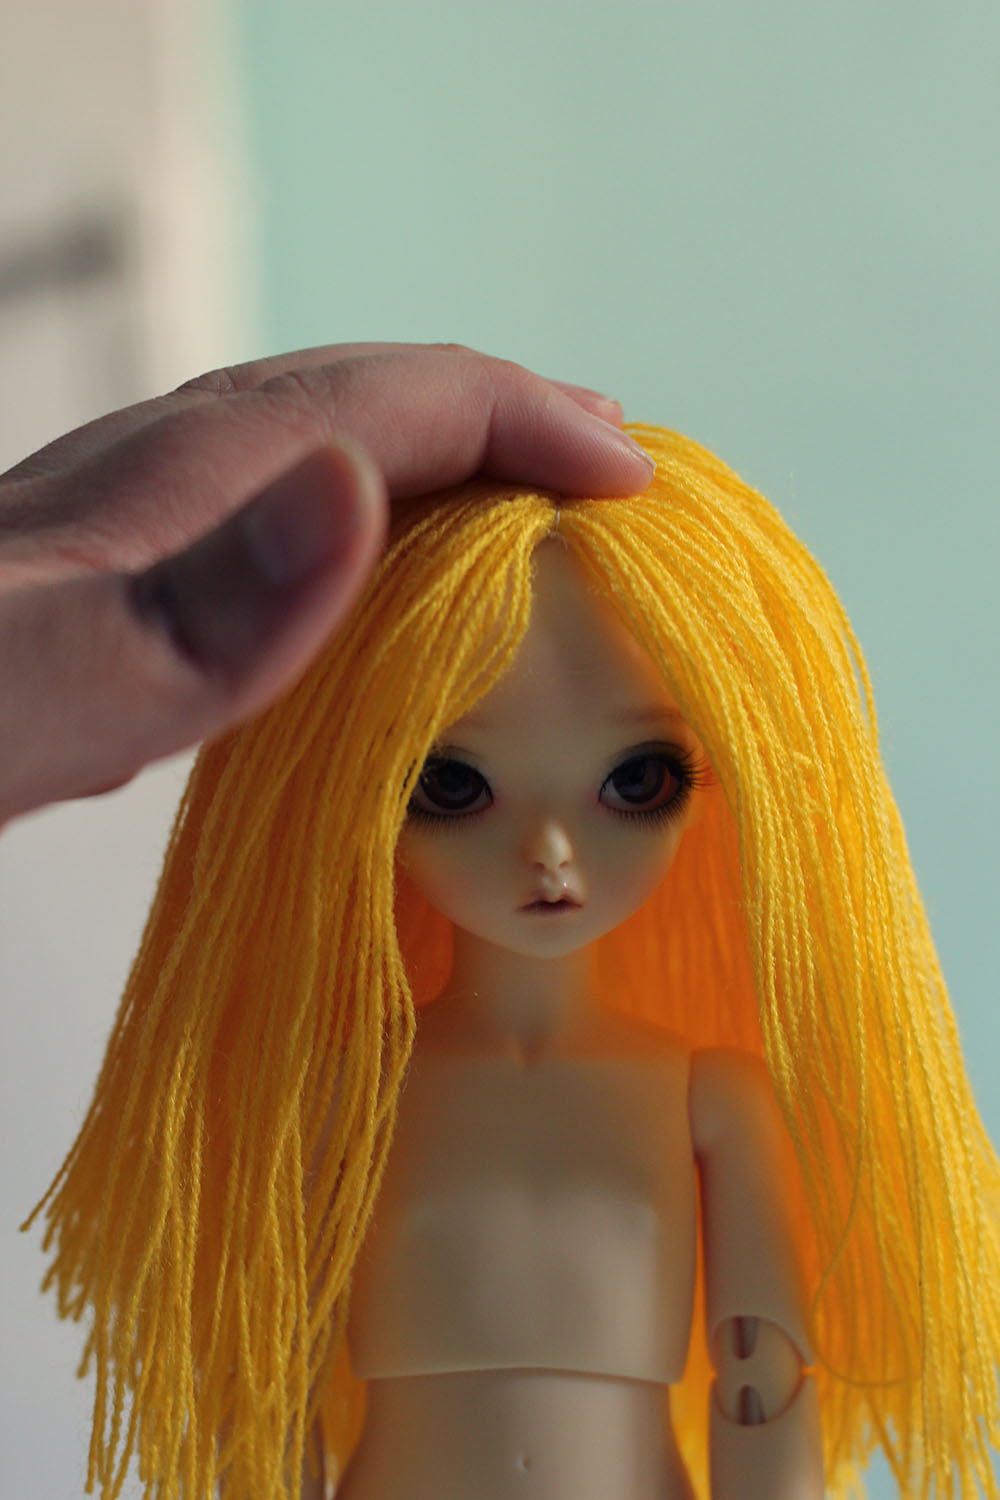
Now it’s looking more as a wig! Place it on your doll’s head to see how it’s going. The wig won’t stay in place at this point and that’s okay.

With the same thread you used to sew the hairs, secure the pigtails. It is hard to do when the wig doesn’t stay in place so feel free to keep it in place with the help of a second person or masking tape. I didn’t use anything or anyone but it took me a while to get the tails right.
Once the pigtails are secured you are free to decorate them with whatever you want, I used a cute red ribbon.
Making the pigtails will make the wig stay easier on the doll’s head, but if you still have trouble when taking photos, you can hide a tiny piece of masking tape inside or use a silicon wig cap.
If you want to go for the rag doll look you can add red cheeks to your photos using Photoshop or any other photo editor program.

My way is really simple but it won’t look that realistic. In any case is a fast and cute way to do it. I created a new layer on top of the photo and painted some big red cheeks using a brush.
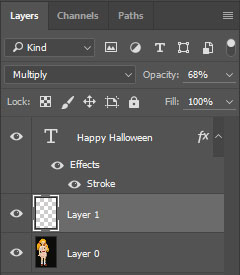
Then I set the layer on multiply and played with the opacity of the layer until I was happy with it.
The end result, most of you saw it already in my last post, but here it is:

Hope you guys enjoy it! And if you want to give it a try let me know how it went~
Have an amazing weekend!


Loved this tutorial!! You left me wanting to make a wig and a ragdoll costume for next year’s halloween!!
The red cheeks mini tutorial is great too, that is how I do it but since my photoshop skills are null it took me a while to figure it out.
Thanks for sharing these!
With your sewing skills you would do so much better for a rag doll costume!! I can imagine the dress and all :D!!! I’m glad you liked it! hope you give it a try~
Thanks for this tutorial! Need to see what kind of thread or yarn I have home. And you can really do a lot with different programs, to change a photo. Nice post!
No prob, glad you like it! If you play around with programs you can learn a lot!! I’m always surprise by your editions made on your phone! I don’t think I could do that hehe 😀
Thanks for the tutorial! This is a neat way of making a quick wig. I really loved how it turned out and I think it looks great on Ailene. You could also use this tutorial to make a wig for a cloth doll and attach it to the head with thread. Hmmm, might inspire me to make a dolly size rag doll using your tutorial for the wig part. Better pull out my cloth doll books.
Thanks for taking the time to do a tutorial. I know it can get very time consuming so I appreciate that you can share these with us.
No prob~ Your idea of using it for a cloth doll is genius!! I might give that a try someday too, but I’ve never tried doing one haha my sewing skills are so bad, can’t even do a straight line! But a rag doll for my tinies would be really sweet 🙂
That’s a very well-written tutorial 😀 I think you have a talent x3~
The wig looks so cute and I wonder if there are any alternative materials we could use in a similar fashion to make quick wigs like that! :O
Thanks! Talent for writing tutorials? hahaha wish I was better at more stuff so I could post more tutorials 😀
I’m sure you could think of other uses for this technique. What about using twine for a scarecrow wig? 😀
This is so cute! You did such a good job! 😀 Ailene is adorable as a Ragdoll :3
Thank you!!! She’s adorable period hahaha 😀 love her little nose
Huh! And you say you are not so good at crafty sewing!! I think you did a great job of this tutorial Alejandra, you shouldn’t underestimate your abilities. 🙂
Love the final photo, she really does look like a pretty rag doll.
Big hugs,
X
Thank you for your kind words, they are always so uplifting! If you enlarge the photo where I should the inside of the wig, you can see how irregular and crooked my hand sewing is hehehe. Still, I think this year I’ve done quite a few crafts, I feel accomplished 🙂
Very nice tutorial 😀 It seems so easy to do after you explained the steps.
Thanks!! I’m glad you like it, I tried to be as clear as possible 😀 sometimes it’s hard because english is not my mother language
I love your tutorials! I want to try them all once I get caught up! :DDDD
Hope you do!